Gear
Last week I spent five days out in Coleman, Texas at John Chambers’ DMR-3 Patrol Phase class. I’ve been to several of John’s designated marksman classes, including last year’s 5-day extravaganza out in Coleman combining DMR-1 and DMR-2 and the DMR-1 class he taught in Reno last fall. He teaches some great classes and is an instructor I’d be glad to learn from again.
During his US Army service John was not only a designated marksman, he was also a member of a long-range surveillance unit, so he’s exceedingly well qualified to teach both the long range shooting and patrolling aspects of this class.
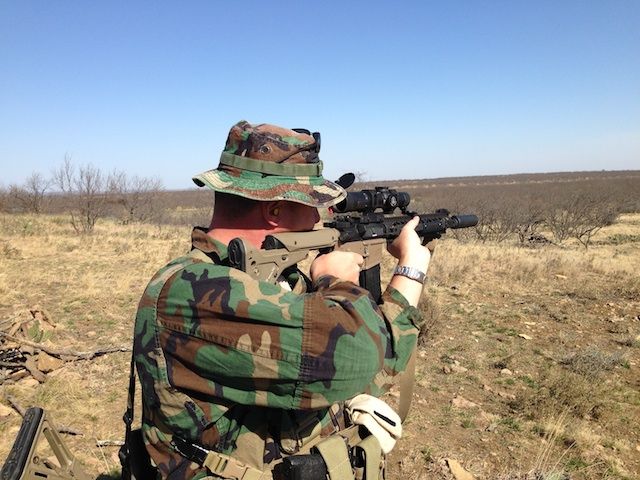
I put together a new rifle for this class, using a Knights upper, Geissele trigger, and Magpul UBR stock. I topped this with a Leupold Mark 6 1-6x scope in an American Defense QD mount. As usual, I ran it with my AAC Mini4 suppressor on the front end. This is not the lightest rifle around, but it shoots very well at distance. For the vehicle portions of the class, and any social purposes enroute, I brought my FS2000. As a backup I brought out the BCM upper on a Palmetto lower, topped by a Browe optic, that I used at the previous DMR class.
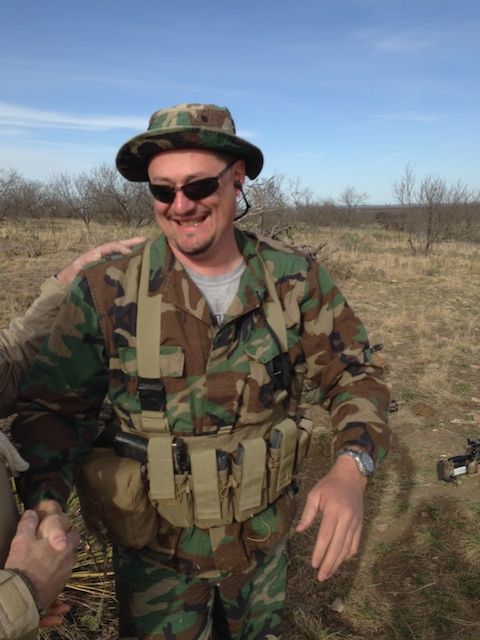
My rig for this class was built around an Insurgent chest rig, converted over to use bungee retention. I counterbalanced this with either a Camelback or an Eberlestock Halftrack pack. While I could shoot off the ruck, I also brought an Atlas bipod. I ran a dump pouch on the belt to receive expended mags. In addition to the rifle glass, I brought a Leupold spotting scope, Vortex monocular, and a pair of inexpensive Burris binos. A Leica rangefinder rounded out my day optics. I also brought out my PVS-14 NVGs to play around with a bit at night. While I brought a bit of multicam, I planned to mainly rely on hippie earth-tone cammo.
Travel
As you might guess from the gear listed above, this would not have been an easy class to fly out to. When I flew out to the class in Coleman last year I had to ship a big box of stuff out there ahead of time and this year I was planning to bring even more stuff. Warriortalk member Saladin was driving out from Vegas and offered me a ride. Rather than having him spend an hour diverting down to Prescott and back from I-40, I drove up and met him in Flagstaff, leaving my car at a relative’s house there.
Saladin got a bit of a late start from Vegas, so we didn’t leave Flagstaff until about 2 o’clock on Monday. We pushed pretty hard though, driving all the way to Lubbock before we stopped for some rack time in the wee hours of the morning. This left us with a fairly easy drive from there to Coleman. Despite taking a long lunch and stopping for supplies in Abeline, we were pretty much the first ones there. We unloaded our gear and hung out as folks trickled in that afternoon and evening.
Wednesday
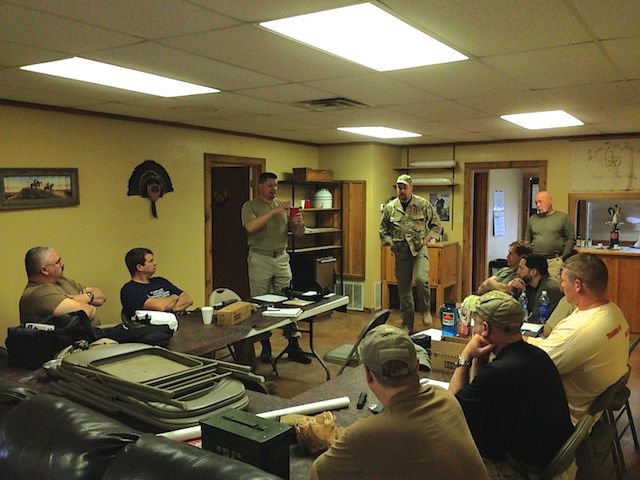
After the usual administrative stuff, John did the safety briefing. In addition to the usual safety stuff like hitting the four rules, he also talked about how we would handle evaccing an injured person from the somewhat remote area where we’d be shooting.
With that out of the way, John segued into a preview of what we’d be doing in the class. He said the class would focus on covering the highlights of patrolling, along with further development of our long range marksmanship skills. Add to this some briefer introductions to CQB, night ops, and vehicle ops.
John talked about the role of the designated marksman. A DM differs from a sniper in that a DM is a fundamental part of a maneuver unit (in this case an infantry squad) and has to be able to perform as part of that unit in all of its roles. So in addition to being capable of long range shooting, the designated marksman needs to be capable of all the basic infantry skills like CQB, team tactics, patrolling, etc.
Having covered the Designated Marksman part of the class, he moved on to patrolling. When the military does patrolling it may launch a patrol using units up to company size. That end of the spectrum is not all that relevant to what we’re doing. However, patrols can also range down to a 4-5 man team. This is what John did a lot of when he served in a Long Range Surveillance Unit. This is more representative of the size of the class and the sort of skills that would be more applicable in the real world.
John talked about the various sorts of missions a patrol might be assigned: combat, presence, and reconnaissance. A combat patrol goes out with the intent to shoot some BGs. A presence patrol is a “show the flag” type operation which may be intended to make nice with the local population, or to stick a thumb in the eye of opposing forces to demonstrate that they don’t control the area.
The principles of patrolling are planning, reconnaissance, security, command & control, and common sense. Of these, John holds that the latter is most important.
He also emphasized the importance of Pre-Combat Checks (PCC) and Pre-Combat Inspections (PCI). Before stepping off on a patrol, check all the patrol members and their equipment. John suggested that the assistant team leader do this by physically touching each piece of critical equipment. During the patrol, at a patrol halt do a sensitive items check to verify everyone had their most critical equipment.
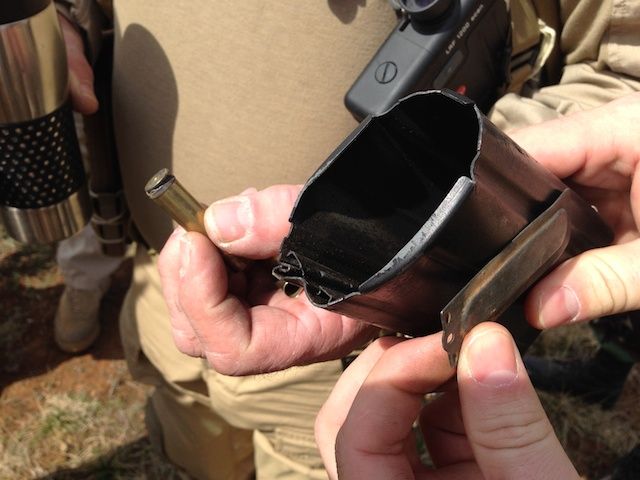
After the lecture we had an early lunch and headed out to the north pasture where we’d be shooting. We started out by giving everyone an opportunity to check their zero at 100 yards. During this process we had a case head separation on a FAL. The hot gasses blew out the bottom of the magazine. The general conclusion was probably bad ammo.
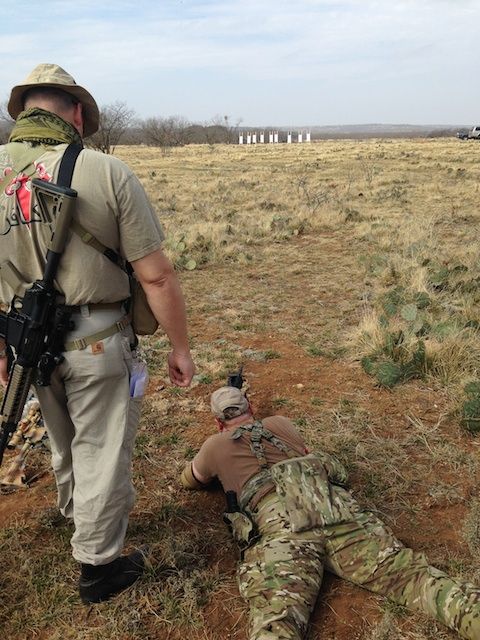
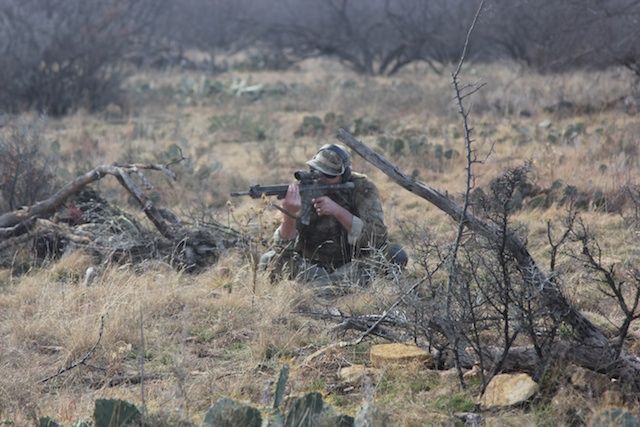
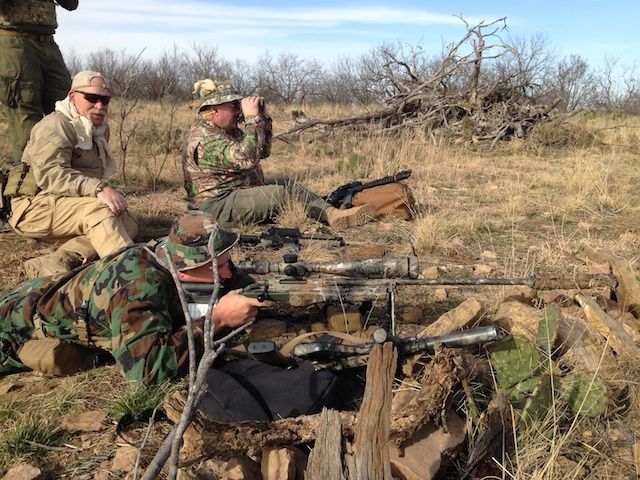
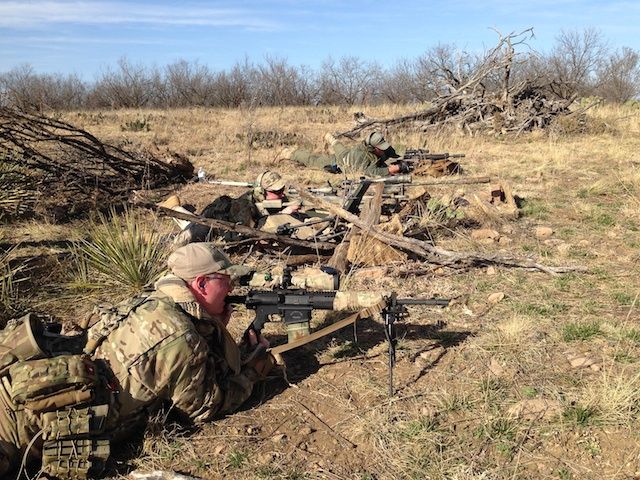
We moved up the hill to our shooting position and set up firing positions. This same area has been the shooting position for John’s classes the past few years, so there are already some positions dug in on the hillside that we could move into and improve. John set some steel out at about 125 and 175 yards.
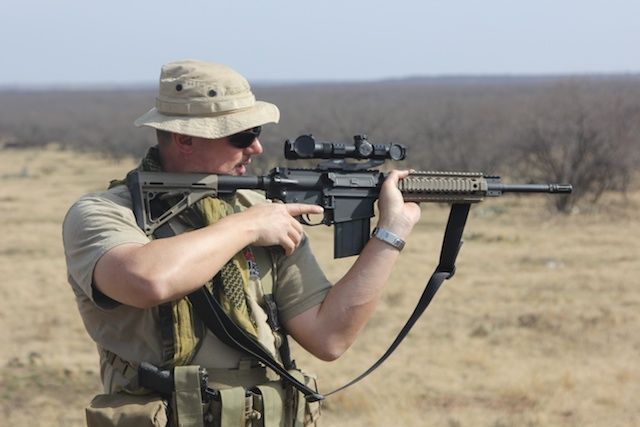
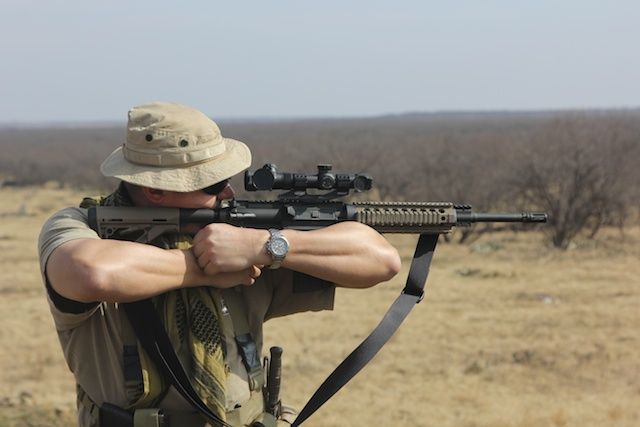
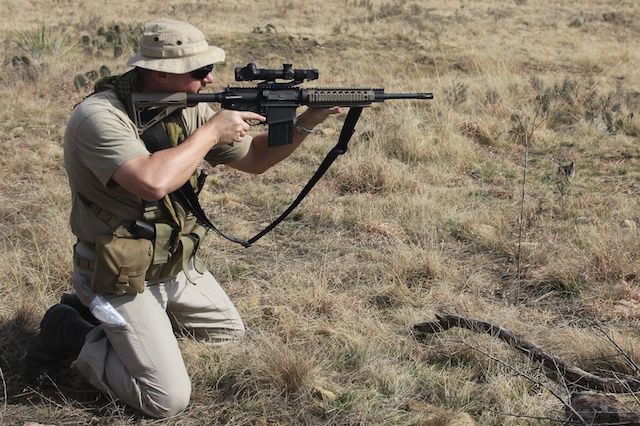
When we were set up we worked some position shooting. John went through the shooting positions, demonstrating each. Along with the classic positions he showed some variations. He showed the reverse crab claw variation on the standing position, reversing the support hand so the pinky side of the hand is downrange. He also demonstrated hugging the gun, placing the magazine well in the crook of your elbow and grabbing your firing arm with the support hand. Everyone shot 10 rounds from each position. At these distances even standing wasn’t too difficult.
Having gotten our start on the long range marksmanship portion of the class, we moved on to some patrolling. John talked about the roles and responsibilities of different members of the patrol. The team leader is in charge, obviously. He deals primarily with the patrol’s interface with the outside world: navigating, assigning sectors of fire, dealing with higher headquarters, etc. The assistant team leader’s primary responsibilities are with members of the patrol itself: handling logistics, conducting PCC, PCI, and sensitive items checks, checking for any gear left behind after a patrol halt, etc. He also takes the tailgunner position when moving in a file.
The point man should be the patrol’s best navigator. He’s the one making the active decisions about which route the patrol is going to take. The team leader is in command, but the point man is the one actually doing the driving. John’s discussion of the point man’s responsibilities segued into some discussion of picking routes. When patrolling, the easiest route is often not the best one. As John put it, “How do you spell trail? D-E-A-T-H-T-R-A-P”. Similarly, you don’t want to move through open areas, or to backtrail (travel back along your own previous route).
In addition to the TL, ATL and point man, the patrol should have a couple of members assigned as pace counters. Every member of the patrol should be keeping a pace count, but at least two people should have this as their primary responsibility.
Moving on, John talked a bit about hand signals for communicating within the patrol. The most basic signals are those to control the movement of the patrol: follow me, stop, freeze, and get down (drop to kneeling or prone). It may seem redundant to have signals for both stop and freeze, but there is a difference. When stopping one can (and should) move to the side a couple of steps, find a good position, kneel down, and, if you’re stopped for more than twenty seconds, to go prone. Freeze means to stop right were you are and not move your feet another inch. There are several applications of this, but the primary one is when the patrol finds itself in a minefield.
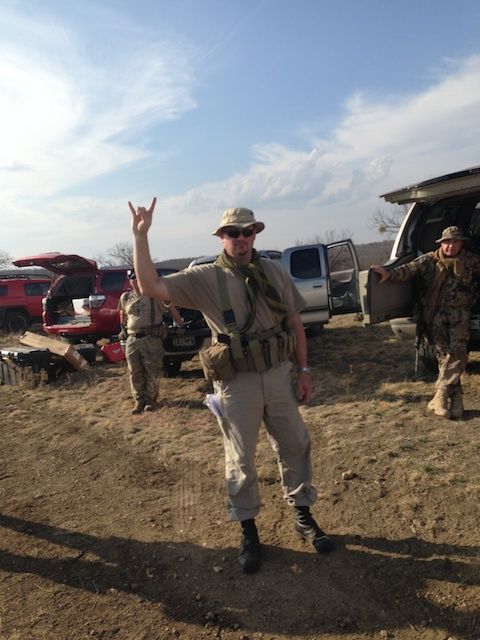
We also covered signals for different formations: line and wedge. This is an example of a situation when John prefers a different symbol than the standard one. The usual wedge signal is bringing the arms together over the head in a triangle, but this is hard to do, and to see, with a big ruck on. Instead, this being Texas, John prefers a hook-em horns gesture for this. This is an example of how teams can customize their hand signals for their particular needs. The key is they need to be simple and concise.
Finishing up, we covered signals for cease fire, calling the TL up to the front of the formation, and reporting sightings of enemy forces.
We talked some about noise discipline, securing anything that might rattle or creak. We also talked a bit about minimizing your scent. The problem here isn’t really body odor, it’s artificial scents, like tobacco, bug spray, and scented soap.
With this we kitted up with rifles, ammo, and water and headed out for a patrolling exercise. After moving about a hundred yards up the hill John had us conduct a patrol halt. Each team clustered up in a tight cigar shaped formation, heel to heel and and butt to butt. You look, listen, and smell for any sign of the enemy, or anything unusual.
We got up and kept moving up the hill, coming to a road, so John took this as an opportunity to cover crossing linear danger areas. There are lots of methods to do this, but this is the one John likes for a small unit. The patrol stops short of the road, back in cover. The point man moves up to the road and checks left and right, then moves across and provides security pointing to the left. The ATL provides security in the other direction. The rest of the team crosses in a quick rush.
After practicing road crossings, we moved back down towards the range area. When we got to the main road, rather than crossing it John had us do a short road march back to the vehicles. Moving on the road is much faster, but it trades security for speed.
With this we wrapped up for the day and headed back to the bunkhouse for some hamburgers and excellent fellowship.
Thursday
This morning we started out with some land navigation. John talked about the importance of knowing your pace count. He showed off his pace beads (in his case knotted bits of paracord) for keeping track of how far you’ve gone. He had us pace off a 100 foot distance (tripling the number of paces to get our 100 yard pace count). We did this both on the road and over broken ground, as well as at a run.
Once we had our paces down John gave each two-man team a bearing and distance to a point that he’d set the previous evening. My partner and I had some trouble finding ours. John finally sent us out with his GPS, and we found that we’d walked right by the GPS point that he’d given us directions to, but that the stake with the flag was 10-15 meters from the GPS point.
After everyone was back from finding the waypoints, we broke for lunch.
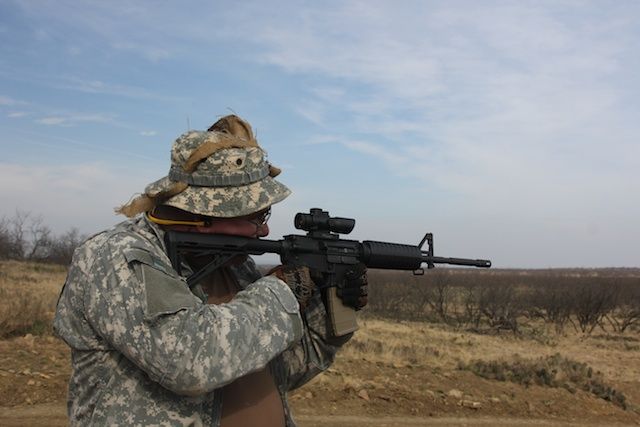
After lunch we did some self-paced shooting. John put targets out from 375-425 yards for us to engage. Even with some wind this was pretty easy for my AR with the optic on it, but I wanted to put my iron sights to the test. I popped the QD optic off and dialed in a setting between 300 and 400. At this range the front sight post was over twice as wide as the target. I set the top half of the target on the right half of the sight, held very carefully and pressed. I hit on the first round and managed 3 of 4 attempts. So I’m pretty happy with the Knights iron sights.
I also had a chance to shoot Saladin’s .223 Remington 700. He calls this his “urban earwax cleaner”. It’s exceedingly accurate. He has an old Swarovski 6x optic with a 5.56mm ballistic cam top turret. Once I had the wind dope, it was dead easy to repeatedly hit at 425 yards.
After everyone had their fun at intermediate ranges, we headed back to the bunkhouse for a break. While we were there I helped Saladin deliver a lecture on night vision optics, outlining the different generations and some of the fundamentals of the technology.
As the sun began to set, we headed back out to the range area. After getting geared up we did a short low light patrol, including a patrol halt. While we were stopped John demonstrated how you could use 550 cord as a low-tech means of communication, running a line from each team member to the teammates on either side. You can tug the cord to get their attention, even set up codes to communicate specific information.
After we made our way back to the vehicles, we broke out the NVGs and passed them around for everyone to have a look at.
Finally, we finished up the evening by doing some night shooting. John set up a couple of plastic targets with a strobe in front of them for illumination. We did some shooting, demonstrating muzzle flash and trying out illuminated scope reticles on low light setting. As we were finishing up shooting, one of the shots managed to hit the strobe.
We headed back to the bunkhouse and enjoyed some nice fish for dinner.
Friday
Rather than rolling right out to the range this morning, we stayed at the bunkhouse and John gave us some CQB instruction. When he was putting this course together, he said that it became clear that there was no way he could cover the necessary fundamentals of patrolling without including some CQB.
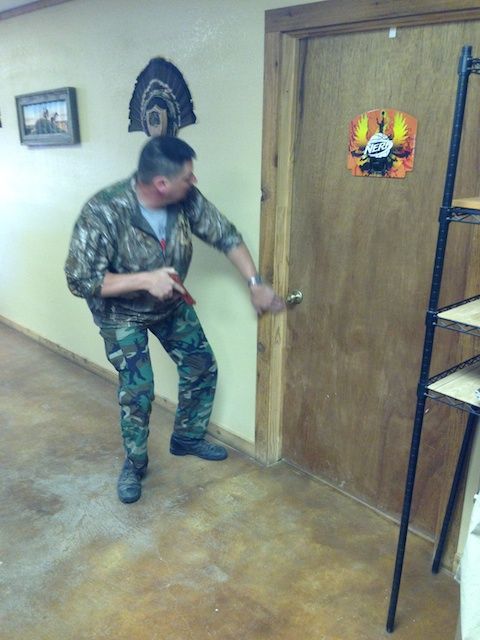
He started out with the fundamental building block of CQB: the corner. John demonstrated clearing a corner using one of the doors in the bunkhouse, then set the students to practicing. We moved on to some basic room entry stuff. Once the students had that down, John incorporated the team aspect and started them working in 2-man teams to clear the bunkhouse bedrooms. We finished up the morning doing the criss-cross entry on the bunkhouse’s main door. This is a way of getting two shooters into a room with two difficult corners very quickly.
We had an early lunch and headed out to the range.
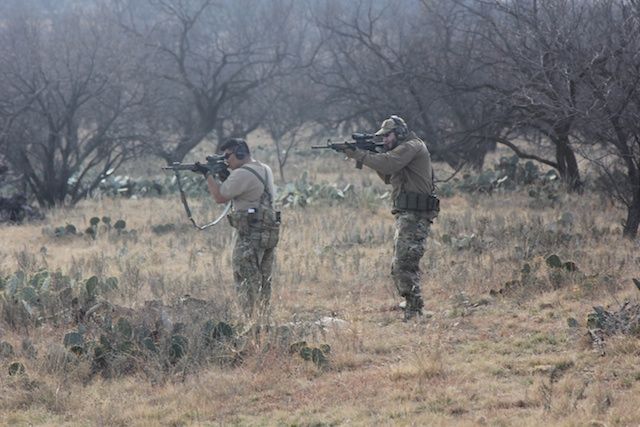
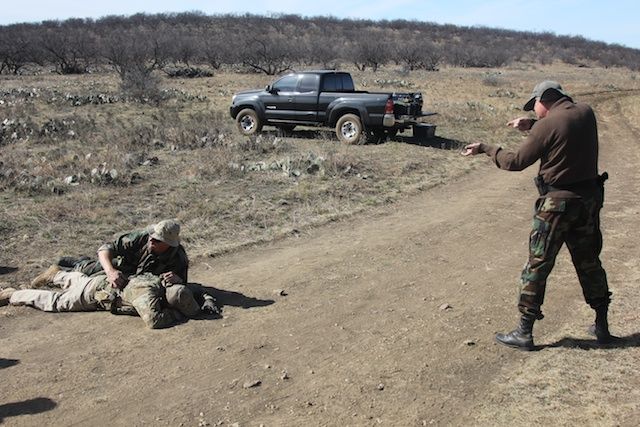
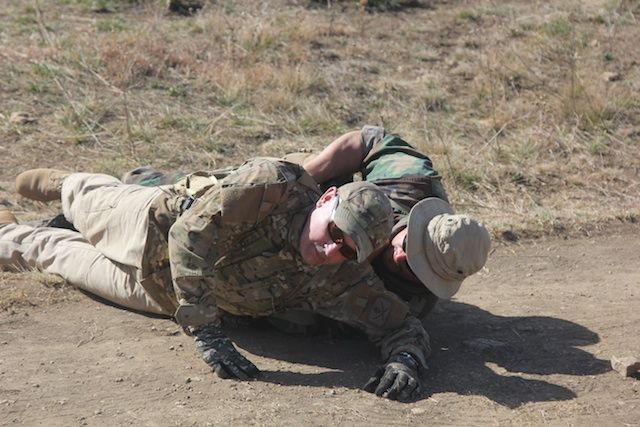
At the range we started out with some react to contact drills. If you’re in a small unit and you encounter any sort of hostile force, the best response may well be to beat feet. One way of doing this with some semblance of order and while putting lead on the enemy force is the Australian peel. The unit is in a file and encounters the enemy force. The point man dumps some rounds (probably a full mag if he’s running a full auto gun) and then runs to the rear parallel to the squad. As he’s doing so, the second guy begins dumping some rounds, then runs to the rear. And so on, until you’ve got sufficient distance from the enemy to break contact and head to the nearest rally point.
We ran this dry extensively before going live with it.
If you have a somewhat larger unit (both in absolute terms and relative to the enemy force) another possible response is to set up a base of fire with part of your force and send the rest out to turn the enemy’s flank and roll them up. We did this drill dry, at a walking pace and a somewhat smaller scale than you might in real life. We started with each team in a wedge formation, one following the other, moving down the road. When the “contact” occurred each team shifted to a line, oriented parallel to the road. One team mimed firing at the enemy, while the other moved out in an arc in a flanking maneuver to the right. As they did this, the team providing the base of fire would shift their fire to the left, giving a bit of distance between the flanking unit and friendly fire. When they’re in position, the force providing the base of fire lifts fire entirely, allowing the flanking force to roll up the flank and assault through the enemy position. When they reach the left hand end of the friendly line, that’s their limit of advance. The unit providing the base of fire moves forward and sweeps across the enemy position until they reach the end of the assault unit’s line. You should end up with the two teams on the ground you were ambushed from in an “L” formation. We ran this a couple of times dry at a walking pace, but given that it involves moving one unit into an area that was recently occupied by another’s target area, John decided not to run this one live.
We did some more self-paced long range practice. Saladin brought out his long range rifle, a SAKO TRG 42 in .338 Lapua and gave others a chance to shoot it. We had a target set up out at 1000 and I was first up. The wind was fairly stiff, 15-20 mph, full value right to left across the range. I asked Saladin what sort of wind hold I should be using. He said, “Right edge of the target”
“Really? That little?”
“Maybe a bit of daylight between the edge of the target and the reticle.”
Sure enough, I put a couple of rounds downrange and found that the perfect hold had the left end of the tick mark on the vertical reticle on the right edge of the target. The YHM suppressor he has on there is really effective too. It’s easily hearing safe and would do a great job helping conceal your position from anyone down range.
John and many of the other students rotated through behind the gun after I’d taken my shots. Everyone got hits at 1000 yards, many of them on the first round.
While it was a bit of a letdown after shooting Saladin’s big stick, I also wanted to get in some more long range practice with my AR. I managed first round hits at 600 and 700 (using easily three times as much wind hold as I did for the .338 at 1000). I also took some shots at the 1000 yard target with my AR, but even with my spotting scope it was impossible to see where my shots were hitting at that distance (the .223 doesn’t kick up quite as much dust as the .338).
After a very nice day, we headed back to the ranch for some truly fantastic ribs and more great fellowship with like-minded people.
Saturday
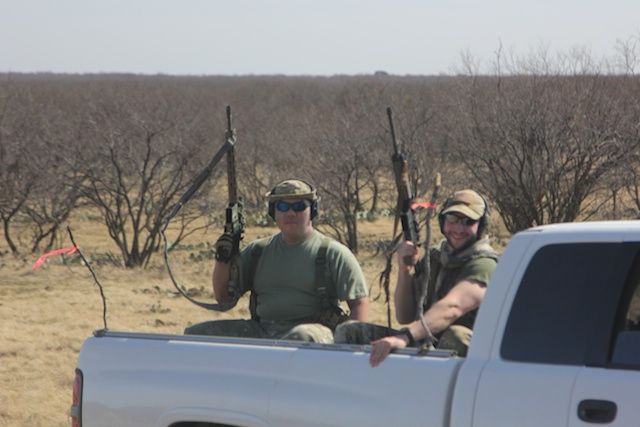
This morning we rolled out to the range first thing. Today would be dedicated to vehicle related stuff. We started out with some vehicle sniper hides. As usual, there was some creative thinking. Several 2-man teams shot from the rear of SUVs and a couple from truck beds. One shot from the sliding rear window of an extended cab pickup truck. There were several suppressors in use (one team borrowed my rifle and can).
When we were debriefing this there were a lot of other great ideas for vehicle hide (many of which required items or equipment nobody had on hand). A particular favorite was the idea of building a hide in the bed of a pickup truck using carpet rolls.
After lunch we moved on to some shooting from moving vehicles. John set up some limit stakes in the bed of his truck, to control how far forward and back the students could shoot. This keeps them from, say, putting rounds into the cab. With two students seated on a box in the truck bed they made a run down the range, engaging targets as they came along side. John sat leaning against the cab as the safety officer.
Shooting from a moving vehicle is not exactly a precision operation. Red dots are optimal, and ACOGs and Browes will work. Conventional scopes are going to be very hard to use. This is really the domain of some long range point shooting.
I switched over to my FS2000 for this (pretty much the ideal vehicle gun IMO) but on my first run I stupidly forgot to put my chest rig back on so I only had the mag in the gun. John had his AUG with him so I swapped over to that.

After everyone had gotten a taste of this and demonstrated that they could do it safely, we upped the ante with multiple vehicles. With two more trucks set up the way John’s was, we had a three vehicle convoy. John talked a bit about the principles of convoy driving and the speed and spacing he wanted maintained during the run. He also cautioned against engaging a target that passes too far aft. That rear limit stake is there for a reason; it’s to keep you from hitting the vehicle behind you. We did two runs to give everybody a chance to do this as a gunner.
Once the vehicle portion was done, we did some more self-paced long range shooting. John set out some jars of tannerite as precision targets. Some were up close but he put some of them out there pretty far, over 400 yards. A little 3″ jar is quite a difficult target at that range. Saladin’s “earwax cleaner” to some use shooting at these further targets.
After all the tannerite was blown up, I had a chance to shoot Saladin’s .338 Lapua again. We’d moved one of the targets out to 1240 yards, way up on the far ridgeline, as far out as we can effectively shoot from this particular spot. Saladin gave me the dope (dial 42 minutes elevation in the scope than hold another 17). The wind was a bit milder than on Friday, so I only had to hold the right edge of the target, despite being further out. As I got behind the gun I cranked the scope up to 25 power. Even with that it wasn’t easy to see the gray target against a dry grass background with the sun at a low angle behind me. As I found the target and settled on to it, I noticed a regular, slight bobble in the scope picture. I’ve heard about seeing your pulse in the scope before, but this was the first time I’d used a high enough power scope to actually see it. I settled in and got everything lined up and gently pressed the trigger. John, who was spotting for me, said he could follow the trace all the way in. He saw my shot centerpunch the target. First round, cold bore hit at 1240 yards.
We retired to the ranch for some of the best steak I’ve ever had and some more great fellowship.
Sunday
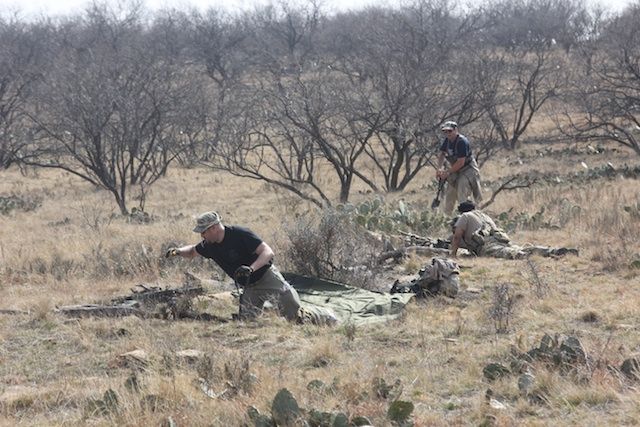
Our topic today was the flip side of some of the reaction to contact drills that we’d been doing the other day: ambushes. Or as I like to put it, “Doing unto others before they can do unto you.” John laid down the basics of both the linear and L-shaped ambushes. The difference is that while a linear ambush simply lines the ambushers up parallel to the enemy’s expected route of travel an L-shaped ambush places a blocking force (the short leg of the “L”) across their route of travel, using your most casualty producing weapon, such as a belt fed machinegun. We concentrated on the simpler linear ambush.
Even an linear ambush is a bit more involved than just lining up and shooting the enemy. The patrol leader designates one team as the base of fire and the other as the assault team. If you have heavy weapons, they would be in the base of fire team. John is a real fan of claymore mines for initiating ambushes, but if you don’t have those available, you can initiate by having the leader fire a shot, by having the MG open up, by precision fire from designated marksmen or snipers, or by using parachute flares night. The possibilities are endless.
The base of fire team is essentially going cyclic; shooting as fast as possible and sweeping the kill zone with fire. The assault team is being a bit more restrained. They’re still shooting, but they’re picking targets of opportunity. After the enemy has been suitably shot up (usually about a minute) the patrol leader calls cease fire and the assault team advances, sweeping through the kill zone and eliminating any remaining enemy forces. Standard procedure is to put two rounds into the head of any enemy soldier, whether they appear to be alive or not.
After the kill zone has been swept, you search the bodies, gather any intel, stack the weapons and render them inoperable, and book it out of there. This is the full drill for a prepared ambush. In a hasty ambush you might refrain from sweeping the kill zone or performing any of the after action steps. Just bloody their nose and run away.
We ran this at a walking pace and a small scale many, many times. Once John was satisfied that we had it down we broke for lunch and he went down to set up some targets for us.
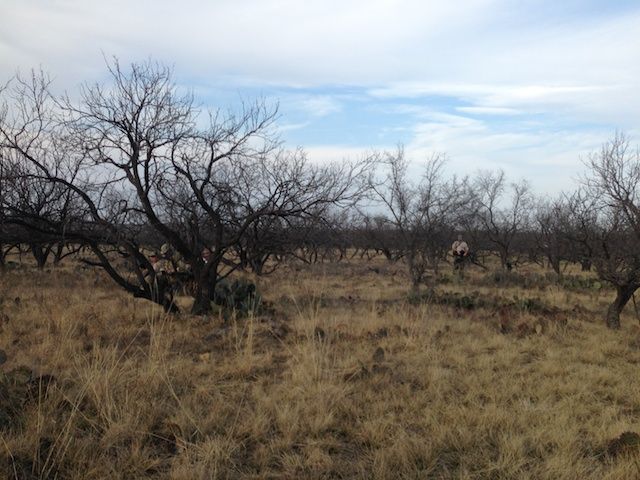
We moved off into the treeline to the right of the range and patrolled downrange for an initial point (with the aid of GPS). From there, we switched to a wedge formation and carefully approached the edge of the treeline from where we could see the targets. John and briefed us on one high value target (a green Ivan type) that we should make sure to get, and his three bodyguards. Just to make things more interesting he’d taped some tannerite to the back of these targets heads. I’m proud to say I was responsible for getting two of the booming headshots.
The student acting as patrol leader called cease fire and we moved quickly back to one of our rally points.
This big exercise was the culmination of the class, and a spectacular culmination it was. We still had a bit to shooting to do however. John had mixed some extra tannerite and once mixed you don’t want to be transporting it. So he set out half a dozen jars on the road and we shot the hell out of it.
We adjourned back to the bunkhouse to hand out the certificates and wrap things up. About half the class went into town together for some dinner. Saladin and I, along with a few others, stayed at the bunkhouse one more night and headed out the next morning.
Closing Thoughts
This was a spectacular class. As usual, one of the highlights was the fellowship that develops when you have all these like minded people bunking under the same roof, eating together, and generally hanging out in the evenings. This goes way beyond what you get at the average class where everyone scatters to different hotels.
The folks at the ranch did a great job putting us up. The facilities were great and the food was fantastic. The ribs and steak the last two nights were the best of each that I’ve ever eaten.
I was happy with how well I shot with my rifle. The Leupold glass is just fantastic and it was easy to use it to reach out to 700 yards or so. The Knights upper easily shot accurately out to that distance. As expected the UBR stock was rock solid. It’s easily the best AR stock out there. The only issue with it is weight but on a heavier, DMR type rifle like this it fits right in. I had a few issues with the Geissele trigger, which was kind of disappointing, and I think I might end up switching that out for a Rock River match trigger like I have in some of my other rifles.
The rest of my gear ran well. One decision I was really happy with was going to a pair of all-leather hiking boots, rather than the mostly nylon tactical boots that I had the previous year. I did not have any trouble with cactus spines penetrating the boots.
The patrolling segments of the class were very worthwhile. I’ve not had the chance to take a dedicated patrolling class, but I’ve done a bit of it, both in John’s class last year and in previous team tactics classes. This class really took it to another level.
One of the things that was a new experience for me was doing a bit of patrolling at night. This really adds a new dimension to it. Seeing Saladin’s really nice set of NVGs was also an experience. My PVS-14 is really good, but seeing the truly top shelf gear does give something to strive for.
The vehicle portions of the class were pretty good. Vehicle hides are always cool. It’s fun to see students apply their creativity to problems like this. Shooting from moving vehicles definitely adds a unique aspect to the class, and there’s not a lot of places where you get the opportunity to do this, especially on this sort of scale.
I want to thank Saladin for letting me shoot his rifles, particularly the TRG 42 in .338 Lapua. I think we’ve demonstrated that you can do some great long range work with .308, and even .223. However, extremely long ranges, 1000 yards and beyond, are really the realm of larger calibers and more specialized equipment. I’d been leaning towards .300 Win Mag for my eventual long range boltgun, but this experience has forced me to reevaluate that a bit.
I also need to thank Billy for giving me a ride out to Coleman and back. He’s got a lot of great sea stories and made it quite an interesting trip.
John had some very interesting thoughts on what he might offer out here next year. Since he hasn’t mentioned them here yet, I won’t let the cat out of the bag, but it will take certain aspects of this class even further.
At dinner on Saturday night I proposed a toast, “Next year, in Coleman!”