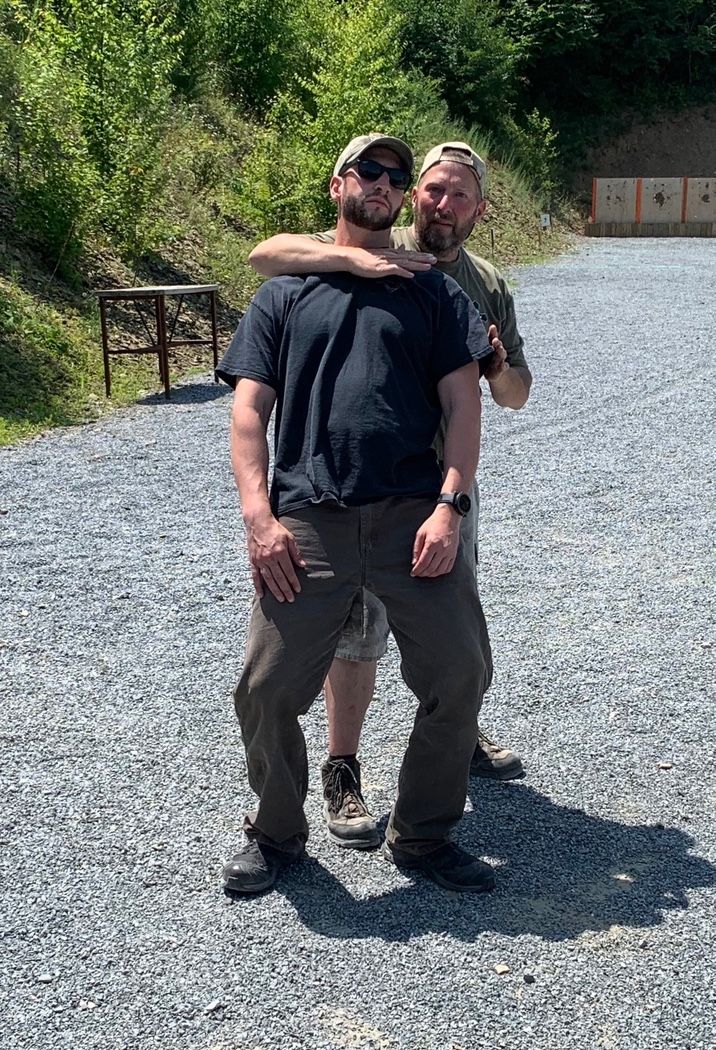
Last weekend I took Full Contact Gunfighter 1 and 2 with Eric Pfleger in Hershey, Pennsylvania. These classes teach a mix of close range shooting, empty hand techniques, knife defense, and offensive use of knives and other contact weapons.
Compared to the amount of time I’ve put into shooting with pistol and rifle, hand to hand stuff has long been a weakness of mine. I took the SI 0-5 foot class several times and did some knife training with Tom Sotis (plus any class I took from Randy Harris always seemed to end up covering grappling and knives at least in passing), so I’m not a total novice. I know enough to know just how little I know. And with what I do know I am horribly out of practice.
Knowing this was a weak spot I’ve been wanting to take a hand to hand focused course from Eric for a long while now. I was never able to make one of his Hand to Hand for CCW courses back when he was with SI, and he’s only taught this sort of thing once or twice in the past five years. When he posted this four-day extravaganza, I jumped on it, even though it was across the country.
Gear
Originally, I was just going to bring my usual RMRed G17 to Pennsylvania. However, the fact that the class would include contact distance pistol work got me thinking about bringing my Glock 19X “Roland Special.” One of the characteristics of the Roland Special is a compensator (in my case a Mayhem Syndicate barrel and comp). A common concern about comps is muzzle blast when shooting from retention or other close contact positions. While I had a chance to do some retention shooting in Roger Phillips Fight Focused Handgun III class last month, I thought this class would be a good chance to test that out even more thoroughly. I still brought the G17 as a carry gun and backup for the class.
Since we’d be doing knife work (and because I carry them anyway), I brought a Spyderco Street Beat fixed blade that I carry at about 11 o’clock, just behind my spare mag, and a Spyderco Endura that carries in my right side pocket. At Eric’s encouragement, I bought a trainer version of the Endura. I also brought a couple of NOK rubber training knives and an orange plastic dummy gun.
Pre-Class Travels in Pennsylvania
The class ran Thursday through Sunday, but I decided to take the whole week off and fly out the previous Saturday. This would give me some time to play tourist in Pennsylvania ahead of class.
After I arrived in Philadelphia on Saturday, I toured the cruiser USS Olympia, which is moored down on the waterfront. On Sunday, I drove up to Scranton and saw Steamtown National Historic Site. It’s quite the destination for a train nut like me. Then on Tuesday I dove down to Gettysburg and toured the battlefield there. This is an excellent experience (I’d been there before, but that was about thirty years ago). Wednesday I saw Eisenhower National Historic Site, just west of Gettysburg, and drove up to Hershey for the class.
Another student and I got together with Eric and his family that evening for a nice dinner.
Thursday
I rendezvoused with Eric at his hotel, and we drove a few minutes to the range. Once everyone was assembled, we took care of the waivers and got the medical brief out of the way.
Eric had everyone introduce themselves. Some of the folks in the class were new to me, but others I’d trained with before when I lived on the east coast. All had fairly extensive training histories, so Eric announced that he was planning to deemphasize the handgun portion of the curriculum and spend more time on the hand to hand and contact-weapon focused elements.
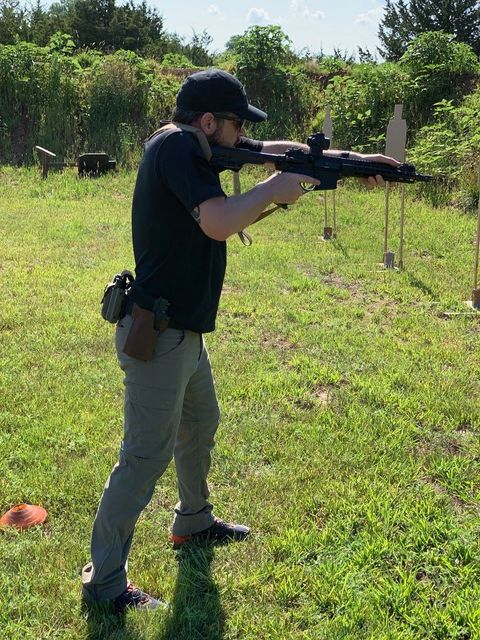
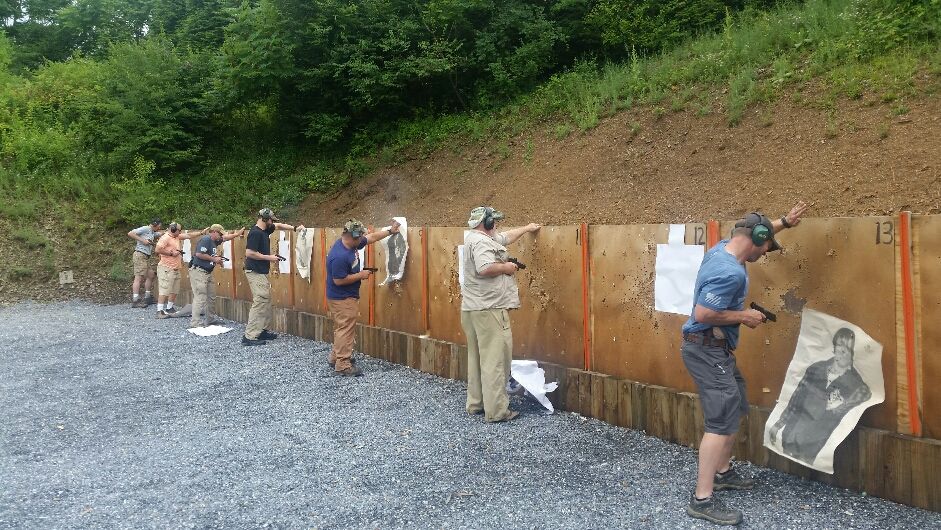
Nevertheless, we started with some handgun work. After a quick range safety brief, we started out working some point shooting to the body, followed by a sighted fire shot to the head (much like in Roger’s class a few weeks ago). Eric emphasized that at the sorts of distances that we’d be training in this class, headshots should be a priority. It’s close enough that they’re doable and at these distances, the situation is urgent enough that we want the instant, lights-out fight ender that a central nervous system hit provides.
We worked some point shooting from compressed positions, initially facing the target, then incorporating turning to engage targets behind us. One thing Eric pointed out that I hadn’t appreciated before is that when you turn to look at a target over your shoulder, your weight will naturally shift to the leg on that side. That flows nicely into pivoting on the ball of that foot as you turn.
Moving on to targets to our right side we did some shooting with the pistol compressed in towards the shoulder in a “chicken wing” position. Eric emphasized that the lack of structural support in this position might cause the pistol not to fully cycle and malfunction unless you have a convulsive grip on it.
Switching over to targets on our support side, we shot cross body. Rather than something like the Center Axis Relock position that we used in Roger’s class, Eric had us work it one-handed as if the other hand was occupied fending off the opponent.
While the issues with targets to the right and left are different, they highlight a common theme in the gun portions of this class. At these sorts of distances, in a confrontation that combines firearms and physical contact, we may not get to shoot optimally. The reality of the fight will likely compromise our shooting position or grip.
Next up, Eric covered drawing a pistol using the support hand. If you’re carrying appendix, you can reach across and draw. With a hip holster, you can reach around behind your back. In either case, you’re probably going to have to start with a very compromised grip and get a better grip on the gun once you have it out of the holster. The idea of doing this in the middle of a grapple when your primary hand is tied up with your opponent seems risky. Much better to have a weapon of some accessible to your support hand: either a backup gun or a knife of some sort. We did this dry first; then once everyone was reasonably comfortable with it, we went live.
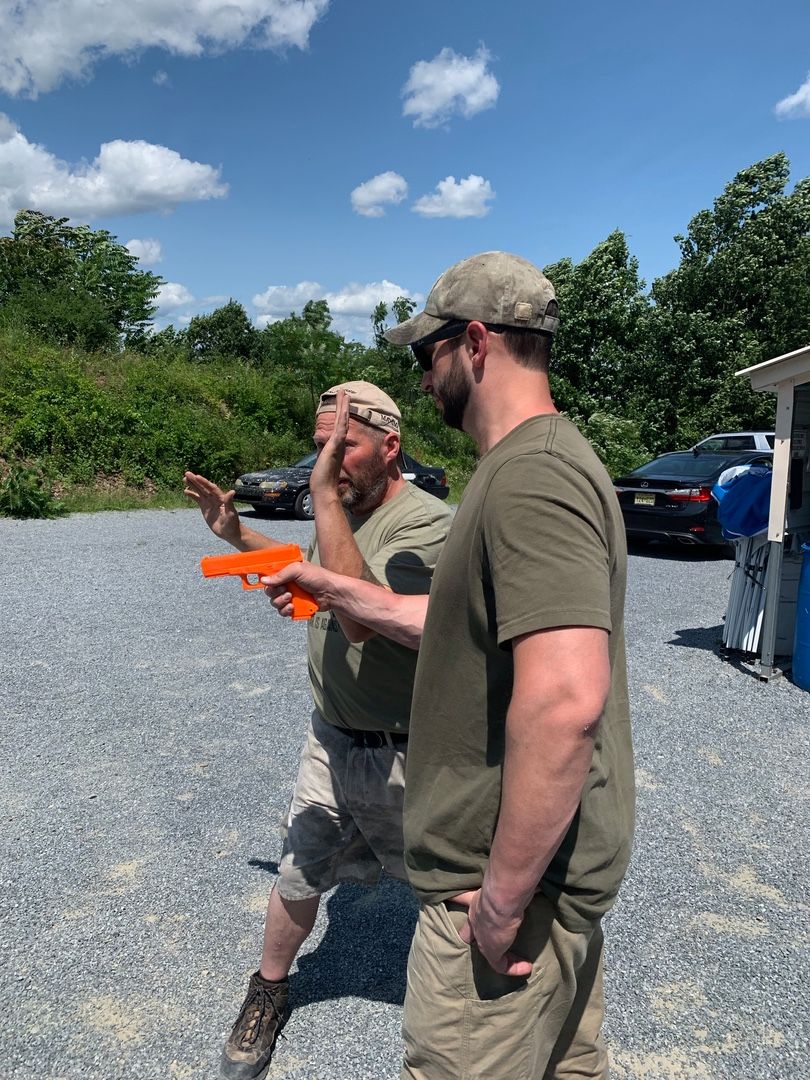
Our penultimate handgun topic For today was defending Sul. Sul is a useful, ready position when scanning behind you or moving through an environment with a lot of non-combatants. However, it doesn’t have the muzzle pointed at a potential threat. If a threat emerges suddenly at close range (as you round a corner or turn around to look behind you, for instance), you need to be able to deal with it.
Eric likes treating this as a combined gun and hand to hand problem, rather than just a gun problem. Depending on which direction the threat emerges from, the response will often start with an elbow strike before bringing the gun into play. We practiced dealing with threats from the front, sides, and rear dry, then shot all of them live.
Lastly, Eric talked about contact shooting. If you have your gun in hand when you’re in a clinch or on the ground with an opponent, you may have to shoot with the barrel physically touching the adversary. This can be a problem with semi-autos because if you’re pushing the gun into the adversary with enough force, it can push the barrel out of battery. One way to counteract this is to put your thumb on the back of the slide and hold it in battery when you shoot. You only get one shot, but that may be enough to give you the advantage and let you finish the fight by other means. Eric had us give this a try. This finished up the handgun portion of today’s class.
Moving on to empty hand work, Eric talked a bit about what he was trying to accomplish with the curriculum of this class. We’re going to be covering strikes, blocks, grapples, ground fighting, chokes, joint manipulation, and knives, sticks, and other contact weapons. He’s not able to turn anyone into a complete ninja after just four days. All he can do is provide an introduction to all four of these topics, giving us some solid basics that we can take with us and practice on our own.
Eric started out talking about footwork, including lead (which foot you have forward) and movement. He emphasized the need for fluid movement and a solid base from which to deliver and receive force.
At this point, it started pouring rain. Thankfully, we had a big ramada for overhead cover, but the rain was pounding on it so hard that Eric could barely make himself heard over the noise. Rather than shouting himself hoarse on the first day of class, we took a break for some lunch.
After the rain stopped, Eric moved on to blocking. He covered a few different techniques, including up and down windmill blocks, hubud, and a few others. He emphasized that a block is not just to prevent an incoming strike from hitting you; it’s also an attack on your opponent’s arm (or leg). You’re basically hitting him with the bony outside part of your forearm, or as Eric likes to call it, your natural ASP baton. Since you’re hitting him anyway, you might as well hit him hard.
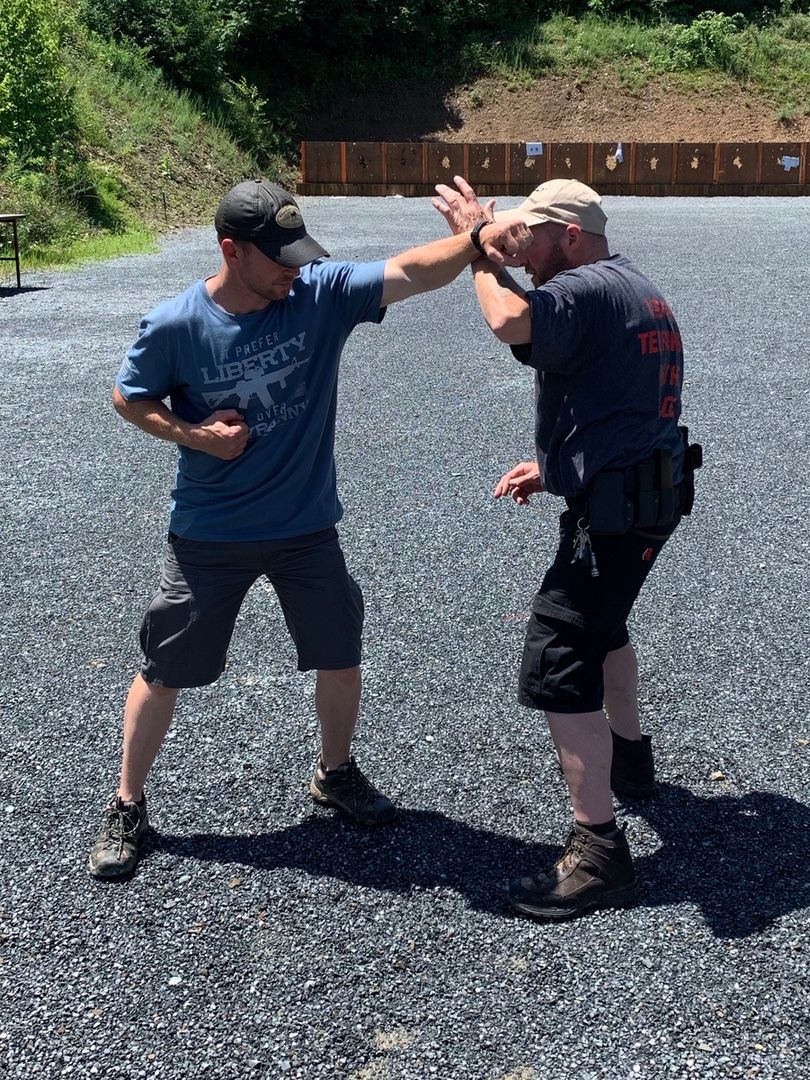
On top of the hard block itself, Eric also encouraged following up your block by counterstriking or trapping the opponent’s arm. An option he really likes for this is a quick strike to the brachial plexus. Or, if you trap the arm, strike the back of the elbow and break or hyperextend it. If you’re getting the impression that Eric is pretty offensive-minded about this stuff, you’re right.
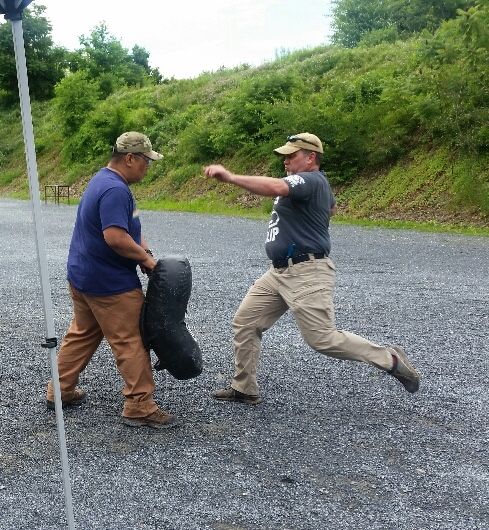
Moving on to striking proper, Eric covered various strikes delivered using the hands and arms: punches in roundhouse, straight, and uppercut varieties, hammer fists, palm strikes, elbows, eye rakes, and pump handle strikes (an upward strike using the top of the fist). Eric had some padded shields, and one of the students had brought out a BOB target, so we could practice hitting stuff.
One thing Eric emphasized was using strikes to set up other strikes. Hit someone in the balls, and it will tend to bring their head forward where it might make a good target for a follow-up strike. Use an eye rake to turn their head and set up a blow to the jaw hinge. Etc.
For strikes delivered by the feet and legs, Eric taught a selection of kicks, knees, stomps, and heel strikes. We had a chance to work each of these on pads.
That wrapped up the first day of class. We headed over to a local restaurant for dinner. There was good food, good beer, and some great conversation.
Friday
When we reconvened on Friday, Eric started us off with some warm-up live fire. We worked some bursts to the body, headshots, and turns.
The meat of this morning’s live fire was the “Murphy’s t-shirt drill.” Sometimes when you’re drawing from a closed front cover garment, the muzzle of the pistol can catch on your shirt. If the adversary is at close range, you can point shoot through the shirt, then shove the pistol forward through the resulting hole (you may need to assist by grabbing the cover garment with the support hand). It’s possible that the gun will malfunction during this process because the slide gets caught on clothing or a case bounces back into the ejection port, so you need to be prepared for that. Once the gun is through the shirt, you can transfer the pistol to your other hand and get it up to eye level.
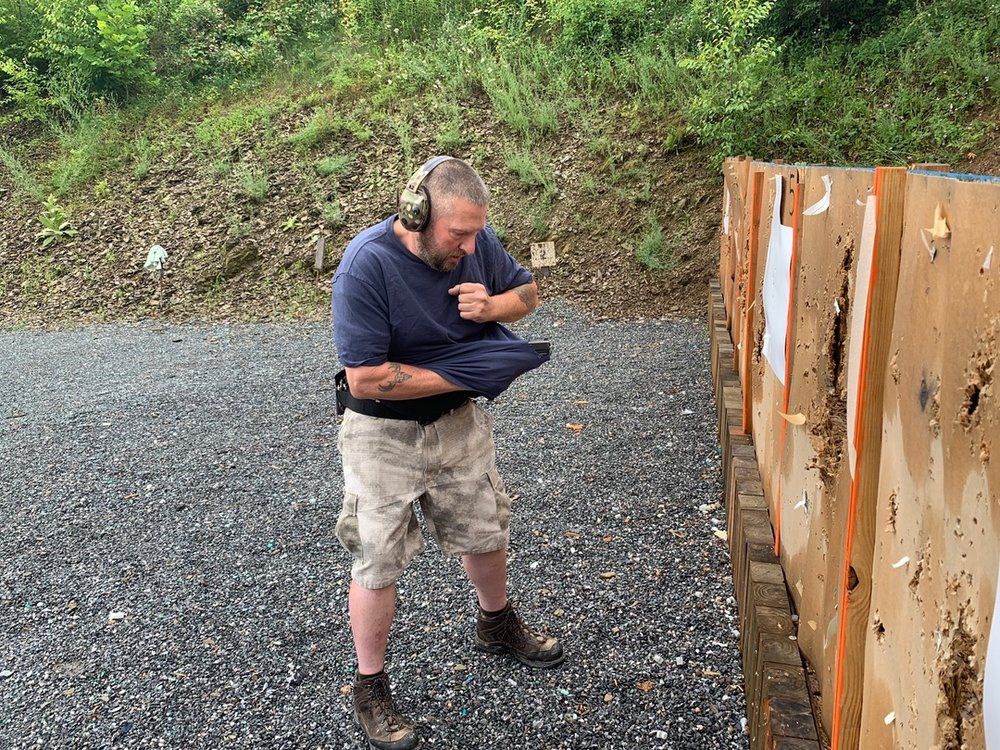
Eric asked everyone to bring an old t-shirt so we could work this drill live. We shot it a couple of times (you can turn the shirt around or use a different spot on the shirt).
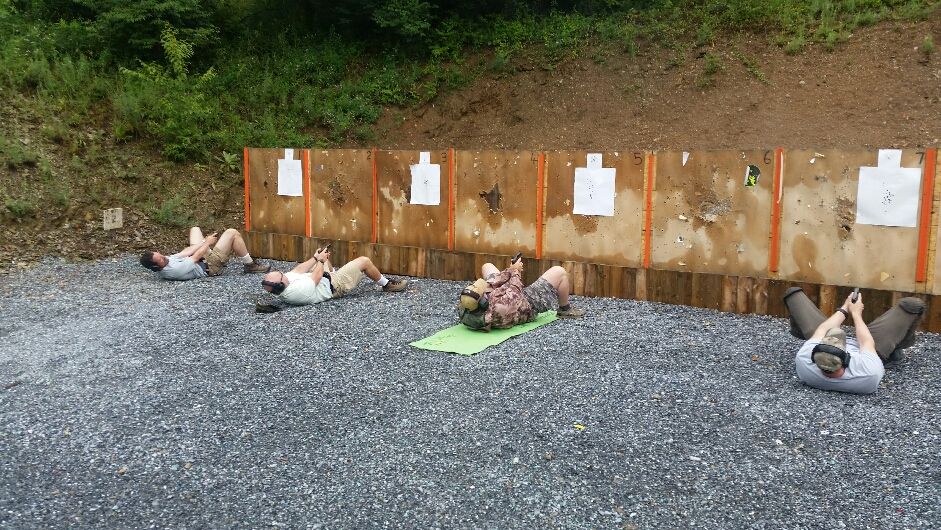
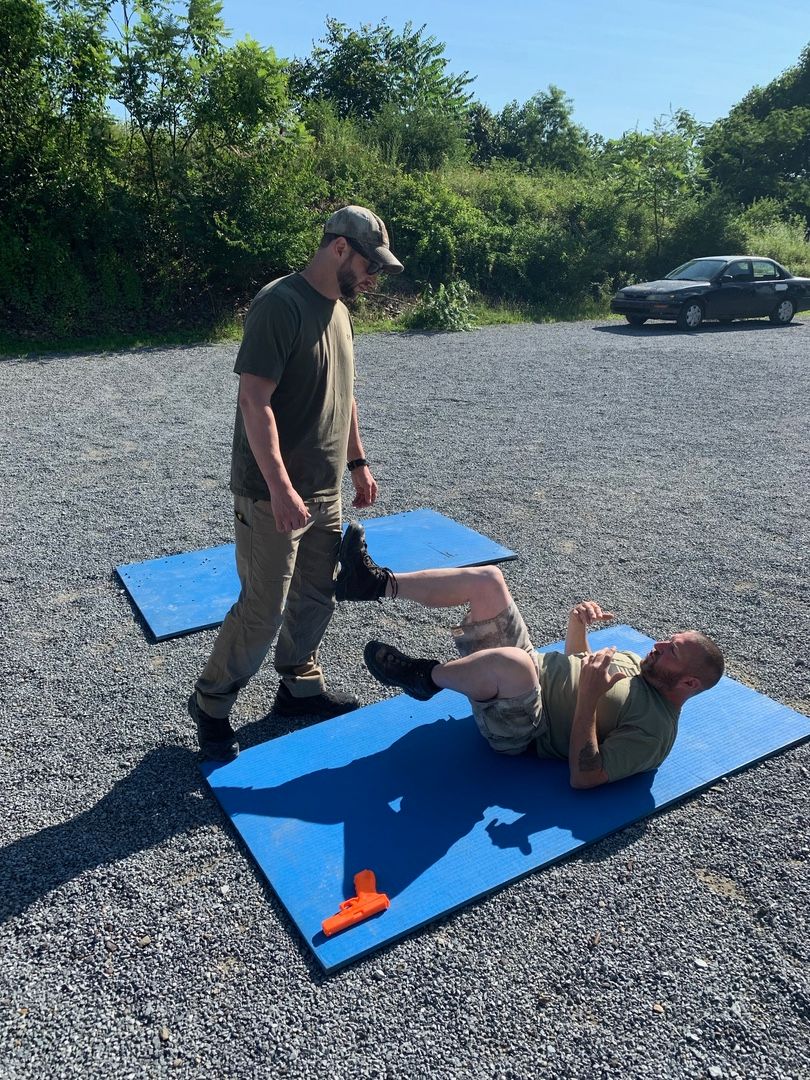
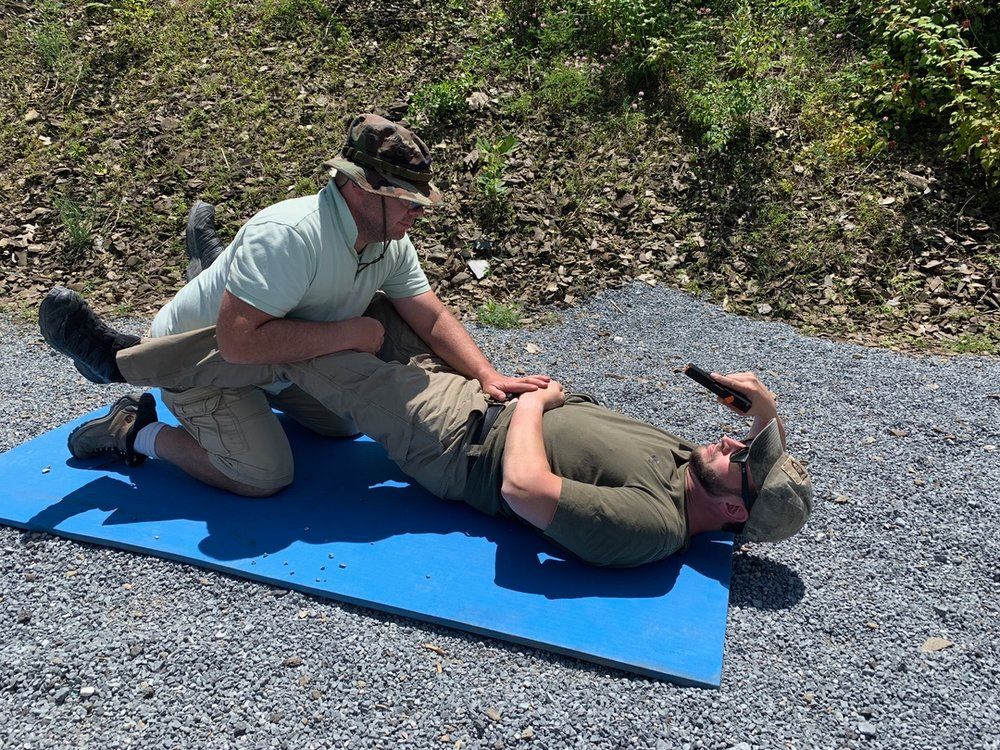
Next up was shooting from the ground. Getting knocked on your ass is a significant possibility during a fight. You need to be able to get your gun out and deliver good hits from the ground. One thing to be aware of when practicing this sort of thing is to make sure your bullets don’t go sailing over the berm. Thankfully we had a nice tall berm (more of a hillside, really) so we had some flexibility in this regard. Eric had us simulate kicking the opponent’s ankles as we got the gun out to keep him off of us.
You don’t want to just hang out on the ground if you have a choice, especially if the BG has friends. Eric demonstrated how to get up while keeping the gun on target. We ran the get-up live a couple of times.
With that, we put the guns away. Our topic for the rest of the day would be knife defense.
Eric started by describing the five lines of attack that a knife strike could take. This divides things into slashes from four quadrants (upper right, upper left, lower right, and lower left), plus stabbing attacks that come straight in.
Blocking a knife is a bit different than blocking an empty hand strike. With an empty hand strike as long as we block the hard, initial strike, we’re less concerned about it slipping around our block without much force behind it. With a knife strike, if the knife slips around our block, it can do a lot of damage even if it doesn’t have a ton of oomph. The flip side is that with a knife we’re generally less concerned about the attacker’s other hand (when we got to offensive use of the knife on Sunday Eric had a lot of good suggestions for things to do with that other hand, but as the defender, it’s a secondary concern). Against an empty hand strike we might not want to tie up both of our hands blocking one of the opponent’s, but against a knife using both hands to ensure that blade doesn’t slip around our block is a good tradeoff.
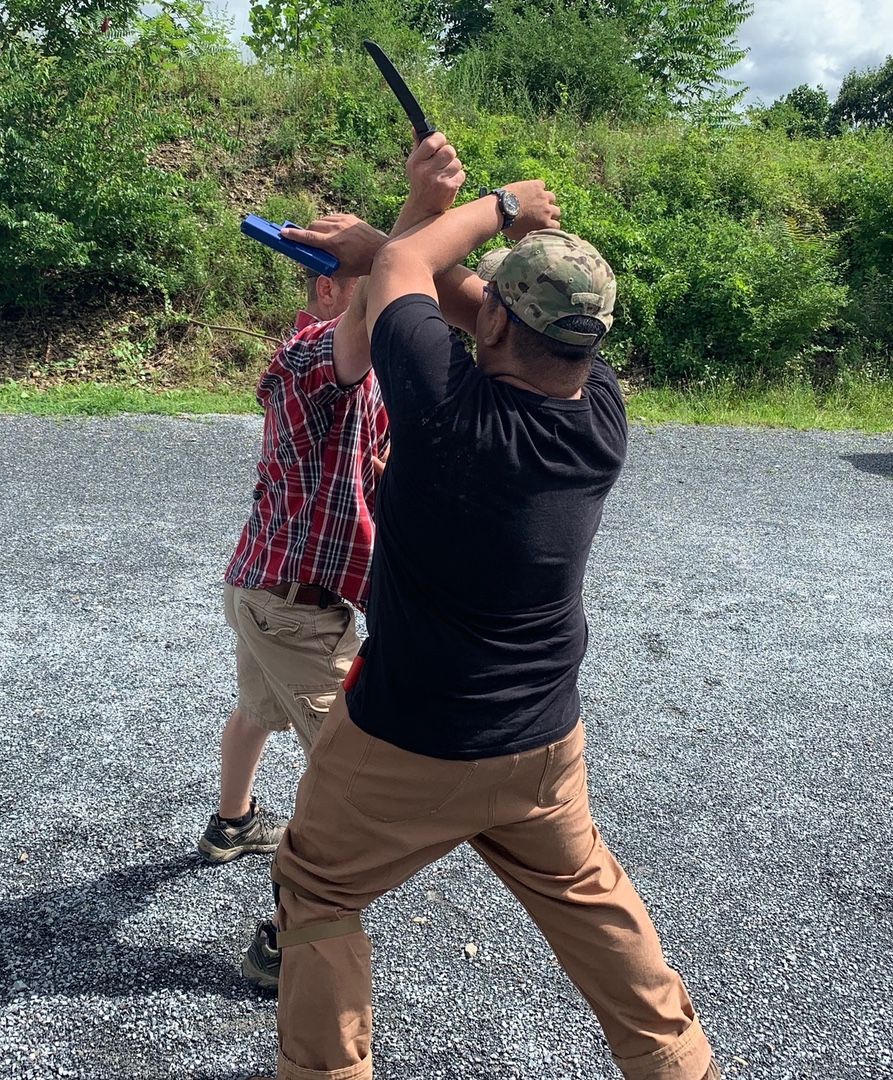
All of this is why Eric strongly advocates using an X block (arms crossed about midway up the forearm) to block knife attacks. While he’s a big advocate of keeping things simple and creating consistency across different categories, there are differences between dealing with a knife and dealing with an empty hand threat (sticks and other longer contact weapons throw in yet another set of dynamics). We worked the X blocks against high line and low line knife attacks.
When you’re empty handed against a knife attack you don’t want to just stand there fending off attack after attack. Eventually, you’re going to flub a block, and he’s going to get one through. Instead, you need to do something to change the dynamics of the fight.

One option for this that Eric likes is trapping the opponent’s knife arm to neutralize the threat and going to work with empty hand strikes. Breaking elbows, brachial stuns, throwing elbows or hammer fists, etc.
If you’re armed (whether with a gun or with your own knife), another option is to break contact long enough to deploy a weapon. The key here is to get enough time and distance to do so without getting stabbed.
With the fundamentals covered and drilled, we spent a good portion of the afternoon working these skills in less structured force on force.
Our last subject of the day was various pressure points. Having Eric demo some of these on you was quite an experience, I can tell you. However, one thing that was very evident was that the effectiveness of a given pressure point can vary quite a bit from person to person. The infraorbital pressure point under the nose is not very effective on me, for instance. If you’re not getting results from a pressure point technique, don’t get fixated on trying to get it to work; move on to something else right away.
After wrapping up, we headed out to dinner. Last night’s meal was good enough that we just went back to the same restaurant. I’ll admit that I pushed pretty hard for this option. While the steak I had on Thursday was pretty good, the bacon wrapped pork chop that some other folks ordered looked great (and it was). We had another evening of fantastic food and fellowship among like-minded individuals.
Saturday
Rather than starting with live fire like we had the past two days, we dove right into ground fighting. While many fights go to the ground, few of them start there, so we started by learning how to fall. You might not think this is something that requires instruction (“easy as falling off a log”), but there are some nuances to it if we want to maximize our ability to fight once we arrive on the ground.
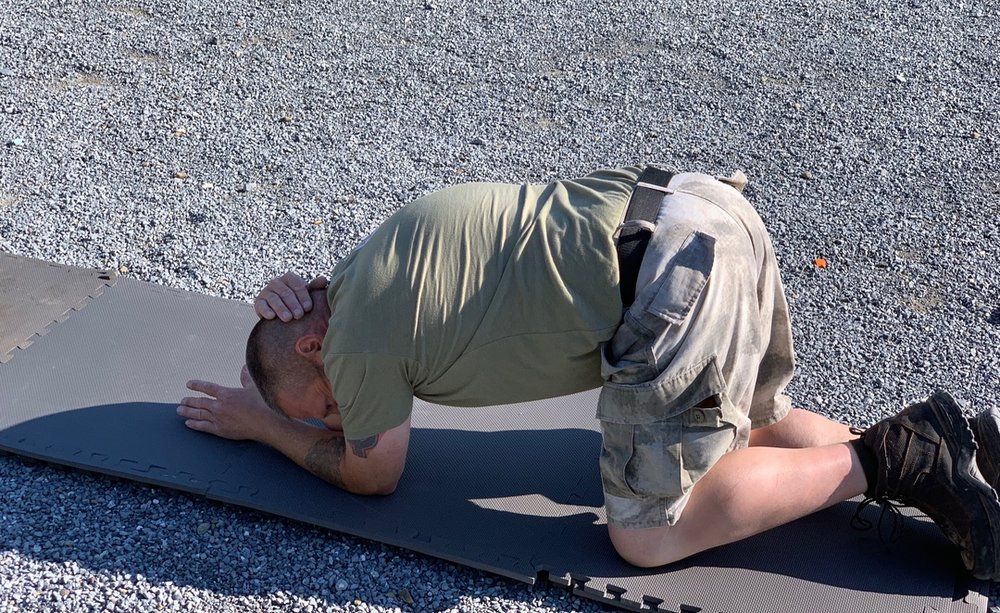
When falling forward, Eric is a big advocate of training to catch yourself with the back of your forearms rather than the palms. Outside the dojo, the surfaces that we fall on are likely to be unforgiving ones (think asphalt, maybe with some broken glass thrown in for good measure). Skinning the hell out of our palms and fingers is not going to do our ability to fight any good, especially our ability to use tools like guns and knives). Catching myself with my hands is something that’s so natural and that I’ve done for so many years, this is one that’s going to take a lot of training to ingrain (I sense a lot of falling in my future).
If you have enough momentum, there is the possibility of doing a forward roll and ending up on your feet or knees, but more likely if you fall forward you’ll end up on all fours. You want to get turned over on your back or rear as quickly as possible so you can get eyes on your opponent and defend yourself. As you do this, you can tuck one leg across to protect yourself from getting kicked in the crotch and throw up an arm to shield your head.
Falling to the rear we have nice big (sometimes well padded) surfaces to absorb the impact. We can also squat on the way down to lessen the impact. The critical thing is to keep the back of your head from slamming into the ground. Tuck the chin and throw your arms out to arrest your momentum.
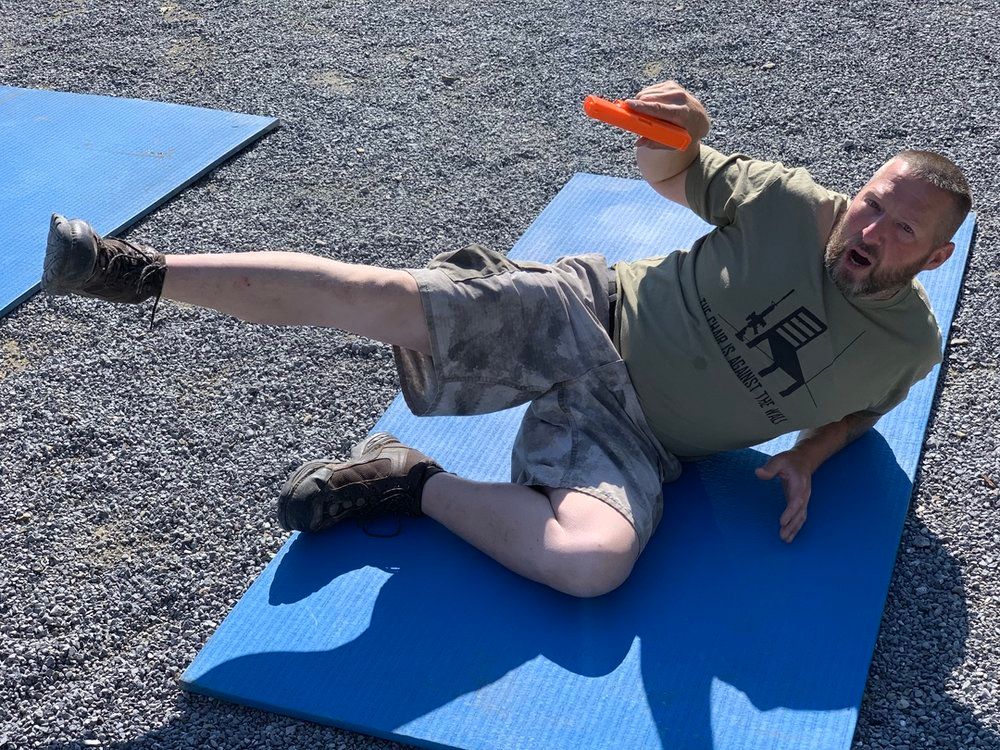
On the ground, keep your feet towards the opponent, so you can kick and use your legs to fend him off. You can either roll onto your side and use one leg to maneuver and the other to kick, or stay on your butt and have both legs available for kicking at the cost of somewhat less mobility. We worked falling (onto some mats rather than the gravel surface of the range) and getting from there into a fighting position.
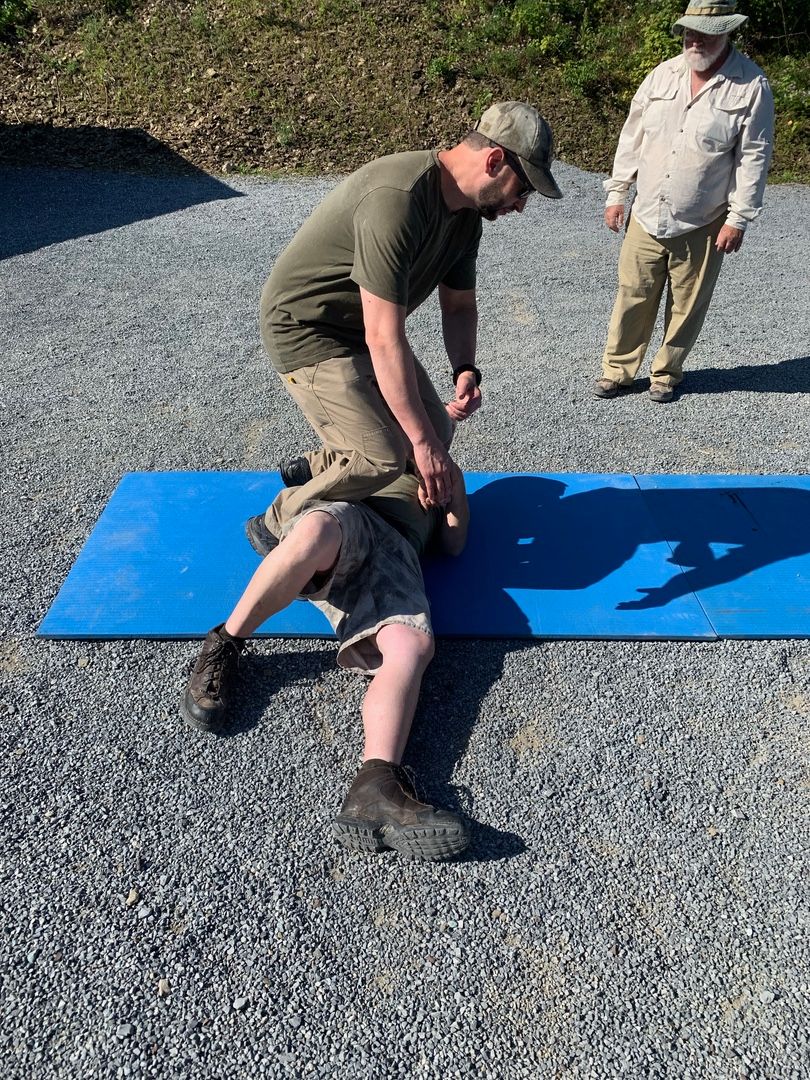
As a general rule, you want to get up as quickly as possible. However, we may be on the ground not just because we were knocked down, but because we took a round to the leg or the opponent stomped our ankle and broke it. If you’re stuck on the ground, you probably want the opponent down there with you if possible. Eric showed a couple of ways for someone on the deck to take down a standing person. All of them essentially involve fixing the foot (trapping the heel if you’re pushing them back, rolling onto the top of the foot if you’re pulling them forward) then using your body weight to push the knee back or pull it forward.
Next up we worked some two on one drills, with one guy on the ground and two trying to maneuver into a position to kick the crap out of him. Two opponents when you’re on the ground really sucks. If you can, the best course of action is going to be to go to guns as quickly as possible. Eric mentioned that part of the reason does these two on one drills is that if you ever have to do this, afterward you can articulate why you shot two “unarmed” guys. “I’ve done this in training, and I’ve experienced the disparity of force that being on the ground against two opponents creates.”
During a bit of a break, Eric did some lecture on the physiological changes the body goes through during a “fight or flight” response and how that affects our performance. He covered how we can mitigate this both before the fight (fitness, nutrition, etc.) and during the fight (breathing).
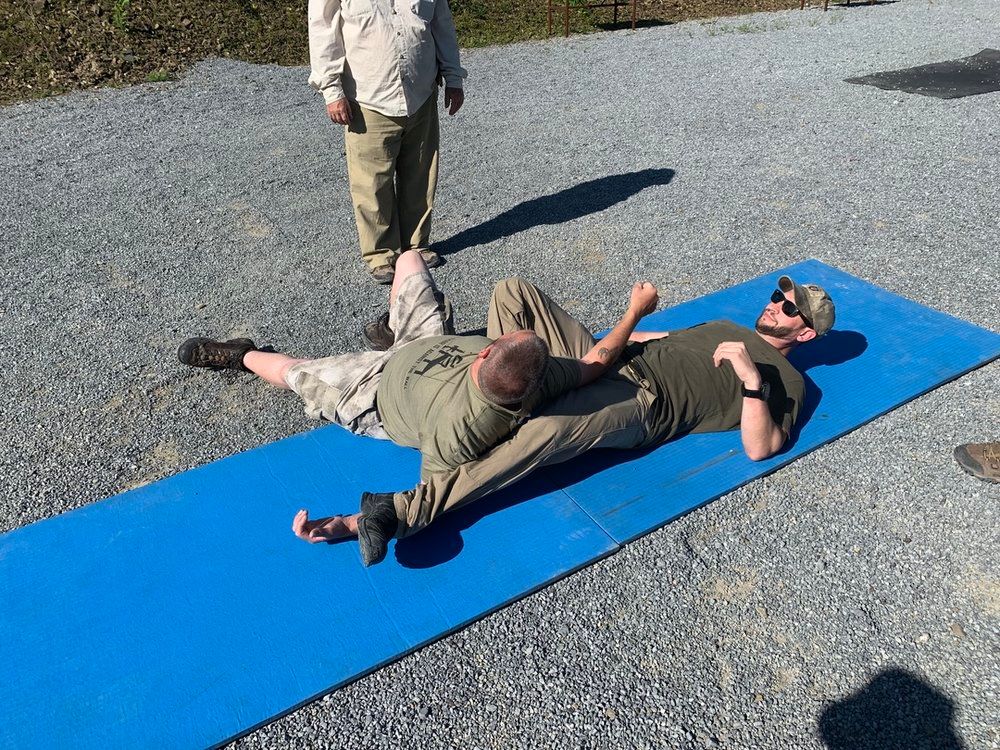
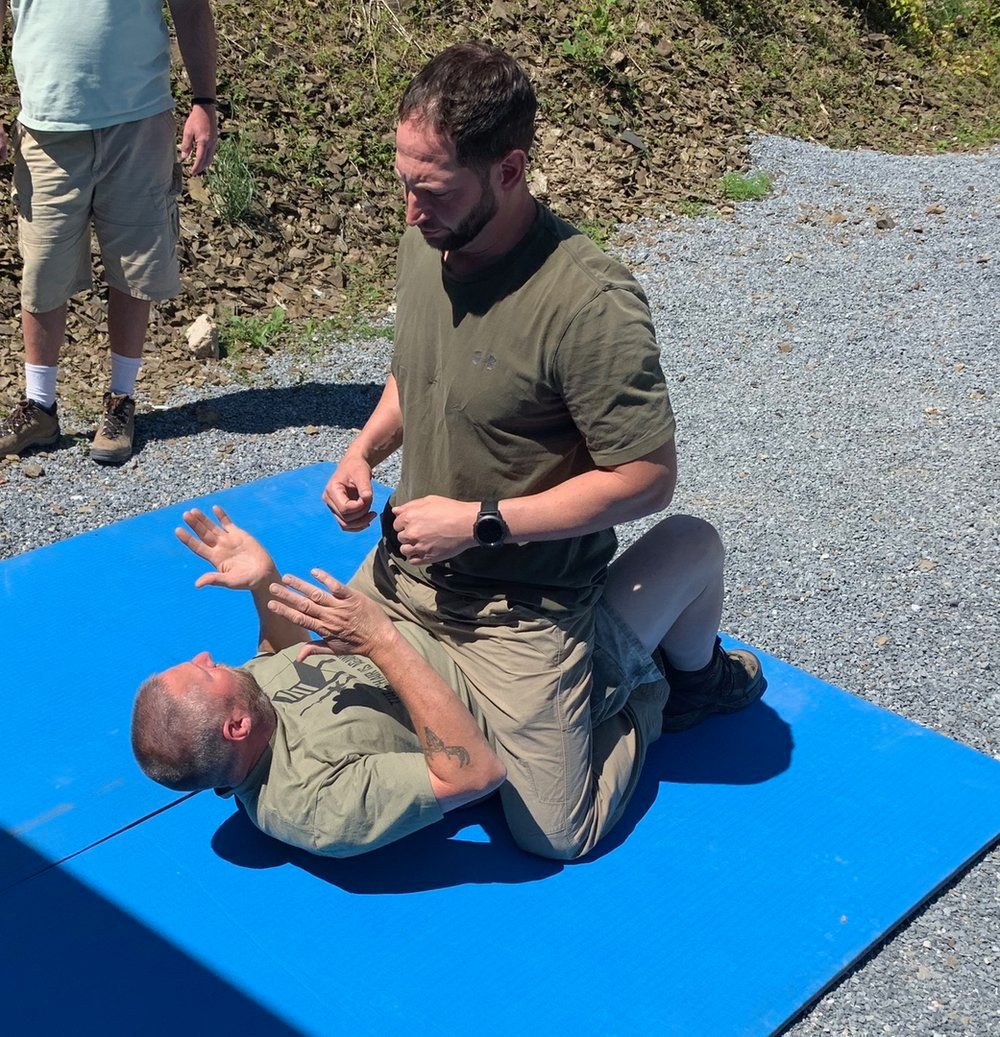
Getting back to ground fighting, we started working on what to do if the BG gets on top of you. This is kind of a shit sandwich, but the least shitty bite is if you’ve got him between your legs in the guard position. He can still hit you from here, so it’s important to keep your arms up to shield your face and to keep your head off the ground, so it’s not bouncing off the deck with every hit.
In the ring, or in a purely hand to hand confrontation, guys who do a lot of ground fighting generally want to keep their legs wrapped around the opponent to keep them from getting around to the flank. In our case, it’s probably not a purely hand to hand fight. We often want to create enough space that we can access a handgun or knife.
Some of this depends on how big you are compared to your opponent. We can create a bit of distance just by “bridging,” pushing our hips up off the ground while keeping our legs wrapped around the opponent’s midsection or torso. Often this isn’t going to be enough distance to keep him from fouling our draw, however. So another option is to use our legs to shove him back until we’ve got our knees, or better yet, our feet between him and us. This does increase the danger of him getting around our legs and coming at us from the side, so we don’t want to hang out here. Get the gun into action and fill him with 9mm or get the knife out and start filleting.
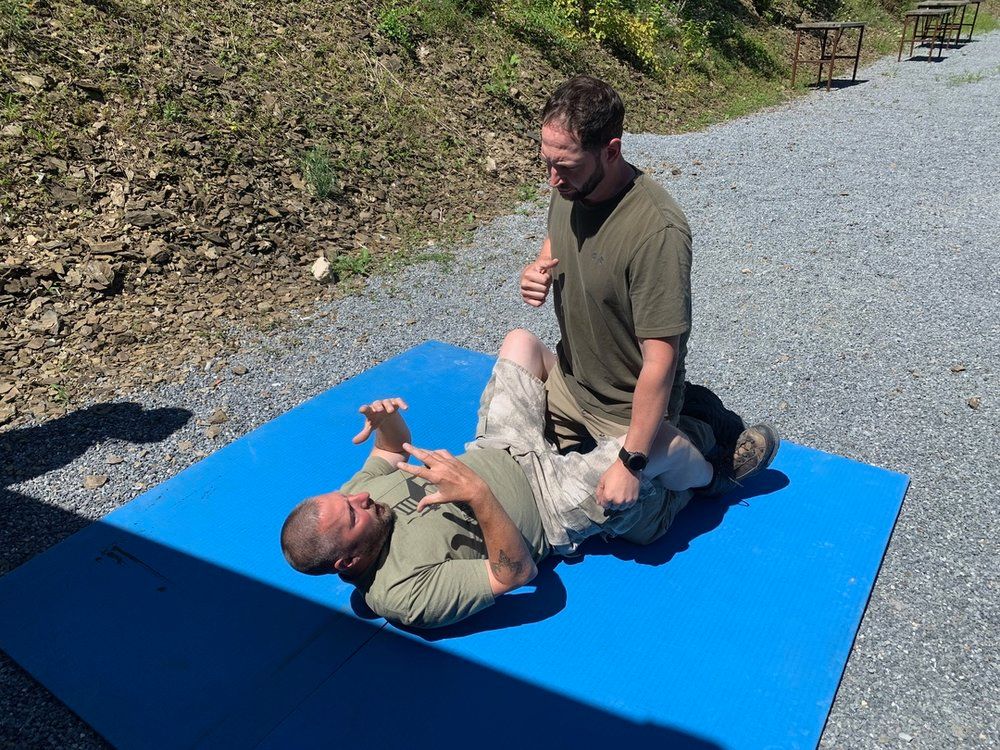
The shittier bite of the shit sandwich is if rather than being wrapped up between our legs, he’s mounted on top of our torso. This is the classic “ground and pound” position you see in MMA fights, and it’s not a good place to be.
One way to counter this is to shove your hips upward. In past classes, I’ve been taught this in the context of trying to totally buck the opponent off, but Eric pointed out that even if you can’t initially get him all the way off it can be useful to upset his balance and get him down closer to you. This is particularly important if your opponent has more reach than you do (when I was playing the BG, for instance) and from the mount, he can pound you in the face while you can’t reach him. If you can upset his balance even for a moment and force him to put a hand on the ground to stabilize himself, you can snag that arm and haul him down where you can start throwing punches, elbows, and hammer fists.
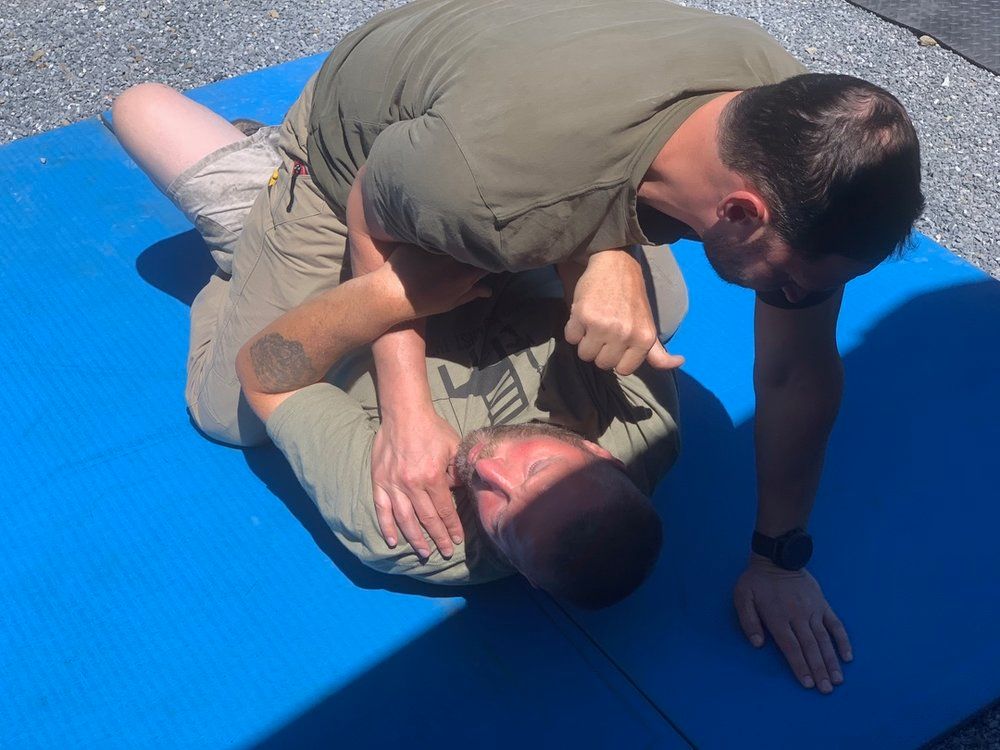
Once you’ve tenderized him a bit, then you can try to buck him all the way off you. To do this, it’s important to get his legs trapped inside your legs so he can’t just splay them out to stabilize himself. Then thrust your hips up and chuck him off. At that point, you can try to break contact (either to run away or to go to guns) or you can climb onto him and go to work.
While we would be doing more with chokes on Sunday, Eric took a break from the ground fighting to teach us the Lateral Vascular Neck Restraint (a blood choke, in other words) because of its usefulness in ground fighting. This is a technique that produces unconsciousness by squeezing the sides of the neck to prevent blood from leaving the head. The body responds to increased blood pressure in the brain by fainting. As with the pressure points, the effectiveness varies from person to person. Eric demoed it on everyone, but he was not really able to get it to work well on me. When it works, it works very quickly, but you need to be prepared to move on to another option immediately if it’s not effective.
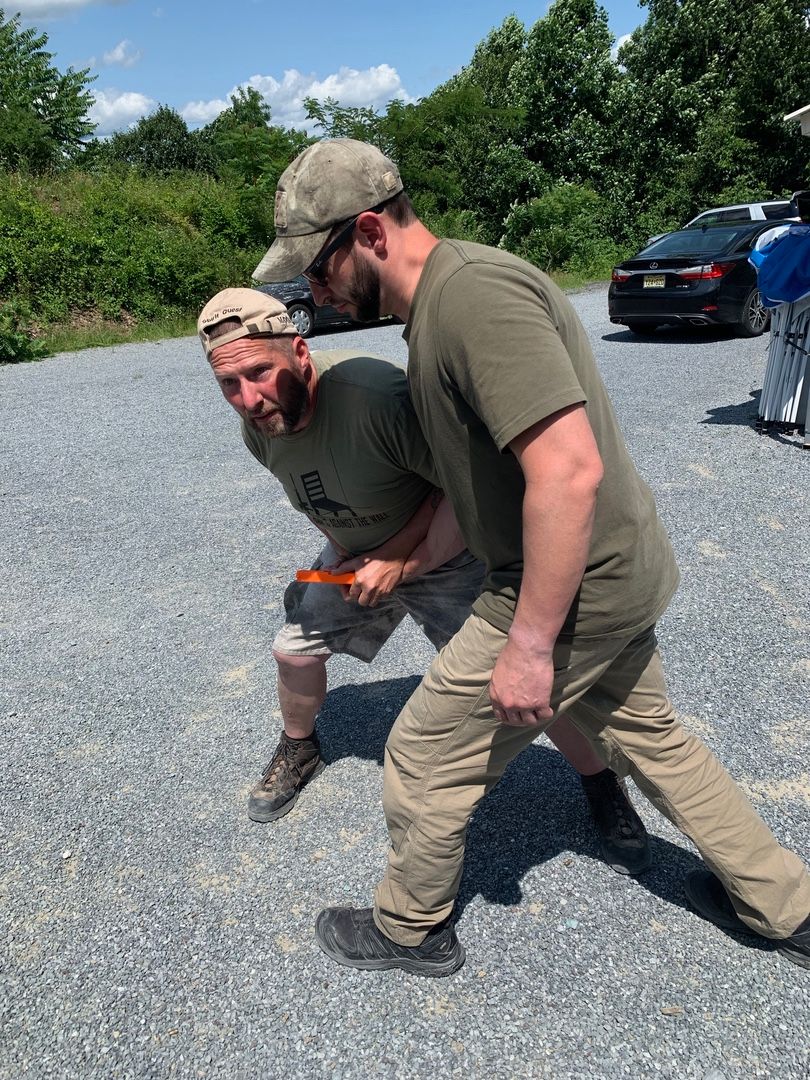
After some more practice with the ground fighting work, we moved on to weapon retention. One of the dangers of open carry is an opponent trying to grab a gun out of your holster. However, even carrying concealed a bad guy might make your gun (or try to foul your draw, which presents many of the same problems). If someone attempts to grab your gun, get your hand on top of his and jam the gun down into the holster. You really want to keep it from coming out. Eric pointed out that this is a lot easier to do in the appendix position than if you’re carrying on the hip (carry behind the hip is even worse).
While holding the gun securely in the holster, you can use your other hand to go to work on the opponent, throw elbows, brachial stuns, eye rakes, whatever you can to tenderize him a bit. If he’s grabbed with both hands, you can stick your arm between his arms and saw on one of them with the bony bottom of your forearm to get him down to one hand. Strike the elbow of the arm he’s using for the gun grab to break it down, then turn your body, moving the gun away from him. Either he’ll let go, or you’ll send him sprawling.
The worst situation is carrying on (or behind) the hip and having an opponent attempt a gun grab from the rear. You don’t have nearly as many options for striking, so throw a headbutt and elbows as you drive your body backward.
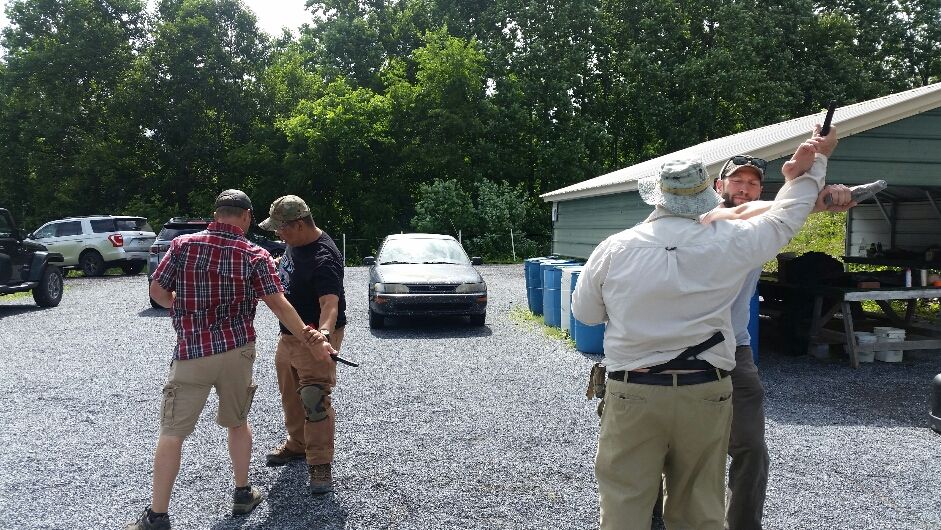
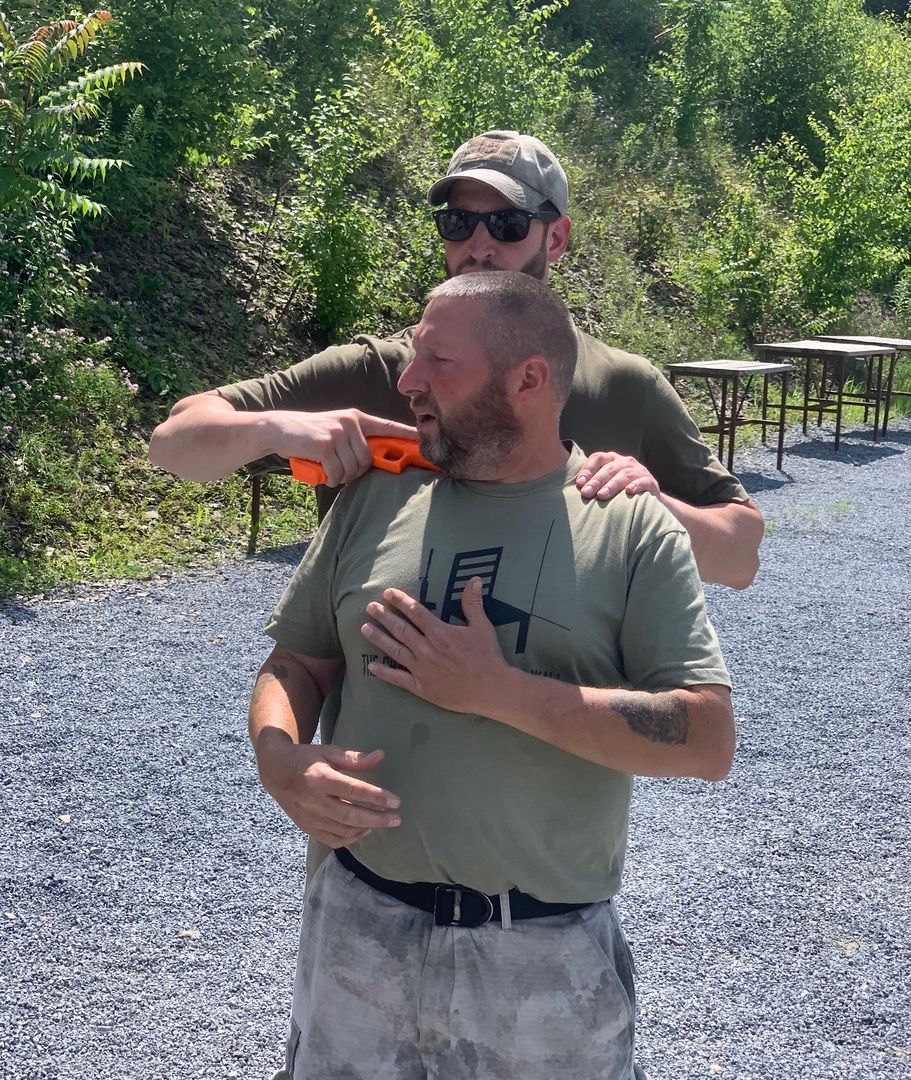
Moving on to the opposite end of the gun, we worked some drills being held at gunpoint and having to strip the weapon and disarm your opponent. The key enabler here is proximity. Unless that gun is very close (ideally within about a foot of your body) an attempted weapon strip is a losing proposition. If he’s close enough, feign compliance, then do something to distract your opponent. Even a simple question can reset his OODA loop for a moment to give you a chance.
While the details vary depending on whether the opponent is in front of you or behind, all of these disarms begin with getting the gun pointed somewhere other than you. Eric is a fan of combining both diverting the gun and moving your body out of the way. This is only going to last a moment, so you need to go right for that gun.
One difference between what Eric teaches and what I’ve done previously is that rather than being very focused on the gun Eric places a lot more emphasis on upsetting the opponent’s balance as part of the disarm. If you’re on the outside of the opponent’s gun hand (with the back of his hand towards you) bring the gun to your belt buckle and take a big step, pulling him forward and off balance. Then pivot, taking a big step back to turn the gun and his wrist, forcing it in towards his thumb, which is the weak route out of his hand.

If you’re on the inside of the opponent’s gun hand (palm towards you) turning the gun towards the thumb is not a good idea, since that would direct the muzzle right back into you. In this situation, you have to attack the gun more directly. This is more the sort of disarm that I’ve learned in the past: control the wrist and move the gun.
We did a bunch of practice, starting in various positions (opponent in front and behind, gun high and low, even the classic gun against the side of the head hostage position).
That wrapped things up for a day. Rather than going to the same restaurant a third time we hit another, somewhat more distant place that had great prime rib. In the field across from the restaurant, there was a guy giving helicopter rides over Hershey park. A couple of the guys from the class took a ride (to get me on a helicopter you’d either have to offer some spectacular scenery or a chance to to be doing something pretty cool like shooting, fast roping, or riding on the skids of a Little Bird).
Sunday
On Sunday morning, we got started with some drills that combined empty hand work and live fire. Obviously having a live handgun into a drill that includes hand to hand with a training partner is potentially fraught with peril. Eric mentioned that he was only doing it in this class because he had a switched on group of students that he had confidence in (lacking that, he might run these same drills using airsoft rather than live fire). Even so, as an added safety measure, we ran these drills using an empty chamber (“Israeli carry”). This is obviously not a carry method that Eric would recommend, but in this case, it could simulate something like fixing a failure to cycle that might occur in a compromised, close-quarters shooting position.
For our first drill, the student had to divert and defeat a knife attack, spend 30 seconds wailing on the BOB target to get his heart rate up, then fall onto a mat in front of a target, draw a pistol and shoot from the ground, then get up and deliver a headshot. An extended drill like this really drives home the physical aspects of a close range fight like this. It’s a lot more work than most handgun drills.
After everyone ran this a couple of times (falling both forward and backward onto the mat), Eric switched things up by swapping out the knife attack for being held at gunpoint and having to perform a handgun disarm.
For the culmination of this series of exercises, Eric had us start on the ground with another student mounted on top of us. We had to get him off, then deal with an attack from a guy in a padded red man suit wielding a big foam stick simulating a piece of rebar or other long, contact weapon. We had to get the stick away from him and use it to beat on BOB for 30 seconds, then pick up our ear protection and handgun from the mat and shoot. This was quite the workout.
After these drills, Eric continued a discussion about weapons that one could use in environments where you can’t carry a gun or knife that had started during a break yesterday. Today he brought out some examples of stuff you can get on airplanes and in other similarly secured locations. He showed off a coin purse that makes a nice sap, a carabiner as a knuckle duster, and some long hair clips that his wife wears that she can use as stabbing implements. We’d already talked about canes yesterday and would be picking that back up when we got to stick work this afternoon.
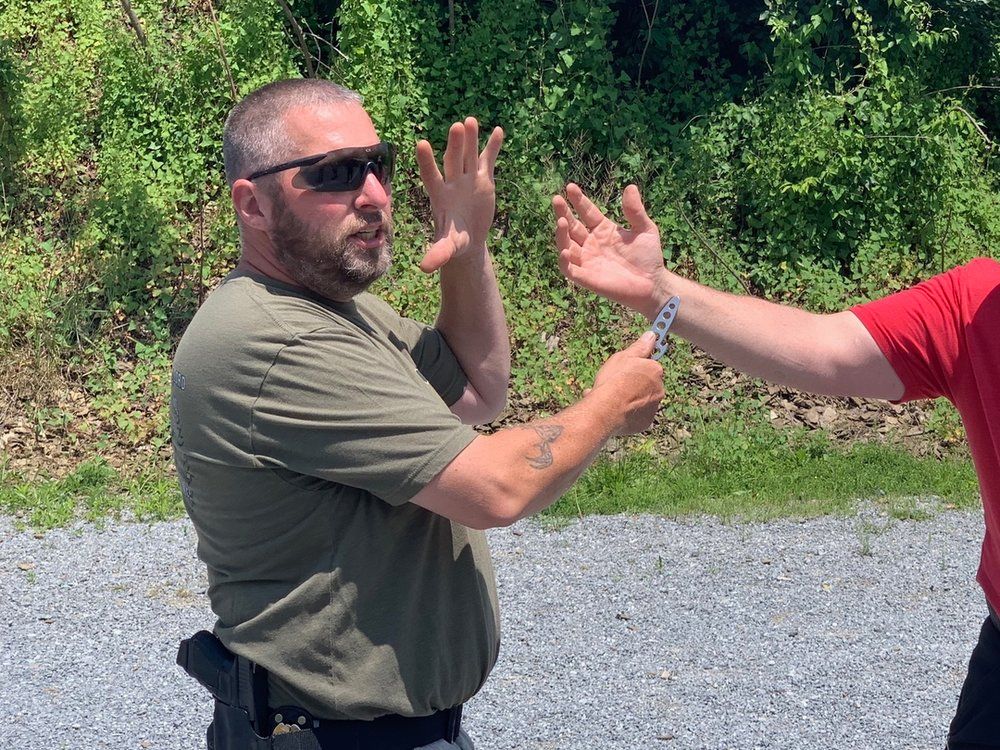
Before that, we moved on to the offensive use of the knife. Thus far, our knife work focused on the defensive end, but sometimes legal restrictions or other obstacles mean that the blade will be our primary means of self-defense. We need to be able to use it to defeat an attacker (or, likely, attackers). The first step in this process is getting the knife out and into action. With my fixed blade, this is pretty quick and easy, clear my cover garment and draw it out, much like drawing a pistol from left-hand appendix. The pocketknife that’s more likely to be my primary in a knife-only environment takes rather longer. Seeing Eric draw some waved Spydercos makes me think maybe I need a waved Delica or Endura.
We spent quite a bit of time practicing accessing. After that, Eric talked about different knife grips and the pros and cons of each. His favorite for general use is a conventional point up, edge out grip. It’s versatile and crosses over to most of the other stuff we use a knife for: cutting food, rope, butchering animals (in Eric’s case anyway). He covered point up, edge in and reverse (point down), edge out grips, but it doesn’t seem like he’s got a ton of use for either. He does like reverse grip, edge in quite a bit, due to its usefulness in dealing with attempted blocks.
Eric covered the five different lines of attack with a knife, which correspond to the five lines of attack we talked about from a knife defense perspective on Friday. They’re downward slashes from the upper right or upper left (#1 and #2), upward slashes from the lower right and lower left (#3 and #4), and straight in stabs (#5, which can either be high line or low line).
With these in place, Eric introduced the 5x5 drill. This is essentially delivering pairs of strikes, cycling through all the different combinations. Throw a #1 followed by another #1, then a #1 and a #2, #1 and #3, and so on, until you’ve worked your way through every possible pairing (like doing the multiplication tables in school). This gets you used to throwing multiple strikes and gives a feel for how they can flow into each other.
Once we had a bit of time with the 5x5 drills, Eric had us start throwing in strikes with the support hand (he also talked about integrating kicks). After everyone worked those for a bit, Eric talked about where to direct our attacks. Specifically what areas to target with the sorts of short knives (3-4” blades) that we generally carry.
In the gun world, we often talk about “shooting to stop” versus “shooting to kill.” With the short knife, there is much more of a distinction, in part because we can’t really deliver the central nervous system hits or heart damage that produces the quickest stops. You can kill someone with these short knives, no question, but it may take him five minutes to bleed to death. We want to end the attack a lot quicker than that.
In order to do this, Eric prefers slashes rather than stabs. With knives this short it’s hard to stab deep enough to get to the really good stuff (especially if you throw stuff like thick winter clothing into the mix). He likes directing those slashes against muscles and tendons that will deny the opponent mobility and the ability to use weapons, like the tendons at the wrist or above the knee, or the muscles of the bicep or glutes. He’s not averse to going for major arteries where they get close enough to the surface to reach with our short knives, like the clavicle, armpits, inside the upper arm, and crotch. He will also deliver slashes to the belly. Spilling somebody’s intestines all over the floor will certainly impede their ability to fight.

Eric briefly covered some stick fighting basics. You can use the same basic lines as you do with knives. There are some special considerations in a stick vs. stick fight to keep from getting your fingers crushed, however, since sticks, canes, and pipes don’t have any sort of handguard. One thing Eric likes is running a stick in the right hand as the primary offensive implement with a knife in the left hand to deal with an opponent who manages to crash through the stick and get inside its swing where it the stick can’t be used very effectively. The knife and stick complement each other nicely. We worked some stick strikes on BOB.
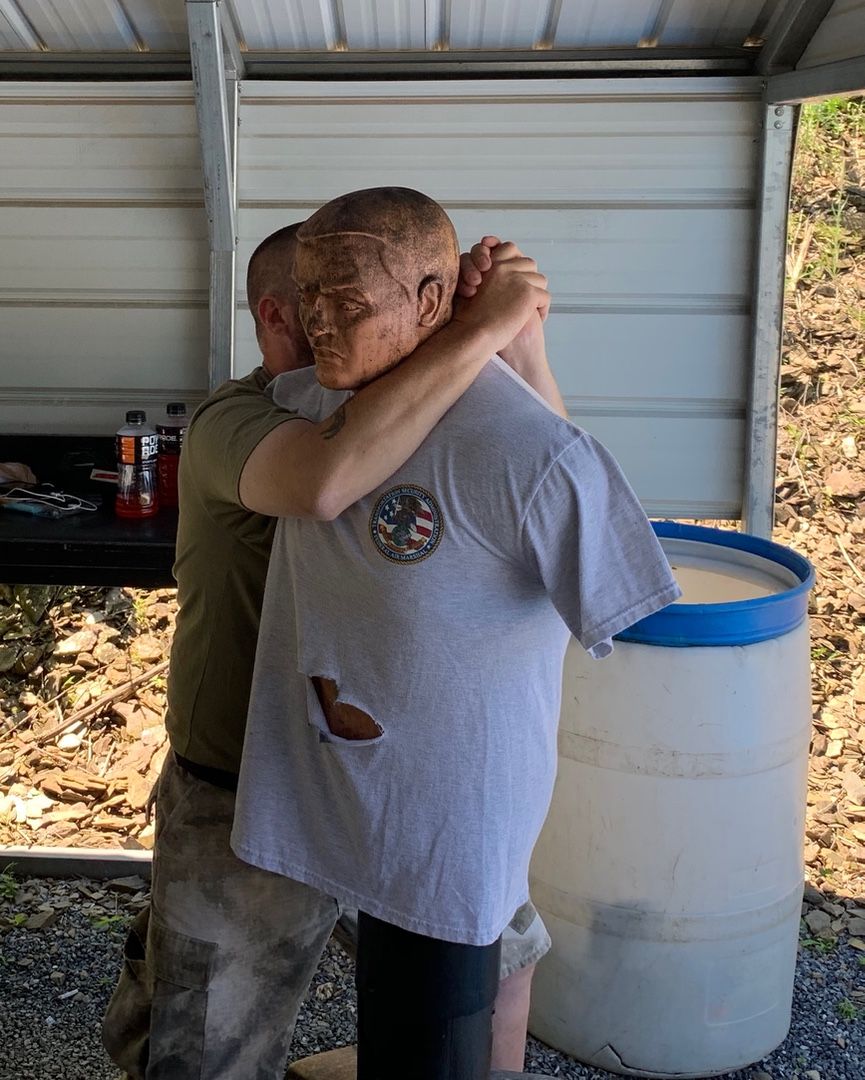
Our last subject of the class was chokes. We’d already covered blood chokes a bit on Saturday. Eric is not a big advocate of airway chokes. Since we may often face situations involving multiple opponents, hanging out with our arms around some guys neck waiting for his air to run out is not a great place to be. A much faster application is “chokes” involving spine compression. Essentially you’re hyperextending the neck, then applying additional force to separate the skull from the spine. This is, obviously, fatal, so safely practicing these is tricky, and they should only be applied in situations where deadly force is justified.
Eric started our discussion of these spine compression techniques by demonstrating a sentry elimination application. You approach from behind, use a hip check and a strike to the neck to get in a position to hyperextend the neck and immobilize his head, piledrive him into the ground, then step through and leverage the skull off the neck. Eric demonstrated the head immobilization and hyperextension of the neck on everyone, then we drilled it very slowly, one step at a time, stopping before the final leveraging of the head.