Last weekend I attended the Fight Focused Handgun III - The Reactive Gunfight class taught by Roger Phillips. The “reactive gunfight,” that FFH III focuses on are situations where you start out behind the curve because you are surprised or your opponent initiates the action. The tool set it teaches for dealing with these situations is built around dynamic movement and point shooting.
I’ve taken FFH III before, as well as Point Shooting Progressions, Roger’s previous flagship point shooting class. While FFH III is worth taking more than once simply to build point shooting and dynamic movement skills, I had a specific reason for wanting to retake it now.
I recently switched from carrying on my strong side hip to carrying in the appendix position (with the gun about 1 o’clock on the belt). This requires a somewhat different drawstroke, including a switch from open front cover garments to closed front. Having taken FFH III before I knew this is a class where I’d get a lot of reps drawing the gun. And they wouldn’t just be static, always squared up to the target, stand and deliver reps either. They’d be very dynamic, in a variety of orientations. This class would put my new carry position to the test.
In addition to being an excellent instructor, Roger has some of the best firearms coaching skills of anyone I’ve seen. He can look at what a student is doing, pick out the mistakes they’re making or something they’re doing that’s less than optimal, then provide feedback that meaningfully increases the student’s performance. I figured that Roger would be the best person to take my new drawstroke to the next level.
Gear
This is not a very gear intensive class. All you really need is a pistol, holster, mag carrier, and a couple of mags.
For my primary handgun, I brought my new G19X “Roland Special”. A Roland Special is a Glock (usually a Glock 19) with a compensator, red dot sight, and weaponlight. This gun is a slight variation on the concept, starting out with the Glock 19X to take advantage of the longer, G17 length grip (I much prefer the way the G17 feels in the hand to a G19). It’s kitted out with a Trijicon RMR milled into the slide, a Crimson Trace Lightguard LTG-736, an Apex trigger kit, a Mayhem Syndicate Mk 2 compensator and barrel, and some nice Dale Fricke kydex to carry it in. The last piece of the puzzle, the Mayhem Syndicate comp, arrived the day before I flew out to Vegas for the class so I didn’t have a chance to run much ammo through it before bringing it.
Given how new and untested my G19X setup was, I wouldn’t bring it to a class without a backup, much less trust it as my carry gun while I was in Las Vegas. Even if that were not the case, it’s generally a good idea to bring a second handgun to a course like this. No sense having a broken or problematic pistol spoil your investment of time and money. So I also brought my usual RMRed Glock 17.
While this is not a gear intensive class, it is an ammo intensive class. Roger lists a minimum round count of 750 rounds and says “bring more if you want to shoot more”. In my experience, while the class can be done with 750 rounds, doing so requires being very conscious of your ammo consumption on each drill. I didn’t want to have to think about that (and I just like to shoot a lot), so I ordered 1500 rounds and had them shipped to Roger ahead of time.
As a corollary to the amount of ammo, this is a class that benefits from bringing lots of magazines. Since I was shipping my ammo out, I wouldn’t have the chance to load mags ahead of time, but I still wanted plenty of mags so I could just get a bunch loaded on Saturday morning and not have to worry too much about it later. A pistol magazine loader like the LULA is a huge asset in a class like this.
Preparation
This class is the culmination of a lot of effort switching to appendix carry. I made the switch back in early February and since then I’ve been doing dry practice almost every day. At this point I’ve done the drawstroke dry thousands of times. Unfortunately, given the restrictions at local ranges I have access to I hadn’t had the opportunity to do any live fire with it.
I’ve also practiced reholstering thousands of times. Given where the gun is pointing in the appendix position, safely reholstering is definitely a critical skill. Particularly when you’re working with a dry pistol, it’s easy to treat reholstering as an afterthought; just a step you need to get through to set up the next draw. I’ve put a lot of effort into fighting this tendency and reholstering slowly and deliberately. One advantage of appendix carry is that it’s easy to look down and visually confirm that the holster is clear before holstering the gun and I worked hard to ingrain that.
While most my dry practice time has been dedicated to the drawstroke, I also put quite a bit of time in practicing reloads; specifically reloading from slide lock (aka: reactive reloads or emergency reloads). When I switched to appendix, I also moved my spare mag from my left hip up to the 11 o’clock position (just to the left of the belt buckle). I wanted to get used to grabbing the magazine from there.
I decided to take advantage of all these practice reloads to make a couple of other changes as well. In the past, I’ve made my default a reload with retention (pulling the old mag out of the gun and pocketing it before inserting the new mag into the gun). When reloading from slide lock I made dropping the empty mag my default. Similarly, my previous practice was to get the gun back into battery by tugging the slide to the rear. I made the switch to using the slide lock lever (the G19X has a nice ambidextrous one). I also swapped my spare mag from a stock Glock one to one of the Magpul 21 round models and used all my practice reloading the larger mag. Between these changes to how I reload the pistol and a couple thousand reps of dry practice, I’d say my slide lock reloads are smoother than they’ve ever been.
Friday
One of the nice things about training in Las Vegas is it’s one of the few places you can get a direct flight from Wichita. Thanks to a 2-hour time difference my flight got me there in the early afternoon. I took advantage of this to stop at REI to do some shopping, make a Walmart run, and grab some dinner before retiring to my hotel.
Saturday
I was up bright and early Saturday morning. After breakfast at the hotel I got loaded up and headed out to the range. I met Roger at the range’s front gate and followed him down to the bay where we’d be shooting. He gave me my 1500 rounds, and I immediately began stuffing ammo into mags; I got all my mags loaded up before class started.
Roger started off with a short lecture explaining the context of the class. In particular, this class, and the way Roger puts it into context has evolved a bit since the last time I took it. This is largely in response to some changes in the way Roger teaches sighted fire.
In a gunfight we’d really prefer to use our most optimal skill set: shooting sighted fire from a solid, stationary position to deliver fight-ending hits as quickly as possible. Unfortunately, we’re not always in a position to do that, especially as armed citizens. Our gunfight may come as a surprise. Even if we see it coming, we often aren’t the ones choosing when to initiate the action and may start out in a position of disadvantage. We’re usually reacting to the actions of a criminal adversary rather than being proactive. This class is all about fighting in those suboptimal situations.
One thing Roger placed a big emphasis on in the course was that even if we start out in a reactive mode using our suboptimal situation skill set, when we get to the point where we’ve gained the initiative, we want to transition to using our optimal skill set to finish the fight decisively. Clint Smith said, “The purpose of a pistol is to fight your way back to your rifle.” Well, the purpose of a reactive gunfighting skill set is to fight your way back to the point where you can use your optimal, sighted fire gunfighting skill set. Integrating the suboptimal and the optimal, the reactive and the proactive was a big part of this class.
This is something that Roger has been saying for as long as I’ve trained with him (even as “the point shooting guy” he still preached the importance of a sighted fire skill set). However, in this class he went much further into including it in the drills.
Since everyone in the class was fairly experienced, Roger noted that this would be more of a workshop type curriculum, exploring these concepts. This class is like a Petrie dish, an opportunity to gather information about what you can do with these skills.
With this, he segued into the safety lecture, talking about friends taking care of friends, the four rules of gun safety, etc.
Roger did a brief review of the optimal stance: support side foot well forward with the knee bent, primary side leg straight to transmit recoil to the ground. The ability to absorb recoil is more important with a rifle, but using the same stance across both provides consistency.
The grip is one area where Roger has really changed what he teaches, a process that started about three years ago in his first Fight Focused Handgun IV - Fight Focused Marksmanship course. The “locked wrist” grip is built around the idea of using leverage and skeletal support to control recoil and muzzle flip, rather than friction and muscular support.
Your primary hand should grip the gun as high as possible, with the web of the hand up on the tang of the grip and the middle finger up tight against the bottom of the trigger guard. Getting the grip as high as possible helps transmit the recoil to your body rather than flipping the muzzle upward. Squeeze tightly front to back: the work counteracting muzzle flip is being done by forward pressure from the web of your hand and rearward pressure from your pinky. These wedge the gun into place.
The support hand should be angled forward and down as much as physically possible; this is the locked wrist. It reinforces your pinky’s rearward pressure on the bottom of the gun. It can also mitigate recoil anticipation problems, since if your hand is locked out literally as far as it can go, it’s much harder to dip the muzzle in anticipation of the recoil when the gun goes off.
So far this matches what Roger was teaching in Fight Focused Handgun IV class I attended back in 2016. One new element he’s introduced since then is keeping the support side shoulder high and your elbows pointed out. This torques your hands together, pinching the upper part of the pistol’s frame tightly between your hands and making the grip much more solid. He’d talked about this in the CQB class last year, but since I skipped out on the live-fire range day in that class this was my first chance to shoot it live in one of his classes. It definitely helps further stabilize the gun and combat muzzle flip.
We started off shooting a couple of one hole drills. This was five rounds of sighted slow fire at about 5 yards, with the goal of stacking every round right on top of each other in a single hole. I did pretty well on this, getting everything into one rather ragged hole each time.
Next we started from the holster and pushed the speed a little, drawing and shooting some sighted fire groups.
Moving down the sight continuum, we did some work drawing and shooting with a flash sight picture. After a few reps of that we transitioned to “type 2 focus”. This is a flash sight picture, but rather than being focused on the front sight, you focus your eye on the target and superimpose the blurry sight picture on the target. By Roger’s definition, this is where really starts, when your visual focus shifts from the sights to the target.
Since I’m running a red dot, there’s not the same sort of distinction between hard focus on the front sight, flash sight picture, and type 2 focus that there is for the folks running irons. Instead it’s a matter of varying how much time I spend getting that dot placed precisely and settled on target. In the earlier drills where we were shooting with greater precision, I took a lot of time making sure the dot was exactly on the aiming point and as still as possible (perfectly still is impossible and part of shooting accurately is learning to accept that). With the later drills I took the shot as soon as I saw the dot near the aiming point, trading accuracy for speed.
Next up was aligning down the top of the slide. Rather than looking through the sights, you lower the gun about an inch and look over it. The sights are still there as reference points, but you’re not looking directly through them. With a red dot you have to lower the gun more and looking through the lens of the optic at an angle can have a distorting effect on those reference points. Given these complications I find I can definitely shoot faster and at longer distances aligning down the top of the slide with an iron sighted gun than I can with a red dot. The flip side of this is that the red dot allows me to use sighted fire in some circumstances where I’d be aligning down the top of the slide with an iron sighted gun. It’s a different set of tradeoffs.
After a fair amount of shooting aligning down the top of the slide, we briefly covered “metal on meat”. This is where you superimpose the entire back of the slide (“metal”) on the target (“meat”). If you can see meat all the way around the metal, press the shot. It works well out to about 4-5 yards, but beyond that the slide starts completely covering a torso sized target.
The final technique in the sight continuum is shooting off the drawstroke. Basically this involves ignoring any visual input from the gun and focusing solely on the target, relying on your body mechanics (drawstroke and stance) to deliver the hits. This works at very close ranges and can be useful in low light, but if you can get visual input from the gun, it generally makes sense to do so. Many people think that this sort of purely body mechanic based shooting is all point shooting is (“spray and pray”). They don’t realize all the other places along the sight continuum that point shooting encompasses. In a two-day point shooting class we disposed of the pure body mechanic/no visual input point shooting in about 5 minutes and I never really used it again for the entire class.
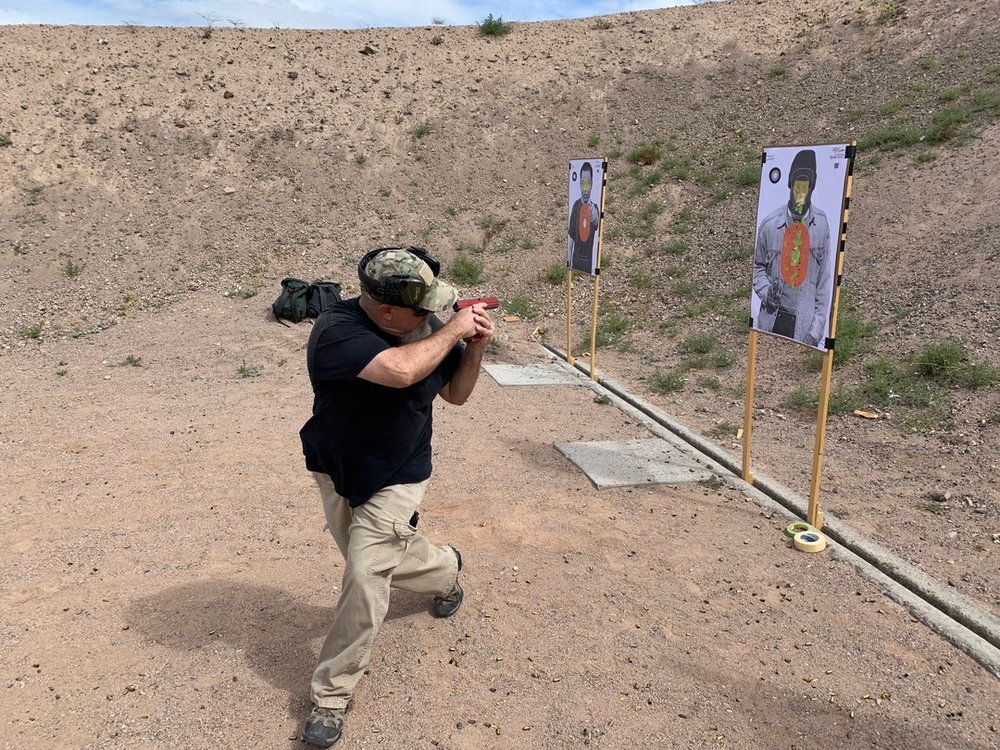
Roger uses a series of step-back drills to bring the entire sight continuum together and help students get a feel for when they need to transition from one technique to another. We started off a three yards shooting solely of the drawstroke and body mechanics. Stepping back to 4 yards, we drew from the holster and shot metal on meat. Step back again and align down the top of the slide. Keep stepping back and aligning down the top of the slide until that starts breaking down, then transition to looking through the sights with the focus on the target. Step back some more and switch to a flash sight picture. We ended up at about 15 yards shooting with a hard focus on the front sight.
Now that we’d covered the sight continuum, Roger gave a lecture on the seven concepts of reactive gunfighting: the reactionary curve, the takeoff, movement, the drawstroke, retention, the sight continuum, and the grip and trigger continuum.
While we’d been varying the amount of visual input in previous drills, we’d done all of it from full extension with the gun up in our line of sight (or just an inch below it when aligning down the top of the slide). Now, we started getting the gun further and further from our field of view.
The first step in this process was to shoot from contact ready, with the gun far enough below our line of sight that you can clearly see the adversary’s hands and waistband. You often need to see these things in order to decide whether or not to shoot them. Optimally, if we decide we need to shoot, we bring the gun up and use our sights. However, things aren’t always optimal and sometimes the need to shoot is so urgent we may need to take our initial shots with the gun several inches below the line of sight.
Here Roger explicitly introduced the idea of fighting our way from reactive to proactive, from a suboptimal situation to an optimal situation. Now, starting out pointed in and challenging someone at gunpoint isn’t that far down the reactionary curve, but it’s still a situation where we may find ourselves reacting to what the adversary does in response to being challenged.
We started out shooting with the gun below our line of sight, then after a few rounds we brought it up and used the sights to deliver another burst. Rather than making this transition based on a specific number of shots, Roger asked us to visualize the physical reaction from the bad guy that would lead us to make this transition from our reactive skill set to a more proactive one. This is what Ninpo Student describes as “knowing when you’ve got a guy”. Think of someone shifting from moving aggressively to being back on his heels in response to your gunfire. It’s important that he still legally represents a threat (otherwise we shouldn’t keep shooting) but we’ve gained enough of the initiative to shift to our proactive, optimal shooting skill set.
The other big reason to shoot with the gun below our line of sight is if we have a retention problem. Often people think about retention being just for very close ranges, but it really starts being a consideration at about 4 yards. The length of your arms put the pistol about a yard closer to the adversary, their arms put their hands about a yard closer to you, and the remaining two yards can be eaten up very quickly by a couple of big steps.
The corollary to this is that we can’t just go from full extension straight to the gun tucked up against the body in a classic “speed rock” position and think that covers all our retention needs, because the speed rock doesn’t work at 4 yards. Instead we need a continuum that allows us to gradually withdraw the gun as we get closer, trading accuracy (that we don’t need as much as the distance gets closer) for weapon retention (that we need very much as the adversary closes in).
The first step along this road is shooting from partial extension. Think of this as being part of the way through the drawstroke, about halfway between when the hands come together and full extension. When we were shooting from contact ready the gun was 5-6 inches below line of sight, now we’re talking about shooting about a foot below line of sight.
Again, during this drill Roger had us visualize the target responding to our shots and make the transition from point shooting below the line of sight to driving the gun out to full extension and delivering a couple of headshots using the sights.
In this class I was trying to manage my ammo so that I never ran dry during a drill (reloading before reholstering, swapping out mags between drills, etc.). But as we were shooting this drill, I did run the gun to slide lock and had to reload. Roger complimented me on how smooth the reload looked, so I guess all that dry practice paid off.
Our last drill before lunch was shooting from an even more compressed position, right where the hands come together during the drawstroke with your elbows up against the rib cage. Because of the solid skeletal support this is a position that allows for very rapid fire, but the lower level of visual input on the gun means that distance is limited. Again, we shot a burst from the below line-of-sight position then drove the gun up to eye level to use the sights for a headshot.
After lunch we picked up with the zipper drill. This involves shooting during your drawstroke, starting where the hands come together and continuing all the way up to eye level. If you do a good job keeping your shots centered and the gun parallel to the ground, you end up with a vertical string of shots right up the centerline of the target. Roger emphasized that the zipper is primarily a drill for learning and practice rather than a combat technique. If we really need to go from shooting from compressed position up to eye level, it makes sense to just drive the gun all the way out and take our next shot from there rather than shooting en route. In training, however, it provides the opportunity to shoot from varied distances below line of sight and varied extensions in a single drill. Being able to use the zipper to produce a nice vertical string of shots demonstrates mastery of several important point shooting skills (shooting parallel to the ground, transitioning from one focal point to another, etc.).
The last drill of the two-handed shooting portion of the curriculum was the hammer drill. With this drill you shoot from where the hands come together and put a burst into the torso, then shift focus to the head and put a round into the head from the same basic shooting position, without extending the gun any further. The key is to hinge your arms at the elbow and go from parallel to the ground to angled upward as you change your focal point from the body to the head. Note that when setting this up it’s critical to make sure that you’re not shooting over the berm.
Moving on to one-handed shooting, Roger talked a bit about Fairbairn and Sykes and their history in Shanghai, since this material comes to us pretty much directly from their book Shooting to Live.
Given this pedigree, Roger had us shoot these drills from a combat crouch, rather than the more optimal recoil absorbing stance that we’d been using thus far. We started out with 3/4 hip, which is the one-handed equivalent of the two-handed shooting from partial extension that we’d done earlier. One difference is because you’re shooting one handed, you need to concentrate on getting the gun on the visual centerline (with two-handed shooting this happens pretty much automatically). Most people initially try to do this by angling their forearm in and articulating their wrist to get the gun pointed at the target, but the bent wrist and angled forearm don’t do a great job transmitting recoil back to your body to be absorbed. A better approach is to get your elbow on your visual centerline, directly behind the gun. This will allow you to shoot faster and more accurately.
As we did this drill my trigger started feeling “crunchy” for the lack of a better term. It was hanging up at the very end of the trigger press and requiring more and more force to get it all the way back. When we took a break to drink water and ammo up, I asked around if anyone had a Glock disassembly tool. (I had not brought one. A lesson for next time even if I’m flying out to a class). Thankfully someone had.
My initial suspect was the aftermarket trigger or connector, but after I popped the slide off, they seemed to move freely. When I detail stripped the lower and popped the trigger, trigger bar, ejector housing, and connector out they appeared pristine. Something in the lower is usually the obvious culprit for trigger issues, but having ruled those out I turned my attention to the slide. Sure enough, when I pressed the striker back it hung up about an eighth of an inch short. That would account for the feeling I got from the trigger. I popped the slide cover plate off and removed the striker. It appeared a bit gunky, but there were no obvious problems with it. I cleaned it off a bit and reassembled the gun. The trigger operated normally. I still don’t know exactly what caused it, but the problem hasn‘t reoccurred since.
Next up was the half-hip position; the one-handed equivalent of shooting from where the hands come together in a two-handed drawstroke. There are actually three variants of this: one where you brace the elbow on the front of the ribcage, one where you press it in on the point of the hip, and one where your upper arm is behind the point of the hip pressed forward against the floating rib. These allow progressively greater retention, but limit accuracy and effective distance as you get less visual input from the gun and it moves off the visual centerline. We shot all three variants.
Roger also used this as an opportunity to teach the elbow-up/elbow-down drawstroke. This is a way to get the gun out of the holster and into a half-hip shooting position very quickly. You acquire your grip, pull your elbow up and back until the gun clears the holster, then drive it down and forward until you hit the half hip shooting position. It is very fast.
Last, we maxed out the retention concept shooting with the gun braced up against the pectoral. Roger taught it with the gun angled downward, so you can have your support side arm up blocking or fending off the attacker and not risk shooting yourself in the arm. This is one take on what many instructors call “the retention position” (propagating the mistaken impression that you only need one position to cover all retention problems).
I’ll note that I had absolutely no issues shooting a pistol with a compensator on it from the retention position.
During these last few drills I was getting a few failures to feed, with the round hanging up halfway into the chamber, angled upward. Given that it only developed late in the day, my suspicion was that it was probably related to the gun getting dirty.
We packed up, loaded up the targets, and headed out. Roger let me buy him a nice dinner at Boulder Dam Brewing and we spent some time talking about the state of the training industry and some of the classes I’d taken and he’d taught recently.
After a nice soak in the tub back at the hotel I cleaned the G19X as thoroughly as I could with the gear I brought with me. I did bring some oil, so I was able to get it well lubricated.
Sunday
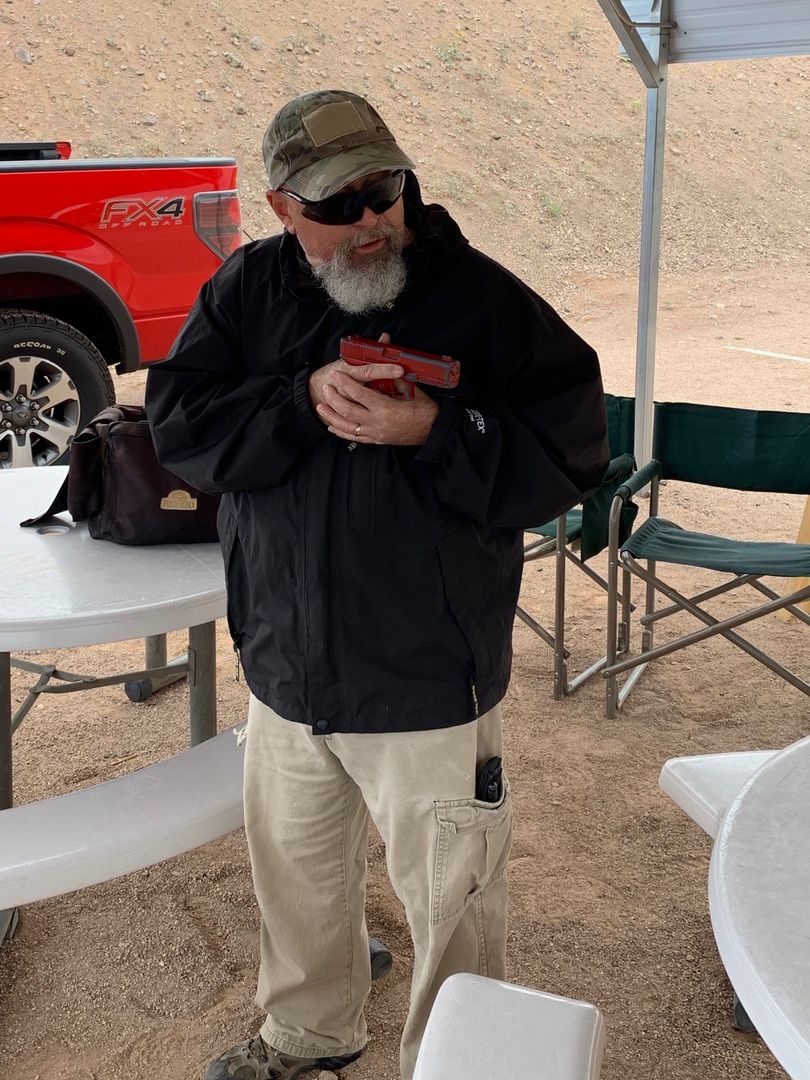
On Sunday morning I worked a bit on this write up. When I went down to grab the free hotel breakfast, I found it was raining lightly. I had not been expecting any rain based on the forecast, but luckily I had brought my goretex rain jacket for the wind we were expecting on Sunday.
The rain continued as I headed down to the range. It was supposed to stop not long after 8 o’clock, so we held off on setting up the targets and shooting until it did.
All of our shooting on the first day had been done squared up to the target. Today’s first block of instruction was dedicated to breaking us away from that. First up was shooting with the target towards your support side. For this Roger teaches the Center Axis Relock (CAR) positions.
The low CAR position has the gun braced up against the chest with the barrel parallel to your shoulders. Roger emphasized that the gun needs to be braced against your support side pec, since having it on that side forces your support side elbow back and keeps the support side arm clear of the muzzle. In this position you can clamp the grip of the gun between your primary and support hands giving very good recoil control. However, being so far below the line of sight and with virtually no extension accuracy and effective range is limited.
When you need to shoot at more distant targets on your support side, you can use the high CAR position. This basically takes the low CAR position and rotates your arms up about 90 degrees, so your support side forearm is vertical and the primary side arm is horizontal at shoulder level, putting the gun just below your line of sight. Recoil control isn’t quite as good, but bringing the gun up to eye level makes hits out to 5 yards or so quite doable.
We shot both the low CAR and high CAR positions live fire, then did a drill where we started out in the low position and shot continuously as we raised the gun to the high position. The cool thing about this is that if you do your focal point transitions right, even though the gun is moving in a curved, C-shaped path the string of bullet impacts will be vertical.
This was actually the one drill where I noticed muzzle blast from the comp. In low CAR the muzzle blast was like getting slapped in the bicep. Nothing that caused any damage or that I would even notice in a fight but in training it was definitely noticeable.
During these drills one of the students got a badly stuck case in his pistol. This was a G27 with a 9mm conversion barrel, which may have contributed to the issue. He got the case knocked out with a rod, but switched over to his G19 for the rest of the class.
The next drill was focused on drawing directly towards the target. As Roger pointed out, sometimes we have to do things on the range for safety reasons that are not necessarily the most efficient in a fight. In this case, safety and combat efficiently match up perfectly. For safety reasons, when drawing the only thing we want the muzzle to cover is the dirt between us and the target. Drawing directly to the target like this also gets the gun on target quickly. Driving the gun to the target is faster, more efficient, and less likely to overshoot than swinging on to the target from the left or right. This is relatively easy when facing squarely towards the target, but if the target is off to the left or right, or even behind you it becomes more difficult.
Facing diagonally uprange with the target off your right (primary) side shoulder the most direct way to get the gun on target is to draw and bring the gun straight up towards the target. If you’re drawing from the appendix position, this can be thought of as driving the butt of the gun to the target. Coming from the hip the gun is traveling more sideways. In either case you end up shooting back behind you using the point shoulder position. One key to doing this safely on the range is to get the gun pointed at the target, then rotate it so it’s straight up and down (or angled over a bit so you can aim down the edge of the slide if that’s your preference). If you try to rotate the gun earlier, you’ll have a tendency to swing the gun up in an arc, rather than go directly to the target which is both less efficient and a potential safety problem on the range.
Facing diagonally uprange the other way, with the target on your left (support) side shoulder, you basically draw to Sul, then rotate your torso until you can raise the gun right into the CAR position (high CAR at the distances we were shooting).
We did a bunch of dry work on both of these before shooting them live, to make sure everyone could get the gun on target without covering anyone else on the line with us.
Having covered the full sight continuum, drawing directly to the target, and shooting at these extreme angles, we had all the building blocks in place to move into dynamic movement. The difference between controlled movement and dynamic movement is all about the relative priority that you’re giving to shooting accuracy and movement speed. With controlled movement you’re sacrificing movement speed to prioritize a good shooting platform. Dynamic movement sacrifices some of that shooting platform in order to move more quickly (there’s also “get out of dodge” movement where you eschew shooting on the move entirely and just book it).
With dynamic movement you’re moving too fast to use your sights effectively. Keeping the eye, sights, and target all lined up just isn’t possible beyond a certain speed (even with a red dot). Point shooting is absolutely mandatory. That said, we’re not just pounding along paying no heed to our shooting platform. The fundamentals of shooting on the move still apply: lower your center of gravity, step smoothly and shorten your stride, and absorb the impact of your footfalls. They’re just done at a faster pace than in controlled movement.
The reason we’re employing dynamic movement is usually to get off “the X”. To get off the spot where our adversary’s gun is pointed, or about to be pointed, and where his bullets are going to go (or where he’s about to hit us with some sort of contact weapon). If we want to do this effectively our initial movement has to be explosive. We need to accelerate very rapidly off of this spot. Our initial “takeoff” is critical. There are a variety of ways to do this, and which is best depends on your physical capabilities and the amount of traction you have available (stuff that works on dry asphalt is not going to work on wet grass, gravel, or ice). Roger demonstrated several possibilities, including just stepping off (“lean and push”), the Pekiti takeoff, the Russian takeoff, and the two-footed takeoff. He seems to prefer the two-footed approach most of the time, but he’ll adopt what works for the conditions. We spent some time playing around with the different takeoffs to see what worked for us (at least on this gravel range).
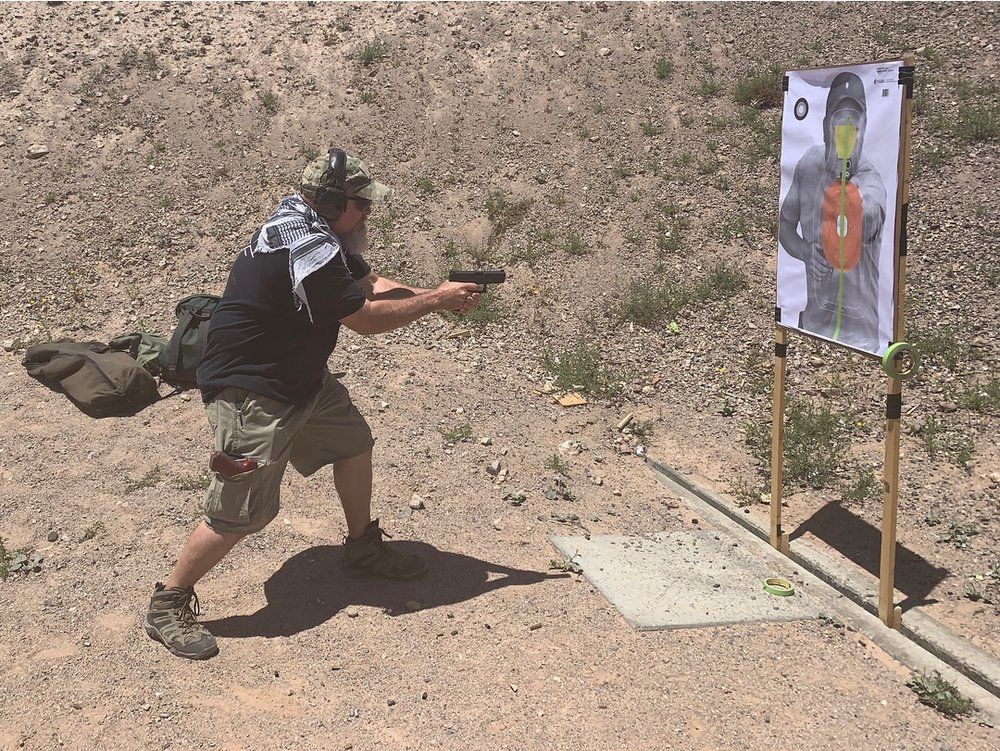
After a bunch of dry work, we started live fire with moving directly towards the target. While this doesn’t get us off the X the way lateral movement does, there are circumstances where going straight in is appropriate. We may need to close rapidly with an adversary to defend a loved one, because we’re facing multiple adversaries and closing on one will put us in a better position versus others, or because it’s the only available option.
One consideration when going straight in is we don’t want to charge right into a retention problem. We worked on techniques for withdrawing the gun into a more compressed position as we got closer.
Moving on to the more traditional, “get off the X” directions, we practiced moving diagonally forward to the left and right (the 2 o’clock and 10 o’clock directions). We started off running these drills from about 9-10 yards, which is really further than you’d want to use these in real life (at that sort of distance other techniques would be more appropriate). However, Roger wanted to give students enough time to do the takeoff, get the gun out, and get some shots off. Once we’d had some practice and everyone was getting the gun out and rounds on target within those first few steps, we moved up to a more realistic distance of 5 yards. At this distance things develop much more quickly, closer to the classic gunfighting “rule of threes” (3 steps, 3 rounds, 3 seconds). For all of these drills, Roger had us cap things off by switching to a sighted fire headshot when we got to the end of our movement.