Before the Class
Last month I had a chance to attend the Advanced Vehicle Operations class taught by Eric Pfleger. I’d done a vehicle class with Eric a couple of years ago, and since then, I’d been encouraging him to do one that included more convoy operations type material. So, I’ve been looking forward to this class for a while.
I took a full two weeks of vacation (including Labor Day weekend) for the class. I was planning on doing some backpacking in Montana before and after the course. Combined with all the gear for the class itself, this meant a considerable amount of kit on this trip. Given that, and the COVID-19 situation, I decided to drive to Montana rather than fly out. It’s quite a drive from Wichita. I left after work on Friday afternoon and drove all day Saturday and Sunday.
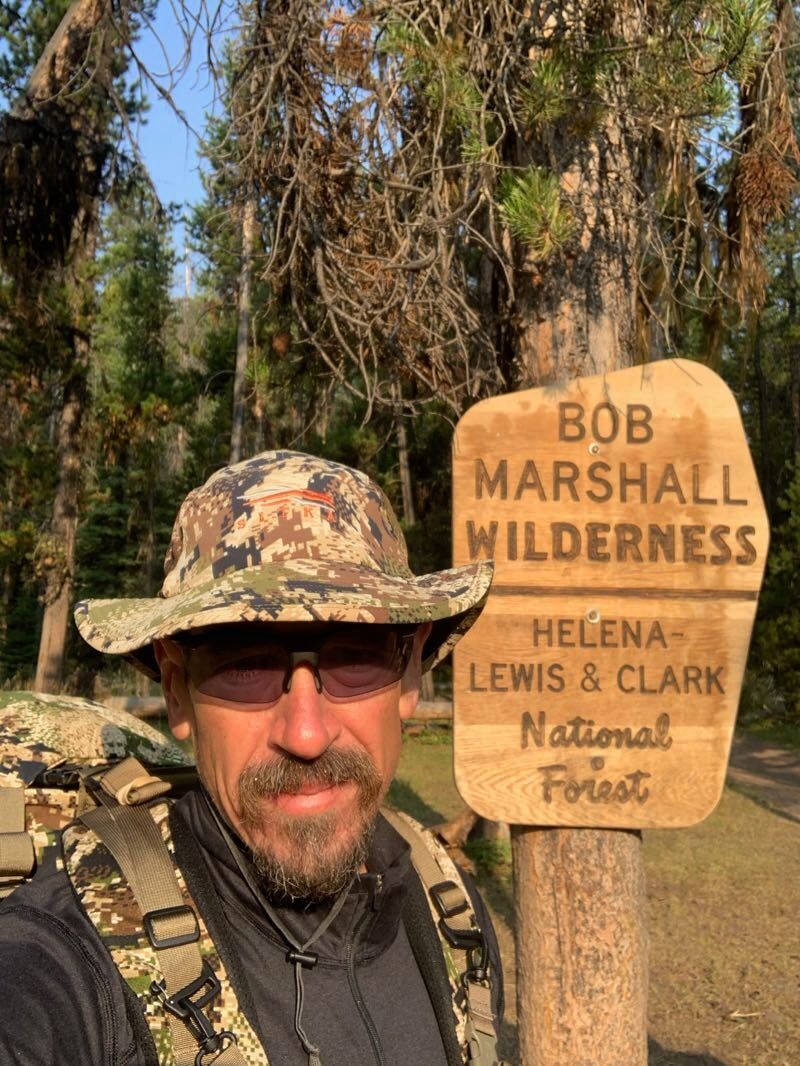
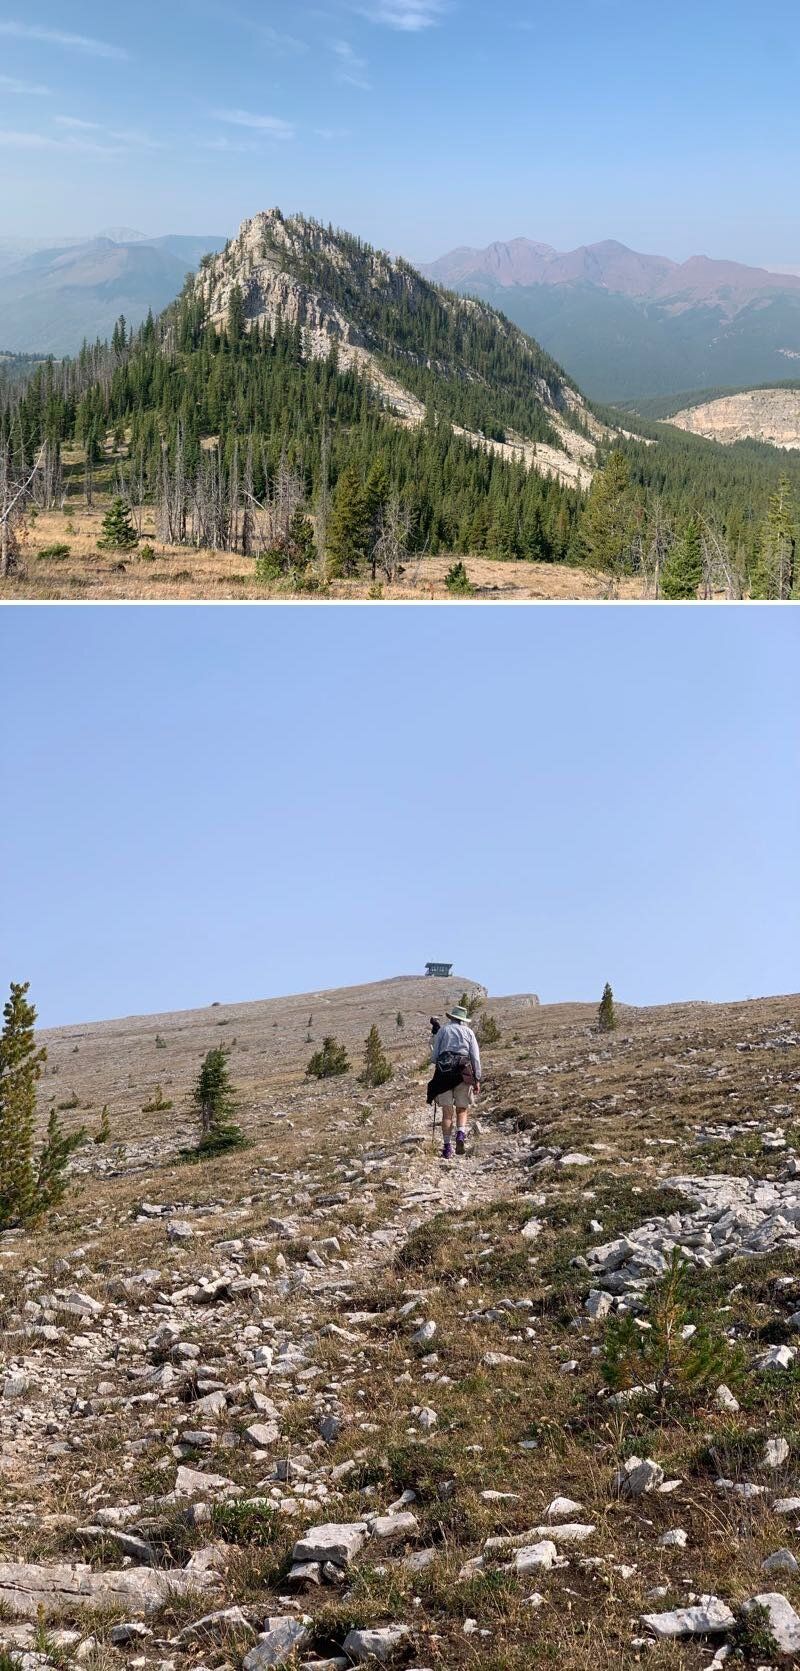
I met my parents at Benchmark Campground in the Bob Marshall Wilderness. We hiked in about eleven miles on Monday, then did a day hike up to the fire lookout on top of Prairie Reef on Tuesday. The hike up Prairie Reef is 11.5 miles and about 3000 feet of elevation gain. Unfortunately, the smoke from wildfires out on the west coast was pretty thick that day, so we didn’t get the great long-distance views that we were hoping for. We hiked back out on Wednesday and stayed the night in the little town of Augusta. The diner at the motel had some excellent huckleberry ice cream.
On Thursday, I drove to Eric’s place, stopping in Missoula to pick up some supplies. I got there mid-afternoon and spent the rest of the day sorting out my gear for the class. Since I only had my little 2WD SUV and Eric needed someone to drive his Toyota Pathfinder out to the range, he had me load all my kit into it.
Gear
My primary rifle for this class was a SIG 556 SBR with an AAC Mini4 suppressor and a SIG Romeo5 red dot sight. While I still love the FS2000 for vehicle work, I wanted to try a folding stock SBR. After doing some dry work with the rifle in the run-up to the class, I was kind of dissatisfied with the safety on the 556. While it seems like it’s in the same place as an AR, it’s just a bit hard to reach, even for a guy with big mitts like me (it’s surprising how many rifle designs manage to screw this up). At the last minute, I was able to source the Krebs Extended SIG 556 Safety.
My handgun for the class was a Glock 19X configured as a Rolland Special, with a KKM barrel and compensator, Trijicon RMR red dot, Streamlight TLR-1 HL. I’ve got an Overwatch Precision trigger with their NP3ed trigger bar and connector in it, and it’s the smoothest Glock trigger I’ve ever shot. It’s also running the Kägwerks extended and raised slide release, which nicely solves my problem of inadvertently locking the slide back on Gen 5 Glocks.
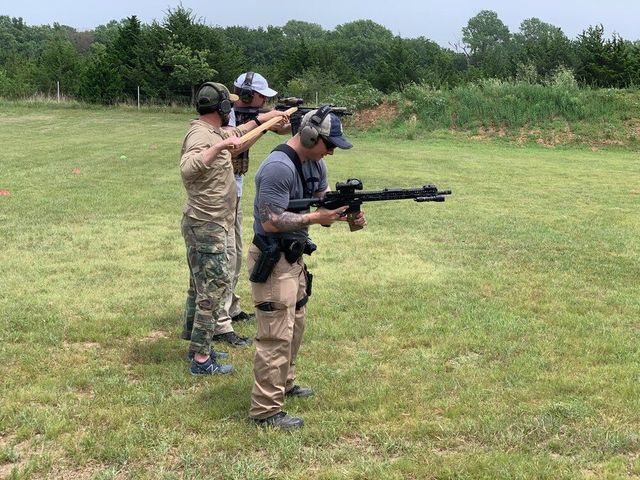
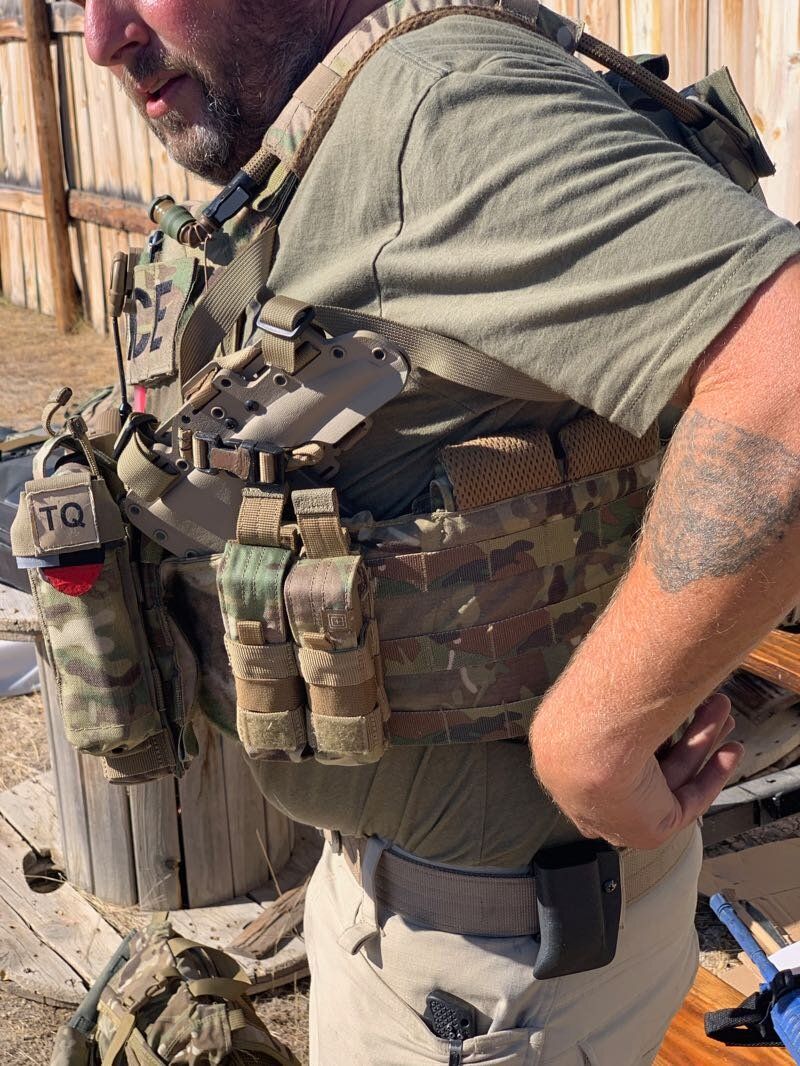
Since this class would not involve any long hikes, I’d decided to run it in armor. In my case, that’s a Velocity Systems Scarab LT plate carrier with Level III+ plates in it and a Crye Airframe helmet. While I can run the Scarab with a battle belt, belt rigs kind of suck for vehicle use, so I wanted to run everything on the plate carrier itself. I used a couple of HSGI Taco mag pouches and one of Dale Fricke’s Eleazar holsters.
The other students in the class were running ARs of one sort of another. Many of them were short (either with pistol braces or SBRs), and several were suppressed as well. There was a bit more variety on the handgun side. While Glocks were most common, there was an HK and a nice STI 2011. A couple of other students were armored up as well.
Friday
Eric headed out to the range early to do some setup. The rest of us rendezvoused at a local gas station. I explained how to get to the range a few miles away and lead the conga line of vehicles out there.
At the range, Eric had me unload all my gear out of the Toyota so we could use it for class. We got going with some introductions. While everyone except one student had trained with Eric before, many of them had not trained together (I knew everyone except the new guy).
Eric described the content of the class. Most of the shooting would be today, with more scenario-based work on Saturday and Sunday. This class would emphasize application more than his previous vehicle classes. While it’s primarily vehicle-focused, it touches on other, related subject areas like small unit tactics and tac-med.
We did a medical brief, including who would be responsible for what in the event of an incident. Eric also covered environmental hazards, including the importance of staying hydrated and the potential presence of rattlesnakes at the range.
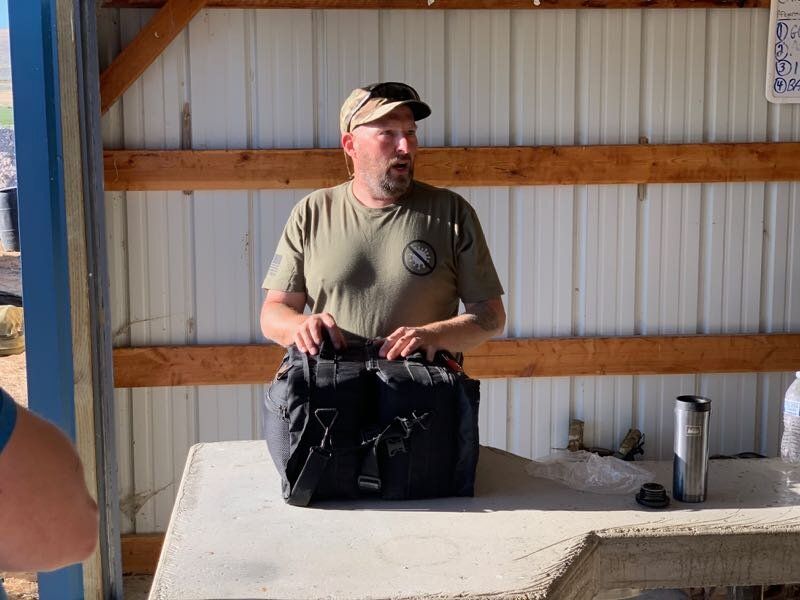
Since we were talking about medical stuff, he also showed off a couple of his vehicle medkits. While they mostly have the same gear as your standard tactical med kit, his vehicle kits have a particular emphasis on burn and eye care, since vehicles have fuel and glass on board and are more likely to produce those kinds of injury. Because you’re not carrying it for miles on foot, a vehicle kit can also just be larger and include more stuff.
Next up was the safety brief. Eric covered the four rules, but he also talked about some gunhandling considerations specific to vehicle operations. Eric prefers muzzle-up gunhandling as a default in and around vehicles (as long as there isn’t anyone on the roof). Most of the mechanical systems in a vehicle that we’d like to avoid putting a hole in are underneath. Muzzle up also avoids sweeping anyone who’s dismounted and gone prone.
During actual operations (as opposed to training), Eric advocates running handguns hot, with a round in the chamber. Long guns, however, are more situational. In a high-threat area or overt operations, run rounds in the chamber, ready to go. However, in a low-profile role (executive protection, for instance), he generally runs bag guns with the chamber empty. Given that it takes some time to access a gun from the bag, it doesn’t take much additional time to chamber a round.
We rounded out the safety brief by going through Eric’s preferred unloading procedure. This involves removing the magazine and cycling the action, doing a visual and tactile check of the chamber and magwell, looking away, then doing another visual and tactile check.
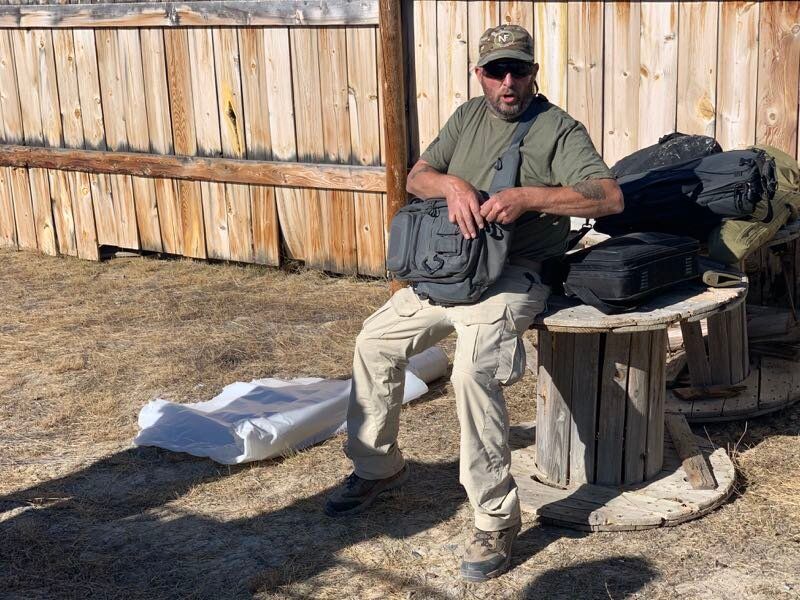
While this class did not include quite the epic gear lecture that Eric does in some of his sniper or survival-oriented classes, he did have an excellent array of rifles and bags suitable for vehicle work to show off. Most of these were SBRs or bullpups, with short overall lengths that make them handy in vehicles. However, he also had a heavy barrel FAL with a drum magazine that can fill a role as sort of a poor man’s SAW. He’s got various low-profile bags, from a laptop case for an Uzi to some longer Sneakybags that will hold folding stock rifles.
On support gear, he noted that battle belts kind of suck in vehicles. He much prefers chest rigs and plate carriers. He likes slick sides on those plate carriers, without a lot of gear hanging off under the arms (the example he showed didn’t even have side plates, just level IIIA panels on the sides). Most of the kit on them was pretty standard, but he does carry a seatbelt cutter. He also prefers the SOFTT tourniquet for vehicle work because of its ability to easily detach and go around a trapped limb.
One thing he noted is that while seated in a vehicle bouncing down a rough road, a full water bladder can be prone to leaking or bursting. He likes the Source water bottle adapters that allow you to detach the bite valve and screw on a water bottle to fill the bladder while it’s on your back. He’ll run a small amount of water in the bladder, with a couple of bottles on his bailout bag to fill the bladder if he dismounts.
Eric also had a couple of examples of helmets, both bump and ballistically rated.
Speaking of the bailout bag, sometimes a vehicle-mounted operation may involuntarily become a foot-mobile op. The bailout bag contains the gear for this situation. While Eric runs some pretty big rucks in other contexts, the idea is that the bailout bag can easily fit in the footwell, between your legs, so it’s easily accessible if you have to bail.
The bag includes necessities like clothing, food, and water. Eric likes to run a second water bladder in the bailout bag, so he can suck water out of that when he’s in the vehicle, rather than the camelback on his back. Similarly, set up the bag so you can fight out of the vehicle using the ammunition on the bag, saving the stuff on your person for if you have to dismount.
One bit of more specialized kit in the bag is a tomahawk. Eric likes hawks in general, but specifically for vehicle use, they have applications as rescue tools.
With the relatively short (for Eric) gear lecture out of the way, we moved on to shooting under vehicles. Eric demoed a couple of ways to make this happen, including traditional prone positions, “brokeback prone,” and urban prone behind a wheel. The primary dynamic here is how tall the vehicle is underneath. Under a big truck, you can assume a traditional prone position and keep the rifle upright. As the height decreases, you have to start doing things like rolling the rifle over on its side. Under the lowest vehicles (think shooting under a sports car), you practically have to lay the rifle on the ground and somehow get your eye behind it.
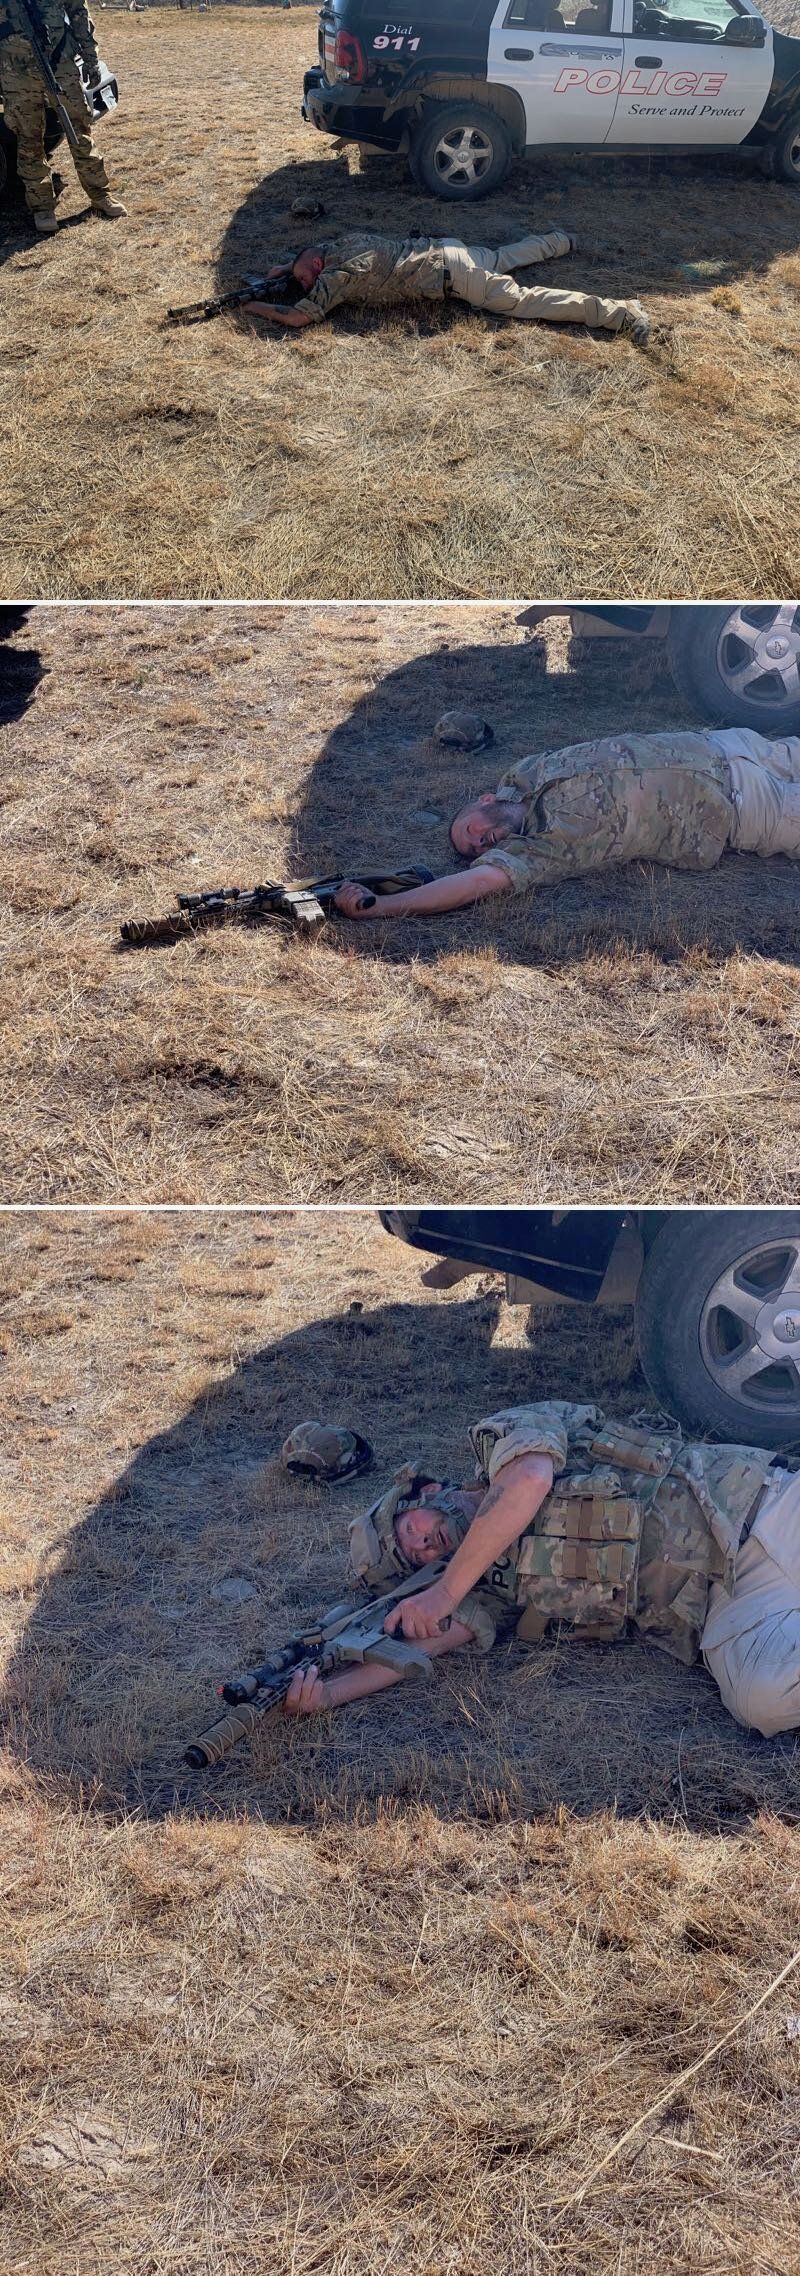
Eric noted that kit like a plate carrier or helmet could impede your ability to assume some of these positions. In particular, helmets can hamper your ability to get your eye behind the optic if the rifle is very low. He demonstrated using a partial transfer (with your support side hand on the pistol grip and primary side hand on the forend, but in front of your dominant eye) can help get you just enough elevation to compensate for a helmet.
Unless you’re shooting under a very tall vehicle at a distant target, you’re not doing to be drilling heads or center of mass shots. This is for shooting ankles and calves, maybe a knee if someone is kneeling. Of course, once you blow a hole in his ankle, there’s a good chance that a more decisive portion of the target will wind up on the ground. Or you can just take advantage of the mobility kill to get up and circle around the vehicle to engage him.
We started out doing some dry work under actual vehicles: a Suburban, Pathfinder, and Explorer. When we went live, Eric initially had us shooting under some wooden stands of varying heights from about 6-12” (these also provided the opportunity to shoot under something a bit shorter and a medium to large SUV). After doing live fire under the wood, we moved back to a vehicle and carefully did some live shooting under it. Those of us with armor had the opportunity to armor up and shoot using our kit.
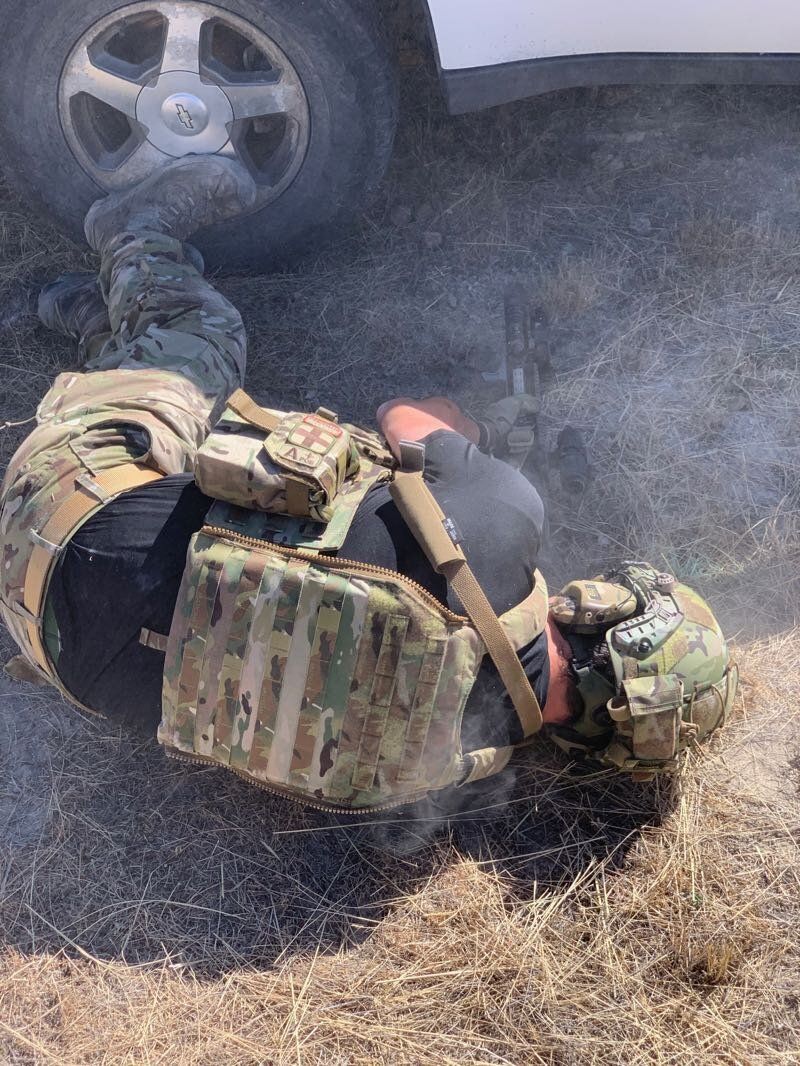
I found that in an urban prone, taking cover behind a tire with your feet up against it and your upper body curled around to shoot on one side or another, a good way to manipulate your body and shooting position was to hook a foot on the tire and use that to roll yourself over or spin yourself around. Eric mentioned that it would be worth dedicating some time to assuming these positions during dry practice.
Next, we switched to pistol. Many of the dynamics are similar, though you don’t have to worry quite so much about supporting the gun. They can be quite handy in tight spaces, like a packed parking lot, and you don’t have as much sight offset to deal with. One thing Eric specifically demoed was proning out behind a tire and rolling onto your side or even back to clear the tire and shoot. It’s quite a quick way to get on target with a handgun.
We shot the same progression with the handguns as we had with the rifles: dry under the vehicles, live under the wood, then live under a vehicle.
While we were doing handgun work, I had a chance to shoot Sammy’s Staccato P2 2011. It’s quite a nice gun, with a great trigger. Not enough to get me to shell out that much for guns, and especially mags, though.
After a short break for lunch, Eric did a quick lecture and some demos about skipping rounds off pavement. This can be useful in an active gunfight around a vehicle. Rather than getting low enough to shoot under it (which requires getting your body down to ground level, even under a fairly tall vehicle), you can just drop far enough to get a visual on the bottom of the BG’s feet. Against something like an SUV, this generally only requires kneeling and bending over. Once you know where he’s standing, you can put a round into the pavement underneath the car, ricocheting it into him. Once again, this is not the sort of thing that will completely incapacitate a bad guy, but it can degrade his mobility long enough for you to come around behind him.
Since we were on a dirt range, rather than pavement, Eric threw a steel target underneath a vehicle to give something to skip rounds off of. Eric did some demos with a handgun, then gave the students a chance to try it with their pistols.
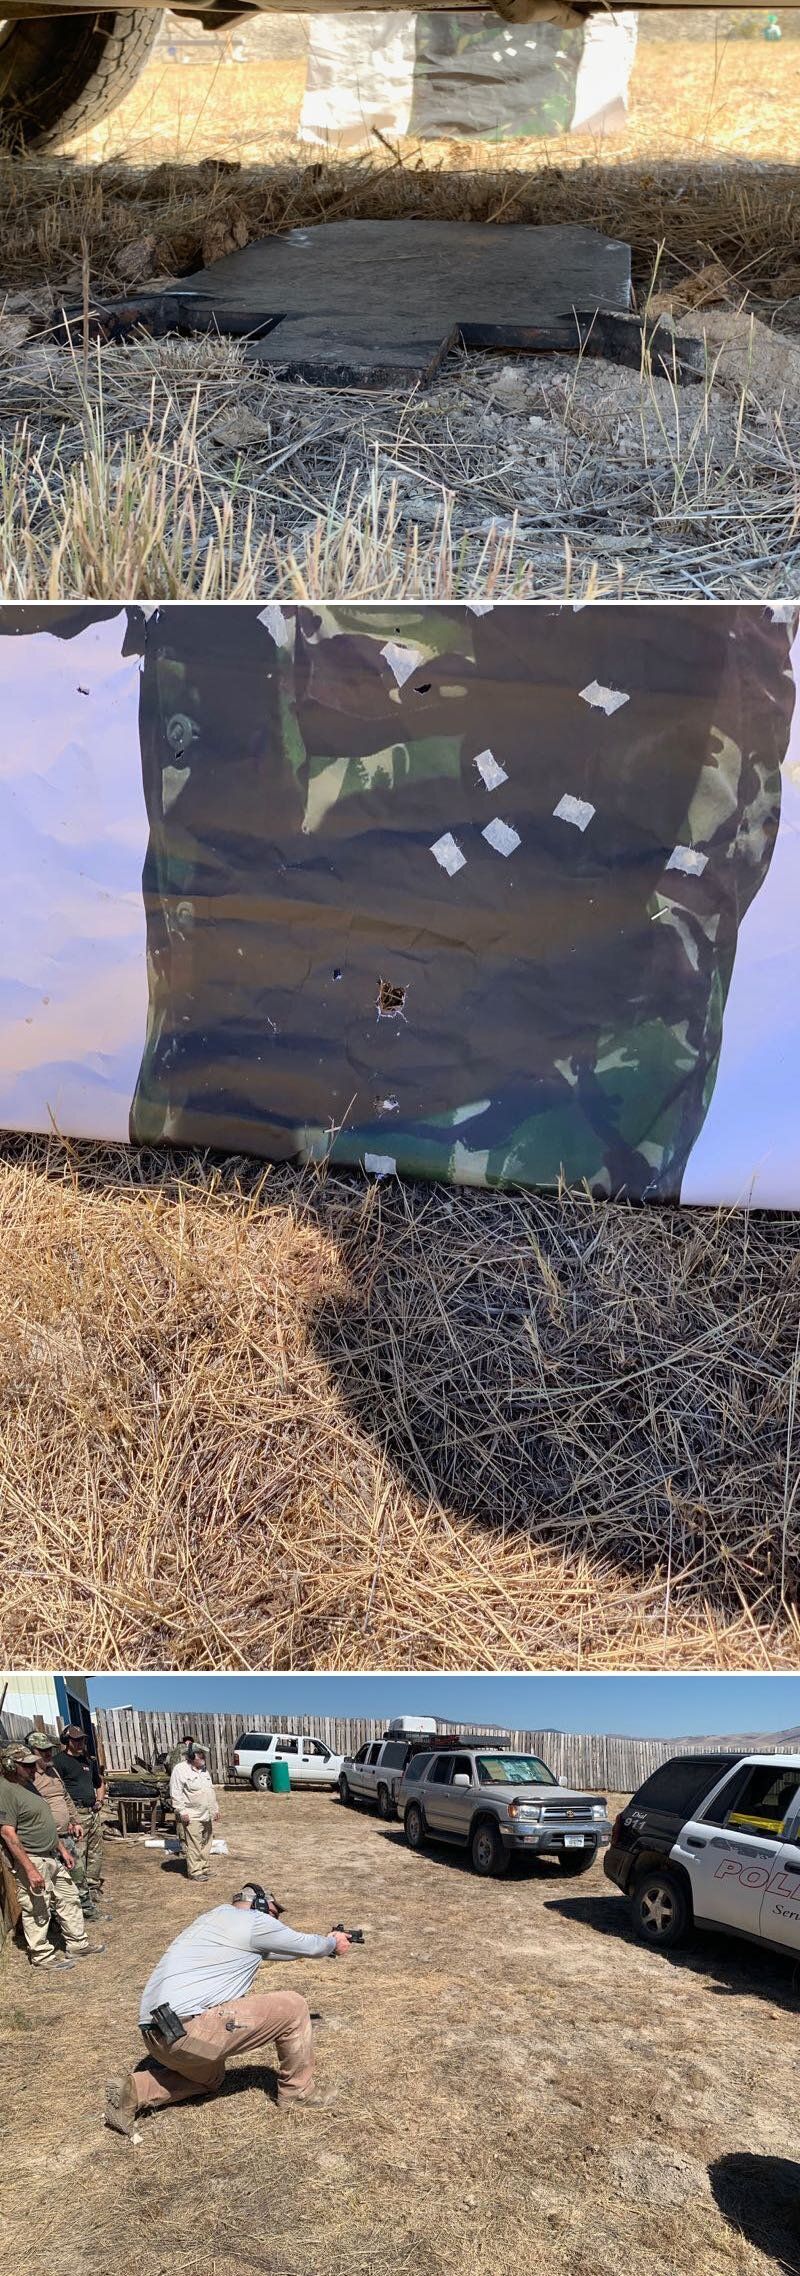
Next up was the shotgun with buckshot, which is made for this sort of thing. Since none of the students had brought a shotty, Eric brought out one of his and did a demo, then offered us a chance to shoot it (I jumped at the chance).
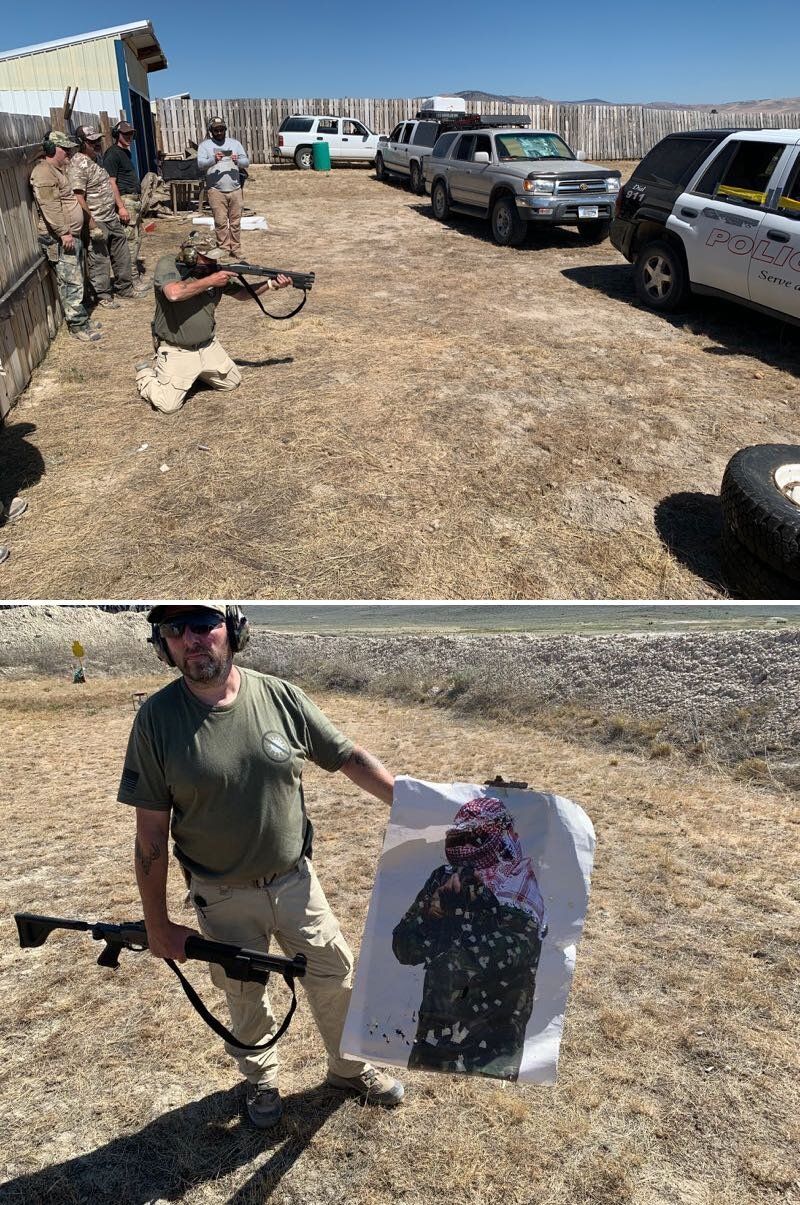
Finally, he brought out the rifles. While none of the bullets or shotgun pellets was pristine coming off the metal plate, this was particularly obvious with rifles. If guys fired from too high, producing too steep an angle, their rounds tended to come apart. If you got down a bit lower (a low kneeling), they keyholed instead.
We also tried it without the plate, just on the dirt surface of the range. With handguns, all this did was kick up some dust. Buckshot put a couple of holes in the guy, but either way, this is definitely more of a hard-surface technique.
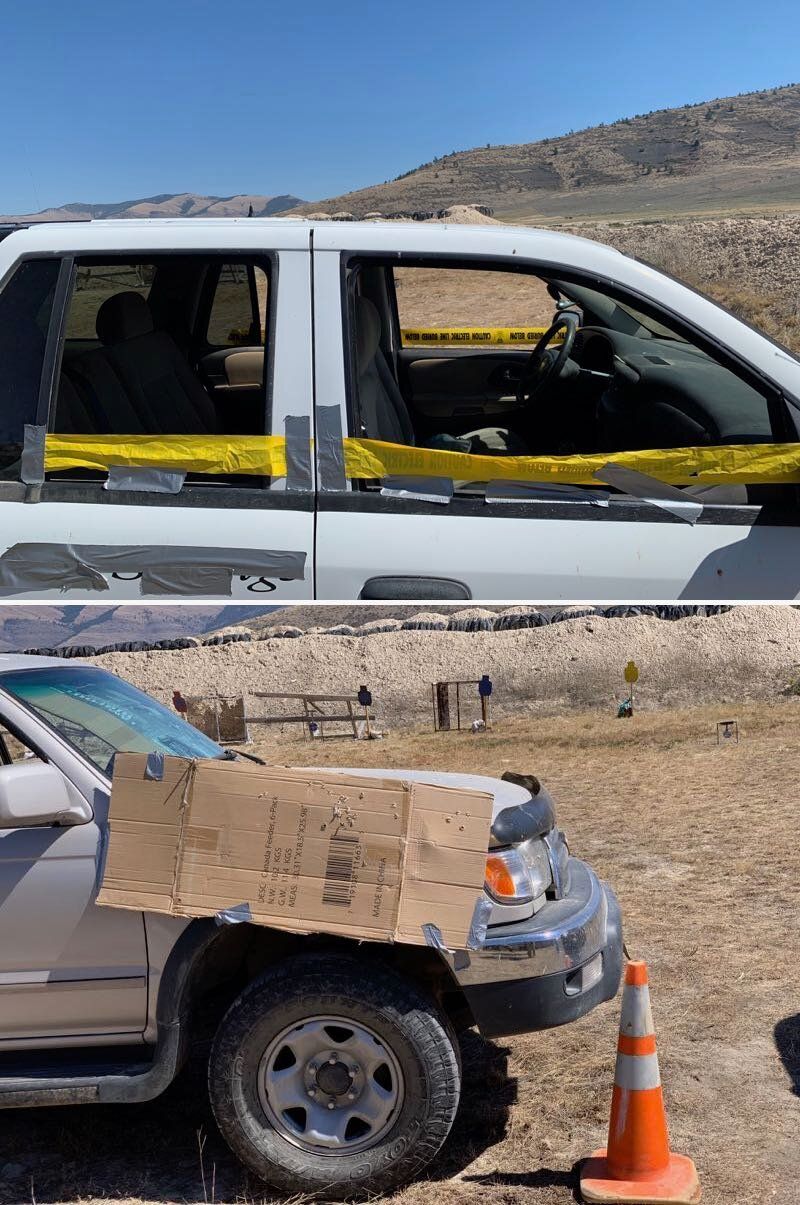
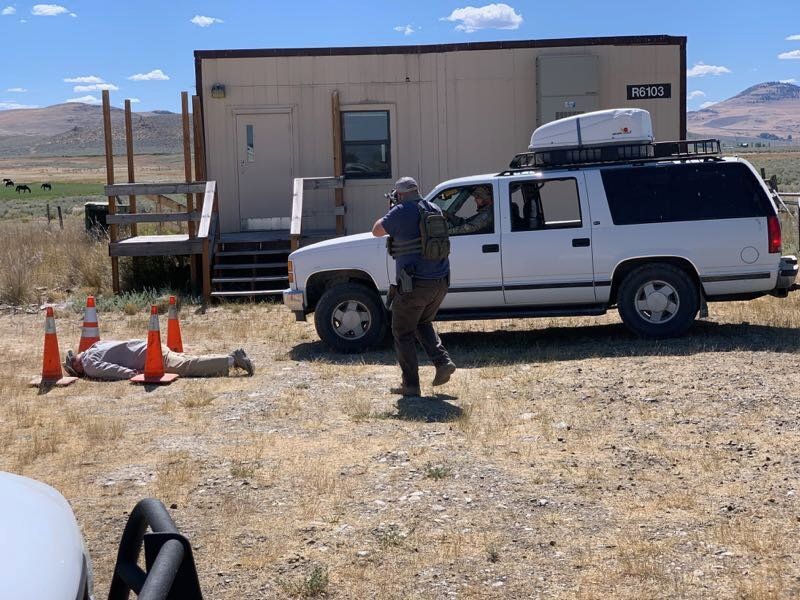
Next up was shooting around, over, and through vehicles. Because he didn’t want any of the vehicles we were working with to go home with any new holes, Eric used plastic tape and cardboard to raise the height of door sills and hoods artificially. He did the same on either end of each vehicle using cones. This way, if you screwed up your sight offset, you’d shoot the cardboard rather than putting a round through the vehicle.
Most folks had experience shooting around and over cover, so there wasn’t a lot of lecture. We started with some dry work. During this drill, I felt a distinct twinge in my back when I stood up. I think it wasn’t just the plate carrier’s weight, but also the rifle hanging off the front of it. If this were just a class I was taking, I might have tried to power through, but since I was planning on five more days of backpacking afterward, I decided discretion was the better part of valor and downed my plate carrier and helmet for the rest of the class.
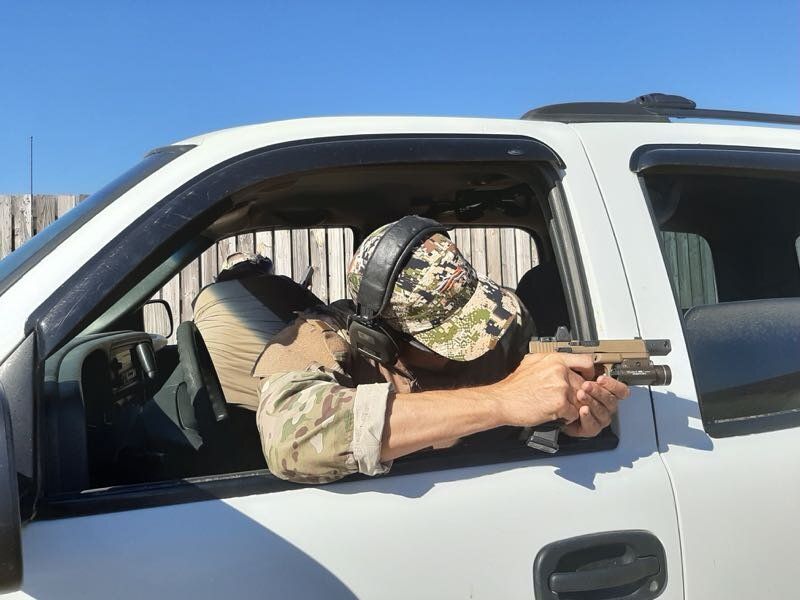
Next up, we went to live fire. Most of this was stuff I’d done before at one time or another, but one thing I hadn’t done before was shooting through a vehicle, in one window and out another. It was interesting, especially with my suppressed rifle. The vehicle acted sort of like a gigantic additional baffle on the suppressor.
Of course, vehicles are more than just obstacles and pieces of cover and concealment, they’re also a means of transport. If we want to take advantage of that in a tactical situation, we have to know how to get out quickly and efficiently when circumstances demand it.
While this isn’t an “anti-carjacking” class, Eric did cover one thing along these lines: how to remove a seatbelt and exit the vehicle from the driver’s seat. He does it with the left hand, sliding down the belt to the buckle, releasing it, then capturing the belt and pulling it across your body as you unlatch the door. Open the door with your foot and keep the belt in hand until you’ve exited the car. This leaves your right hand free for a firearm and minimizes the chance of getting tangled in the seatbelt.
In a more team-oriented environment, it can be essential to coordinate your departure from the vehicle with other team members. Eric talked a bit about verbiage: “Dismounting” indicates that you’re ready to get out. In a noisy combat environment, this may be accompanied by a tap on the shoulder or back of the head to get his attention. A response of “Dismount” from your teammate indicates that he’s heard you and knows what you’re about to do (so he won’t accidentally shoot you in the back of the head when you unexpectedly pop up in his line of fire).
We did some dry drills with pistols, practicing dismounting and addressing threats to various directions.
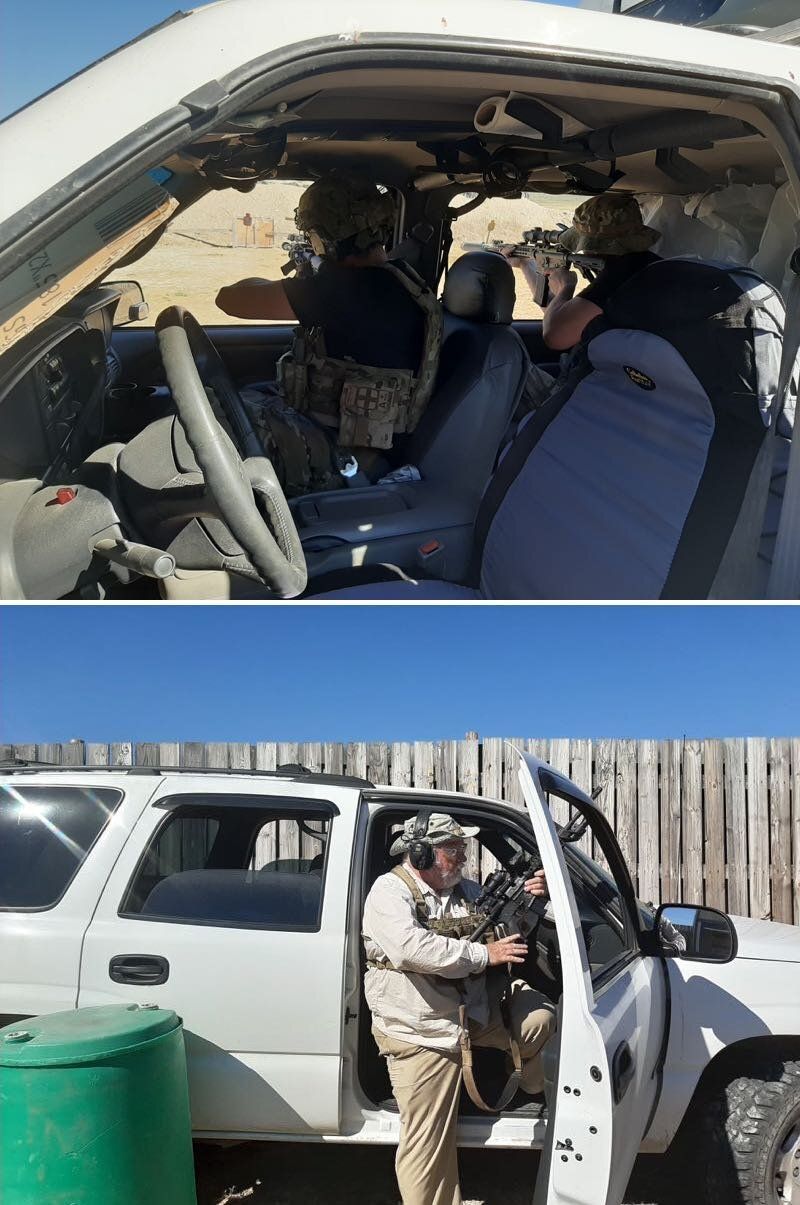
After doing a few live pistol drills, we moved on to rifles. Eric demonstrated ways to hold a rifle in a vehicle. As mentioned, he prefers muzzle up, so you can hold the rifle muzzle up with the butt on the floorboards between your legs. If you have a bailout bag between your legs, the rifle can go between your legs and the door.
This is a bit more complicated for the driver since he has a steering wheel in the way and needs his legs free to operate the pedals. Eric showed how to carry a rifle between your body and the door, with the muzzle against the dash and the butt between the seat and the door. As I found out on Sunday, the exact dynamics depend on how much room there is between the seat and the door and how far it is to the dash in that particular vehicle. When shooting from inside the vehicle, the driver will probably want to use a pistol or a very short shoulder weapon (something like a stocked pistol or small submachine gun). If he has a rifle, he may not go to it until he’s outside the vehicle.
After doing some drills with the rifles, we left off for the day. We headed back to Eric’s place and ordered some pizza from an excellent local pizza place. I’m not grading on a curve here, it’s not just “good for small-town Montana”, it’s good pizza period. A few folks had to head home or to motel rooms, but those of us camping at Eric’s place hung out, enjoying some good beer and good fellowship until quite late.
Saturday
We reconvened out at the range at 8 am Saturday morning. Today’s main event would be a ballistics lab where we shot at a variety of auto parts with various calibers and examined the effects. Eric started with a review of our medical and safety briefs. He included some discussion of special considerations for glass. This included the importance of wraparound eye protection (preferably goggles that seal around your face) and gloves (not just to protect your fingers, but to keep from transferring glass to your eyes by touching them).
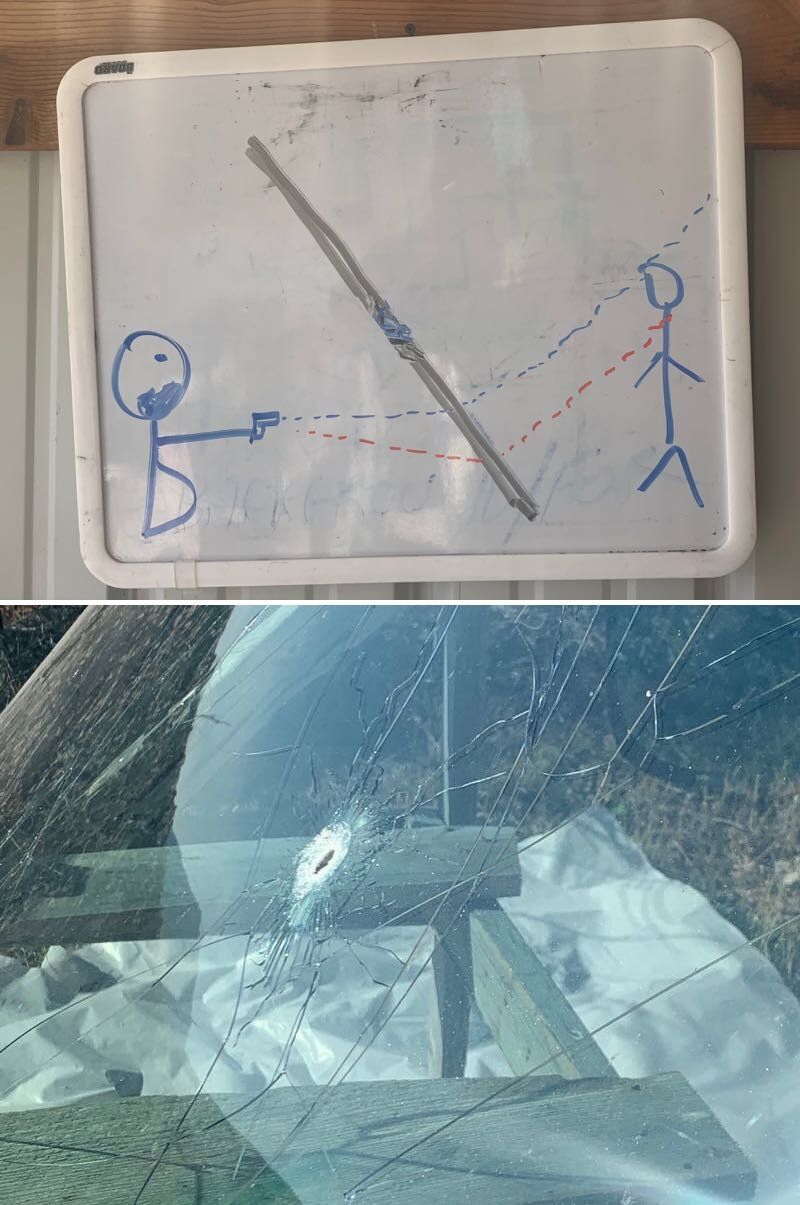
In this vein, our first activity was shooting through windshields. Windshield glass is dominated by two factors: the fact that it’s laminated glass, sandwiched between layers of plastic, and that in most vehicles (other than busses and large trucks), the glass is angled. Laminated windshield glass will tend to deflect bullets, but the direction of deflection is opposite what you might naively expect. Bullets tend to “bite” into the glass as if they want to go through it perpendicular to the glass’s surface. Thus, shooting out through a car windshield, the bullet will be deflected upward, and it will be deflected downward while shooting in.
How much do bullets deflect? It depends. It depends on the construction of the glass (with newer windshields tending to be more durably constructed), the angle of impact, and the construction, weight, and velocity of the bullet. Generally, lighter bullets, those with rounded noses (like pistol rounds) and lower velocities, will tend to deflect more. Lightly constructed bullets may even break up on impact.
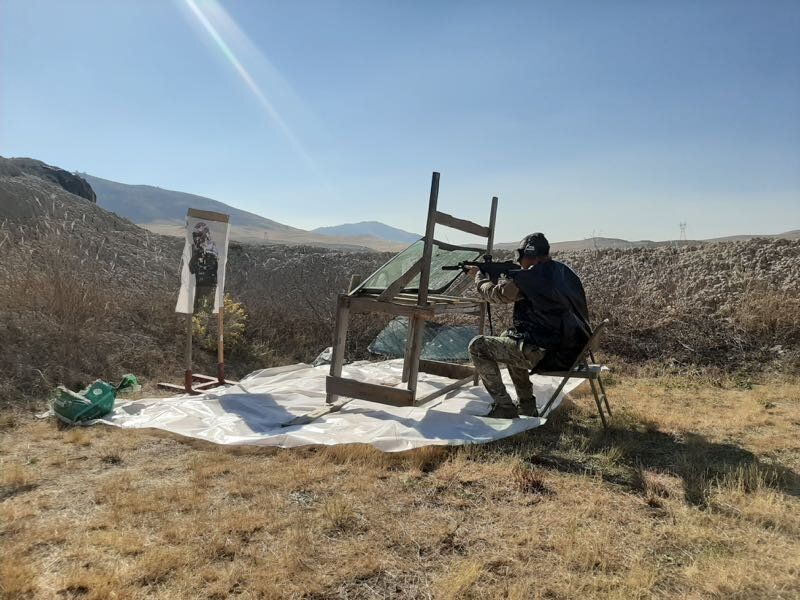
We had a chance to see most of these factors in action. Eric set up a windshield in a wooden stand, angled as if we were shooting through it out of a vehicle. He set up a target approximately a hood-length away. He had some wraparound goggles and a hefty bag with arm and head holes cut in it for protection from glass fragments.

We shot through the windshield with various handgun and rifle rounds. The deflection was quite significant, especially with the windshield at an angle more typical of a sedan. Some handgun bullets (Winchester White Box and unbonded hollowpoints) broke up passing through the glass. 5.56mm rounds tended to keyhole. After the first round the laminated glass starts to loose its integrity. Repeated shots through the same area of the windshield resulted in less deflection and no keyholing.
Eric pointed out another way to solve the deflection problem with a rifle is to fire your initial shots, then drive the muzzle through the hole to deliver additional fire. This is easiest to do with bare barrels that extend a good distance past the handguard and don’t have a front sight tower.
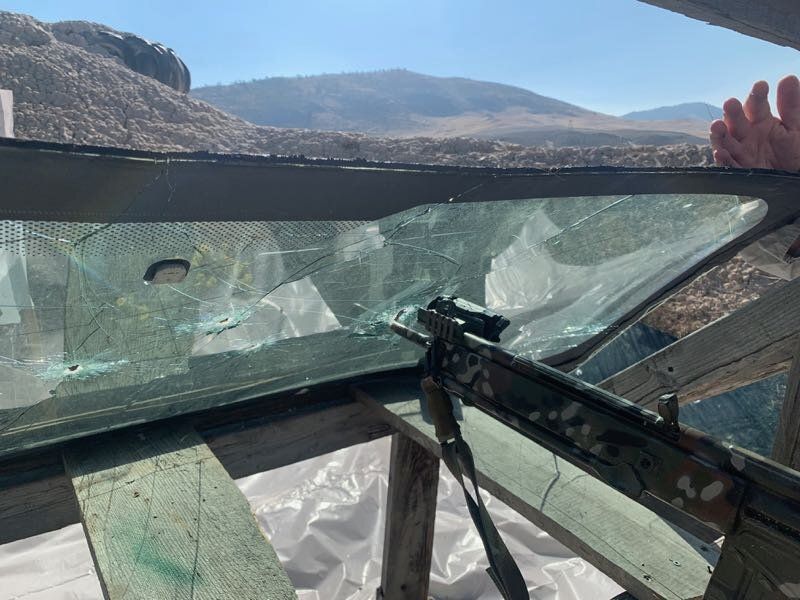
The other big takeaway is that shooting through windshields generates a massive amount of tiny glass fragments, both inside and outside the vehicle. This is enough to make eye protection look like a really great idea.
We flipped the stand around and simulated some shooting from the outside in. If you’re not trying for a precision shot (hostage in the car, etc.), the shorter distance between the glass and the driver means that deflection is less of an issue. However, we saw several rounds, including 55 grain M193 ball, come apart going through the glass. A Speer bonded 62 grain projectile, on the other hand, stayed in one piece and made a nice round hole in the target. 12-gauge buckshot worked well at hood-length ranges, but at 15 yards, the combination of spread and deflection meant that few pellets actually hit the target. Slugs blew right through the glass with no issues.
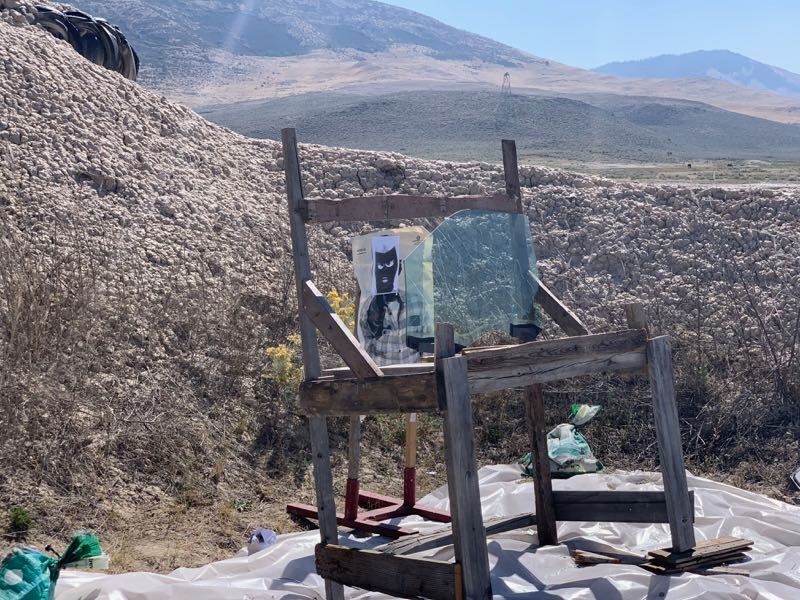
One of the significant changes in automobile construction the past few years is that federal regulations mean side windows on many vehicles have changed from safety glass that crumbles into tiny cubes after any penetration to laminated glass, constructed similarly to windshields. Eric had one of these new side windows to test out. When we shot it with some handgun rounds, we found that it was actually splitting the bullet in half. The bullet broke up on impact. While part of the round penetrated and hit the target (albeit with some deflection), the other part stayed outside the vehicle and ricocheted off the glass. Eric said he’d seen the same thing with some of his sniper rounds.
He also had an older side window made of safety glass. As advertised, it crumbled into tiny cubes upon impact (with just the window tint holding them in the frame).
With that, we cleaned up all the glass (aided by the plastic Eric had put town earlier) and broke for lunch.
After lunch, we moved on to auto body panels, starting with doors. Shooting the door from a 90° angle, both .223 and 9mm blew right through it. Some parts of a door will stop most rounds, like locks or parts of the window mechanism.
Aside from those special cases, the only ammo that had trouble with a broadside door panel was 12-gauge buckshot, which performed poorly. Slugs, of course, blew right through it. At this point, between the results on windshields and body panels, we were all pretty convinced that slugs were a much better option against vehicles than buck. Eric took a moment to talk through how he teaches “select a slug” drills with shotguns.
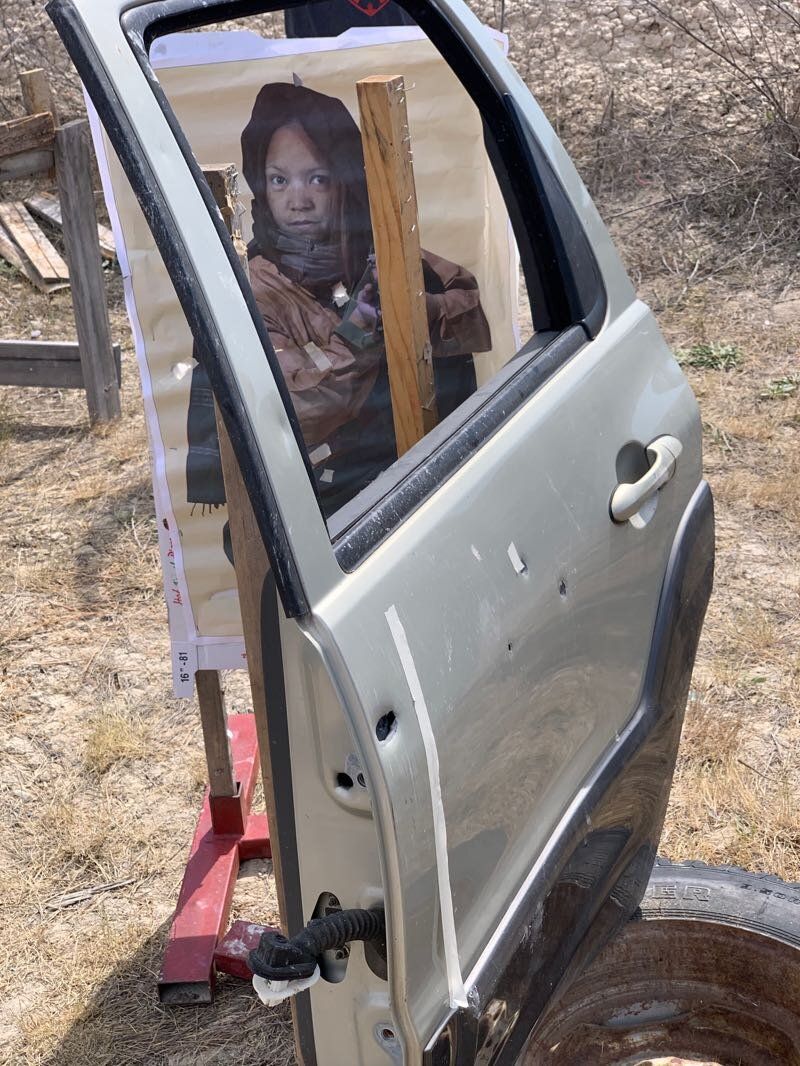
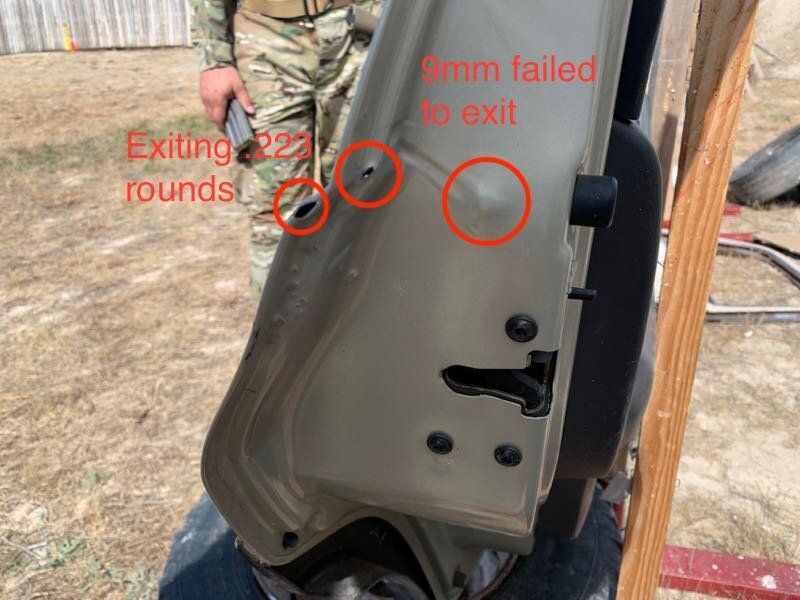
Things changed quite a bit when Eric angled the door panel as if you were taking a quartering shot on the vehicle, or someone was using a partially opened door for cover. Both 9mm and 55gr .223 failed to penetrate. They went through the outer panel but were captured within the door itself. A Speer bonded 62gr round penetrated but experienced substantial deflection. When Eric brought out the 7.62x51, the door panel went from cover to concealment. It’s not surprising that the black tip AP round went through with no issues, but so did vanilla M80 ball.
Eric brought out a door from a much older vehicle, something from back in the ’50s, and we shot at it to compare the effects. Even at a 90° angle, it demonstrated the ability to resist penetration by even NATO spec 9mm submachine gun ammo about 50% of the time. They don’t build ’em like they used to.
One rule of thumb you often hear is not to crowd your cover. Among other reasons, a round might ricochet off it and hit you as you expose yourself to take a shot. While I’d heard of this before, Eric arranged one of the most compelling demonstrations that I’ve seen. He brought out the hood of a truck and positioned a target behind it. The idea was to skip a rifle round off the hood from about 25 yards and see the effect of varying the distance from the hood to the target.
Of course, doing this effectively requires placing the bullet with less than an inch of vertical deviation (including accounting for mechanical offset). When Eric tapped me for the job, my first thought was, “Crap.” I think I did a pretty good job, though.
One interesting thing is that despite the holes in the hood, the bullets did not penetrate and pass through to the underside. They ricocheted off. When the target was further away, the impact was much higher on the target. If you were standing right next to the hood and stuck your head up, you’d have ended up with a bullet in it. Stand back 10-15 feet, and it would zing right over your head. While there are circumstances that require getting closer to cover (adversaries in elevated positions, limited depth behind the piece of cover, etc.), if you can get back further, get back further.
This lead to some more general discussion about using vehicles as cover. Eric talked about how he positions his patrol rig during traffic stops to effectively use it as cover if necessary. I’ve read about stuff like this before and participated in similar discussions. However, the work we’d done with live fire against vehicle components lent an immediacy and a greater understanding of the dynamics. Using vehicles as cover in a fast-moving gunfight isn’t just about putting a car between you and the bad guy; it’s about understanding the angles, what parts of the vehicle are most resistant, and how to shoot around (and through) vehicles (as we’d done the day before). I feel like this class left me with a much better understanding of these issues than anything I’ve taken before.
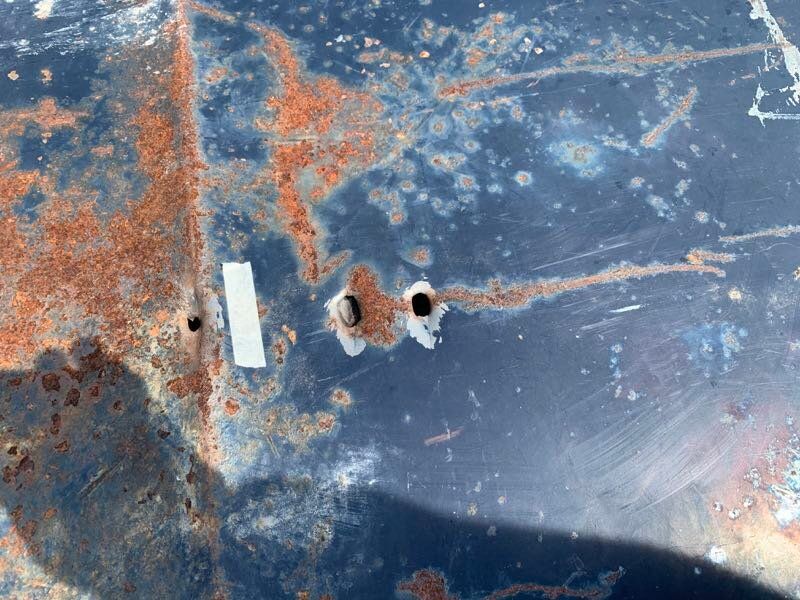
Our last major subject/target for the day was wheels and tires, from both the perspectives of using them for cover and deflating them to stop a vehicle. We started out shooting at tires. Even 9mm could penetrate even a reasonably heavy truck tire, but the resulting hole was less than half the diameter of the original round. It may take a couple of minutes for this to deflate fully, followed by a few more running on the deflated tire before it shreds and really impedes the vehicle. Rifle rounds also punch a nice small hole on entry, but on exit, they tended to blow out a larger hole, potentially leading to a faster deflation.
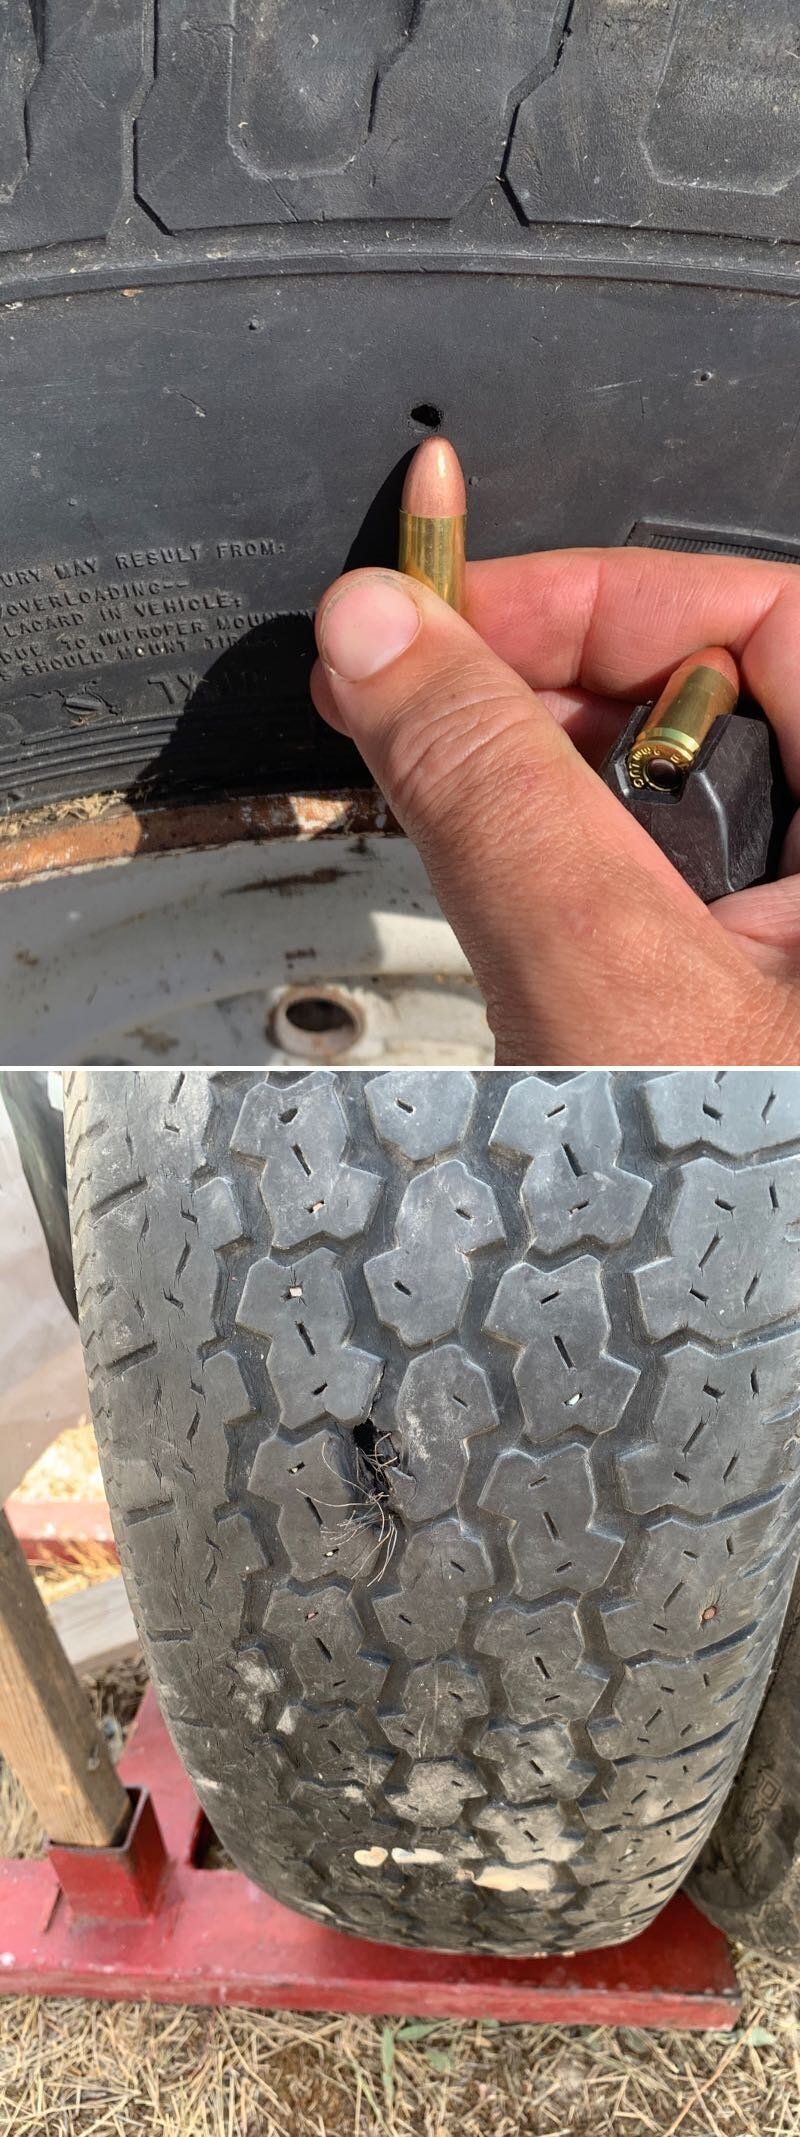
From a quick deflation perspective, punching a hole in the rim, which doesn’t have the same sort of partial self-sealing properties as rubber, is even better. However, tire rims proved impressively resistant to handgun rounds. Even .223 rifle rounds tended to penetrate one side of the rim but not exit the other. Rims make pretty good cover against these calibers, and that’s before you throw in brake rotors, differentials, and other stuff that usually lives behind them. There’s a reason urban prone behind the tire is widely taught for fighting behind vehicle cover. .308, on the other hand, punched right through both sides of the rim.
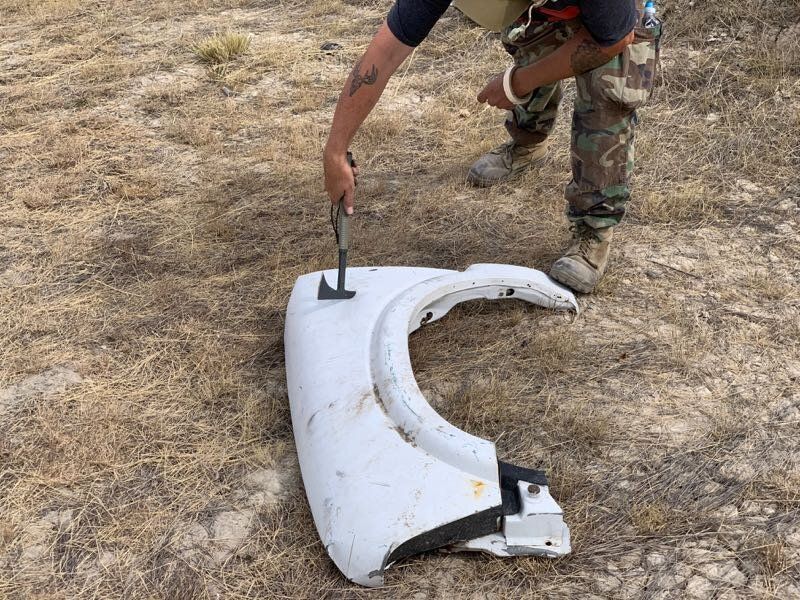
Eric loves tomahawks, and before we finished up, he brought out his RMJ Shrike and demoed both using it to pop tires and its capabilities against bodywork should you need to use it as an extraction tool. I may need to think about adding a hawk to my kit.
As mentioned earlier, all this demonstration and experimentation gave me a much better appreciation for the dynamics of using vehicles for cover and defeating an opponent trying to take cover behind a vehicle. It’s one thing to hear someone talk about how to do this stuff. It’s another to see a well-designed demonstration of why we want to do things a certain way.
The other big take-home lesson for me was the effectiveness of .308 against vehicle cover. It’s not a death ray that’s going to crack engine blocks, but against most parts of a car, whether it be glass, bodywork, or rims, .308 was clearly at another level when it came to defeating automobile cover.
We packed up our gear and headed back to Eric’s. There, he cooked up some excellent antelope steaks, along with mashed potatoes and roast zucchini fresh from the garden. Along with some excellent local beer that a student had brought, I broke out a bottle of bourbon that had been waiting there at Eric’s place for well over a year. Another student had a bottle of fine Kentucky bourbon as well. Between all of us, we managed to make some pretty serious dents in both bottles. It was another evening of fine fellowship as we sat and talked late into the night. Eventually, we all turned in, ready for a final day of training tomorrow.
Sunday
Today’s material emphasized the team tactics elements of the course. Eric started out talking about how to position multiple people within the vehicle to provide maximum coverage.
While he laid out specific seating plans and fields of fire for 2-4 shooters, there are a couple of commonalities that underlay these decisions. First off, the driver is primarily there to drive, not shoot. When the vehicle is in motion, he’s not going to be contributing to outgoing fire. When the vehicle is stopped, he can cover a sector, but due to the steering wheel and the need to be able to quickly shift back to driving, it’s probably better for him to do so with a handgun or a very compact weapon like a submachinegun rather than a full-size rifle. Finally, unless the vehicle is completely disabled, the driver probably isn’t going to dismount at an extended halt, so someone else needs to be available to cover the driver’s side of the vehicle. So if you have three or more people, at least one of them should be in the rear driver’s side seat to provide cover on that side.
One thing that may not be obvious at first glance: if you have only one shooter in addition to the driver, it’s often advantageous to put them in the rear seat, so they can shift from one side to the other to deliver fire in both directions, as well as shooting forward between the seats and to the rear out the rear window.
Eric also drew on his experience doing executive protection work to talk about where to position a non-shooting protectee. While most of us may not be doing bodyguard duty, we probably have people in our lives (children, grandparents, etc.) who will not be pulling triggers if something goes down. The same basic principles apply. Indeed, he talked about how he and his wife split the duties of loading their son and providing cover.
Next up, we talked about multiple vehicles. Here, if you have less than four trigger-pullers per vehicle, you want to distribute them among the vehicles and situate them to provide maximum coverage in all directions.
Eric also talked about how to position vehicles at halts. For short stops, staggering vehicles to either side provides better fields of fire. For extended halts, pulling vehicles abreast of each other and angling them can create working space between them for providing medical care, sheltering protectees, etc.
Generally speaking, if your vehicle is operable, driving away from danger is preferable to dismounting and fighting it out (most of us are not on search and destroy missions that require slugging it out with the enemy). However, if driving away is not an option (due to a disabled vehicle, blocked routes of escape, etc.), it will often be better to dismount and fight on foot rather than remaining in an unarmored vehicle.
The general rule is that the people closest to the threat will provide initial covering fire from inside the vehicle while those further away dismount. Once they’re out, they provide covering fire while those who are still mounted get out. The tricky bit is that if you’re initially taking cover behind a vehicle, the most obvious point of cover will often put anyone dismounting later directly in the line of fire. This both raises the chances of accidentally shooting a teammate and inhibits effective outgoing fire.
The best solution is for the first folks to dismount to take cover behind something other than the vehicle itself. If no additional cover is available, you may have to either just move away from the vehicle and go prone, or get creative. For instance, for a threat to the rear, when the front seat passenger dismounts while those in the back seat provide cover, he might hop up on the hood and shoot over the vehicle, providing cover while providing a clear area for the rear passenger to dismount.
Eric also covered some finer points, such as when to close doors after you disembark (leaving a clear space for your teammates to move), and when closing the door is just going to slow your teammate down because he’s going to have to reopen it again. Similarly, you may decide between leaning out the window to shoot to the rear or shooting through the rear window based on whether a shooter is right or left-handed.
After Eric went through the explanation with the aid of a whiteboard, we ran through some of this dry using vehicles out on the range.
I made a bit of a stupid choice here. Getting out of a vehicle with contact to the right or left sides involves the folks on the side towards the threat squirming over the center console or across the back seat. At this point, my back was feeling quite a bit better, so I decided to give it a try. That was a mistake. Despite not being in armor, I re-tweaked it, probably worse than I’d done on Friday. While I was able to solider on, I had to deal with it not only for the rest of the class but also during my hikes the following week.
If you’ve got more than one vehicle and one gets disabled, you want to get the folks from the disabled vehicle into one of the operable ones so you can get the hell out of dodge. The procedure for doing this is called a cross deck rescue.
Once the disabled vehicle’s crew has dismounted (if they’re able), the working vehicle pulls up near the disabled one. If possible, it’s best to pull up on the side of the vehicle away from the threat. This provides a bit of cover. Generally, the driver will remain in the vehicle, and one guy will assist any injured personnel in boarding the rescue vehicle. Any other shooters will get out and provide covering fire. Any uninjured personnel from the disabled vehicle get on board, followed by the rescue vehicle’s dismounted crew. Of course, since you’re doubling up two crews in one vehicle, you may not have enough seats for everyone. If you can’t crowd everyone in, some or all of the dismounts from the rescue vehicle can either hang on the running boards or rear bumper of the rescue vehicle or walk out, using the slowly moving rescue vehicle as rolling cover.
Before we tried this dry, Eric did a safety brief specifically focused on keeping anyone from getting run over. One of the dismounts would be the “ground boss” and would be responsible for making sure everyone was aboard and calling “last man” (or safely out of the vehicle’s path if they were walking out). The driver does not roll the vehicle until they get the word from the ground boss.
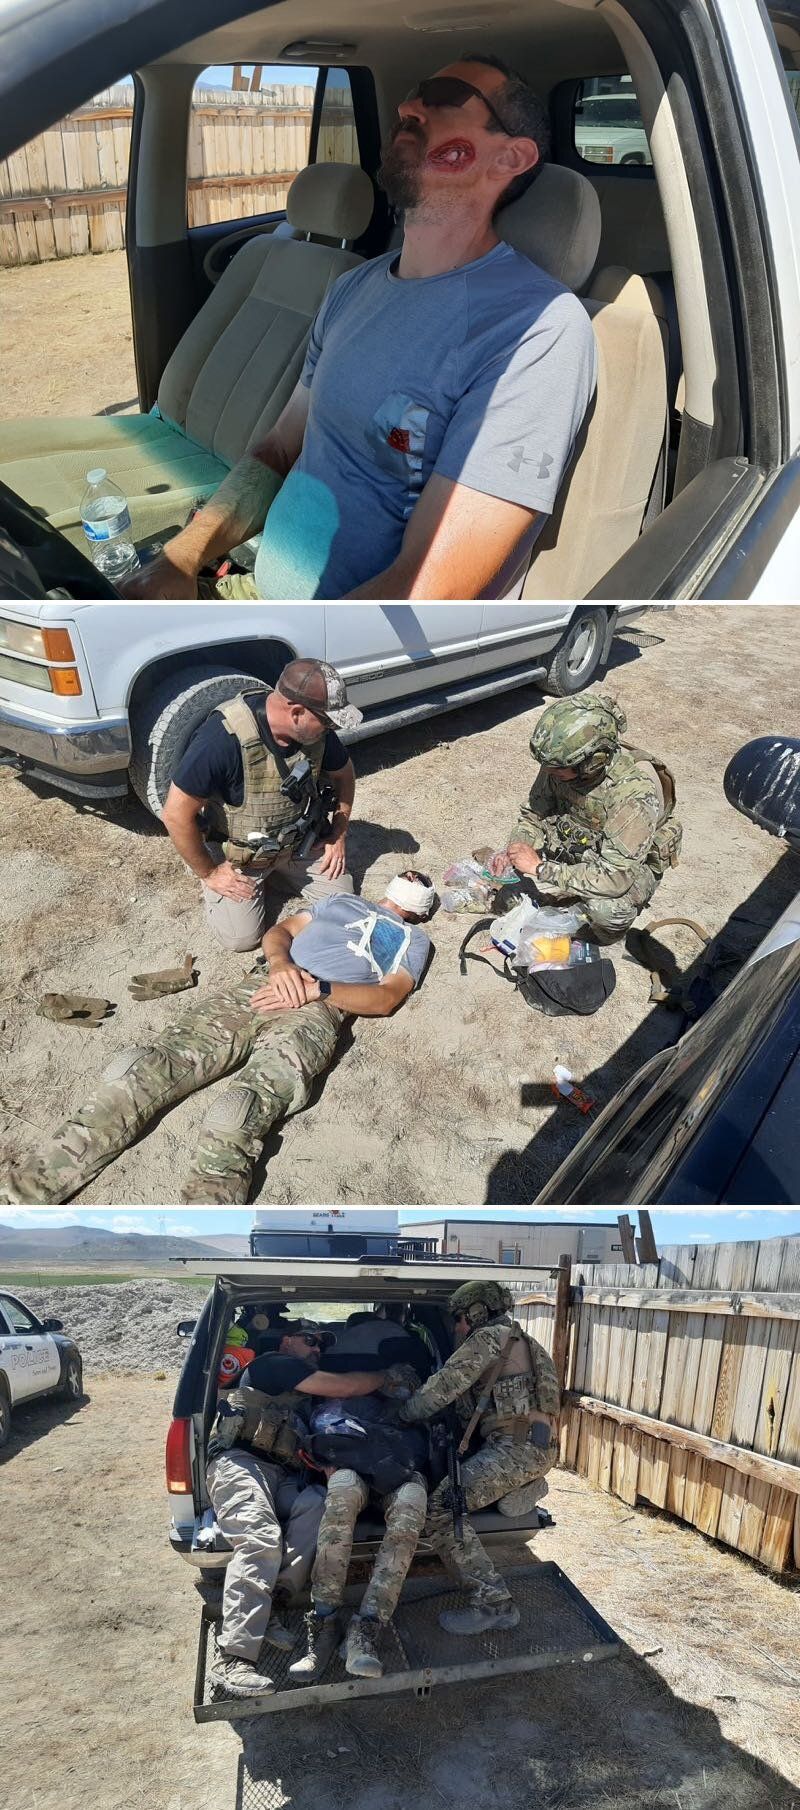
We ran a couple of cross deck rescues dry, with one injured guy in the disabled vehicle who could only move with a rescuer’s assistance. After these went well, Eric decided to up the ante with a more seriously injured crew: one ambulatory with assistance, one unconscious. Eric tapped me for the unconscious guy. He had some cool rubber wounds that he applied to give the rescuers something visual to diagnose (I got a face wound and a sucking chest wound). The guys doing the rescuing had a big bag of medical training gear Eric provided and came in blind, not knowing what they’d find.
They got me out of the driver’s seat, carried me behind the vehicle, and applied some initial aid. After they hauled me up on the tailgate and prepared to roll out, Eric threw them a curveball by calling out that I’d stopped breathing. They had to get out an Ambu bag and start supplying air for me (they also started administering chest compressions, which wasn’t strictly necessary based on the info Eric had given them). I’m sure trying to provide CPR on the tailgate of a (slowly) moving vehicle was quite a challenge.
After lunch, we moved on to rolling rescues. This is where you use a slow-moving vehicle as cover to move up and rescue a downed individual from an area that’s under threat. While the driver moves the vehicle up at a walking pace, the cover man walks alongside, using the vehicle for cover and keeping his rifle on the potential threat. When they’ve got the vehicle between the downed individual and the threat, the driver hops out and loads him in the vehicle. Then they roll back out, with the cover man keeping his rifle on the threat the whole time.
We ran these drills with one driver and one cover man, then started throwing in a second cover man (requiring the two cover guys to be aware of their teammate’s position while still using the vehicle effectively as cover). We also did some runs providing cover from inside the vehicle, which trades some safety for speed.
Next up, we were able to do a bit of shooting from moving vehicles. Eric set up a couple of steel targets along a long berm. He drove us by them in his Pathfinder, with the shooter either in the driver’s side rear seat or the front passenger seat. The setup required us to do this at a fairly short range (around 10 yards), so we stuck with handguns, rather than shooting rifles at steel up close. There were also some pretty rigorous safety protocols to ensure that the driver didn’t get muzzled, especially when shooting from the seat just behind him.
Even at a moderate speed, this was bouncy enough that it definitely required more point shooting than using the sights. We were able to get rounds on steel, but there were plenty of rounds in the berm as well. It reinforced the idea that if you’re going to drive, drive. Shooting from a moving vehicle is hard enough; dividing your attention between driving and shooting would make it even worse.
For our last segment of the class, we got used the long dirt driveway from the road to the range to run some convoy operations. We started with two vehicles, and at least one person in each vehicle had a radio, so we could coordinate. We started with a security halt to open up the locked gate out at the road, then turned around and practiced responding to IEDs and doing a cross deck rescue.
There was a bit of faffing about as we figured out how to coordinate and apply what we’d learned in an environment that was a bit different from the square range. Once we got the hang of it, Eric threw in a third vehicle (which also meant fewer people in each rig, which required some adjustment). We ran some more security halts and another cross deck rescue.
With that, Eric called an end to the class. Everyone else had to get on the road. Since I had another week in Montana lined up, I stayed the night at Eric’s place before heading out to the Cabinet Mountains Wilderness for another couple backpacks. On Saturday, I started the three-day drive back to Kansas.