I recently took CQB Entry/Breaching with Eric Pfleger. I’ve been encouraging Eric to teach a breaching class ever since we did a bit of shotgun breaching work in the Total Gunfighter class a few years ago. When Eric announced this class, I was all over it.
Gear
This class isn’t as gear-intensive as some of the sniper classes I’ve taken from Eric. However, I’d be doing a six-day backpack in the Bob Marshall Wilderness after the class, which meant I needed all of my backpacking gear in addition to the gun stuff. Fortunately, I had stashed some of the gear I would need for the backpack with Eric after the sniper class earlier this summer. This allowed me to get everything into two big suitcases and a carry-on.
I brought my 10.5” SBR AR with a Gemtech GMT-556LE suppressor. This gun is set up with a carbon fiber handguard extending over the can so that you can get the benefit of an extended handguard with a short overall length. I’m running an Aimpoint Micro T-1 on a riser. This is the first rifle class in a couple of years that I’ve shot with a red dot rather than a low power variable optic.
As my secondary, I brought my Roland Special Glock 19X with a Mayhem Syndicate comp and Trijicon RMR optic. For the class, I’m running a Surefire X300 rather than the Crimson Trace Lightguard I’ve had on there in the past because that’s what’s compatible with the holster I’m using. This was also my carry gun on the trip; this is the first time I’ve carried this pistol as my primary self-defense implement. I also brought along a 10mm Glock to carry on the backpacking trip after the class.
If I’d been driving to this class, I probably would have brought a plate carrier, but since I flew, I kept it simple and just went with a belt rig. In this case an AWS Light Assaulter belt with a couple of Tyr Tactical mag pouches, a Safariland ALS holster, a dump pouch, knife, multitool, and some medical gear.
I bought a set of Mechanix breaching gloves that offer a bit more protection than the Overlord gloves I usually wear. I ran Multicam for the class (in part because I love the Crye combat pants).
Friday
My flight to Montana on Friday went smoothly (though I think I shocked the lady at the check-in desk when she asked me to open up my rifle case). Eric picked me up at the airport in Missoula. After hitting some stores and grabbing dinner, we headed out.
Saturday
Eric and I left for the range about 7 am. The venue for this class is a private range. Eric had mocked up a wall with a door in it out of some 2x4s and an old door. This morning he immediately got busy sketching out a floor plan in orange paint on the ground for us to do some tape drills on later that day.
Everyone else in the class rolled in before the start time, and we began with the usual waivers and a medical brief. Eric went through the safety lecture, though for this class in addition to the standard gun stuff (the four rules) he also spent some time on the hazards created by breaching, like broken glass and crushed fingers. Eye protection and gloves are essential in this class.
Eric talked a bit about what we’d be covering today and tomorrow. The class would mostly concentrate on CQB for the solo operator and 2-man team, though we might touch on larger teams a bit. He emphasized that this would be a class that required using our brains much more than our trigger fingers.
That said, we started out exercising those trigger fingers. Eric had us do some pistol work, emphasizing the accuracy standards required in a CQB environment. We started with some one-hole drills, then move on to controlled triples, then three-round bursts, followed by a cranio-ocular shot.
As mentioned earlier, gloves are essential in breaching and the CQB environment in general. However, most of us don’t spend a whole lot of time shooting in gloves (and if we do they’re usually thin, dexterous gloves rather than well-armored breaching gloves). Eric talked a bit about the kind of gloves he likes. As it happened, every single student in the class brought the same Mechanix Impact gloves. We put these on and went through the same shooting drills as we’d done earlier. The gloves definitely added to the degree of difficulty. Eric gave us the option to continue shooting gloved up or to go back to shooting barehanded until we got to the breaching stuff. I decided to take on the challenge and shoot the class gloved.
Next up, Eric had us practice turning and addressing targets to our 3 o’clock, 9 o’clock, and 6 o’clock directions. Thus far we’d been shooting at roughly “halfway across the room” type distances. We stepped it back to across the room distance and practiced maintaining the necessary level of accuracy at the longer distance.
We had some rain on and off, ranging from light sprinkles that weren’t even worth breaking out the goretex for to a slow drizzle.
With the review of shooting fundamentals out of the way, we moved on to room entries. Eric started by talking about doing this solo versus a two-man team. The solo operator faces the challenge of trying to cover the entire room. However, he also has the freedom to maneuver any way he wants. In a two-man (or larger) team, you have help covering other sectors. However, your movement is restricted by the need to keep lines of fire clear. Essentially, team CQB has a lot more rules. Everyone needs to be on the same page and follow these rules to avoid friendly fire or situations where a teammate can’t shoot a bad guy because a team member is in his line of fire.
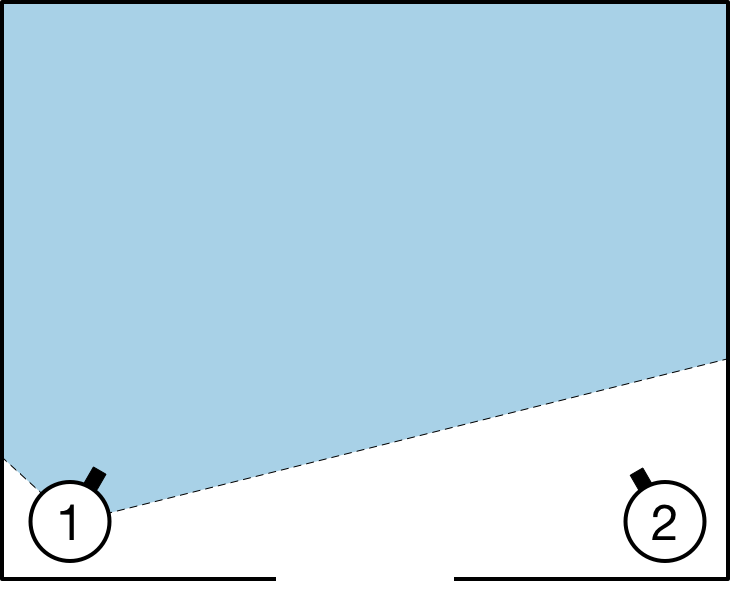
As a solo operator, you probably want to seek out a wall or corner as your position of domination. This restricts the area you need to cover to 180 or 90 degrees, rather than 360.
In a two-man team, your points of domination are defined for you: the corners of the room closest to the door. This gives each man a sector of fire that extends from his corner to the back of the room to one meter off of his teammate.
Eric talked a bit about static entries versus dynamic entries. In a static entry, you’re doing more of a search; nothing is pushing you to move faster like there would be in a hostage rescue or active shooter situation. In a static entry, you conduct a slow, deliberate angular search from outside the doorway (slicing the pie). See as much of what you can see from the outside before going through the door.
Once you’re ready to enter the room, however, you always do it dynamically. No inching your way in the door, move quickly through the fatal funnel.
While we were still doing these as one-man entries, Eric did introduce an element of team operations into it from the very start: announcing that you were coming out of a room rather than just stepping through the door weapon-first and potentially triggering a friendly fire incident. He had us do this by sticking our hand through the door, giving a thumbs up and announcing “one coming out.”
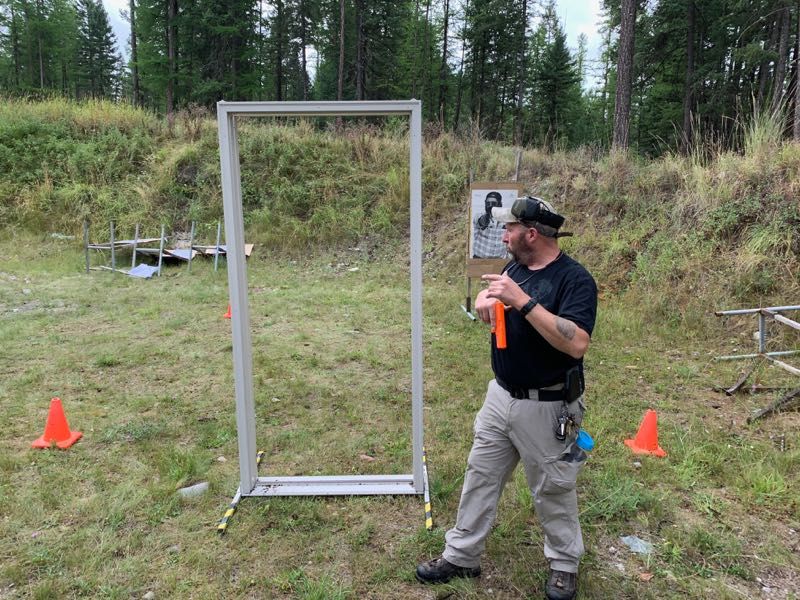
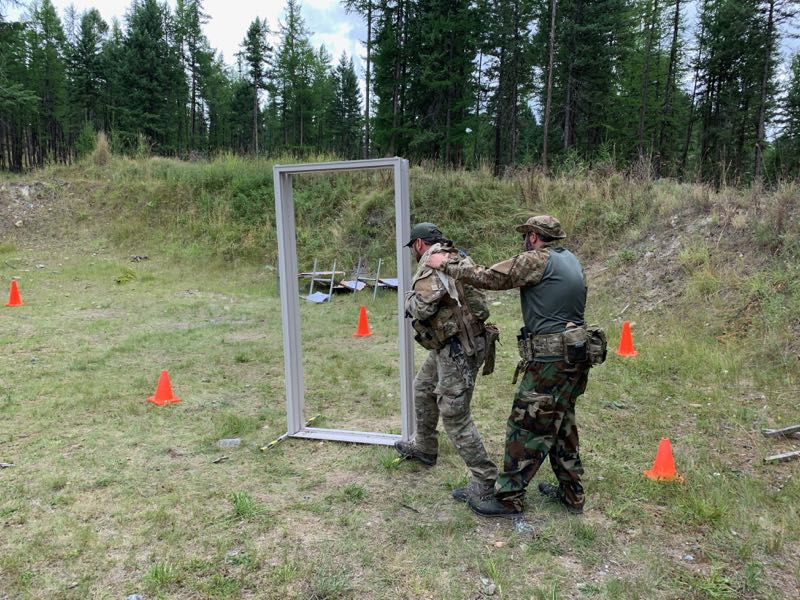
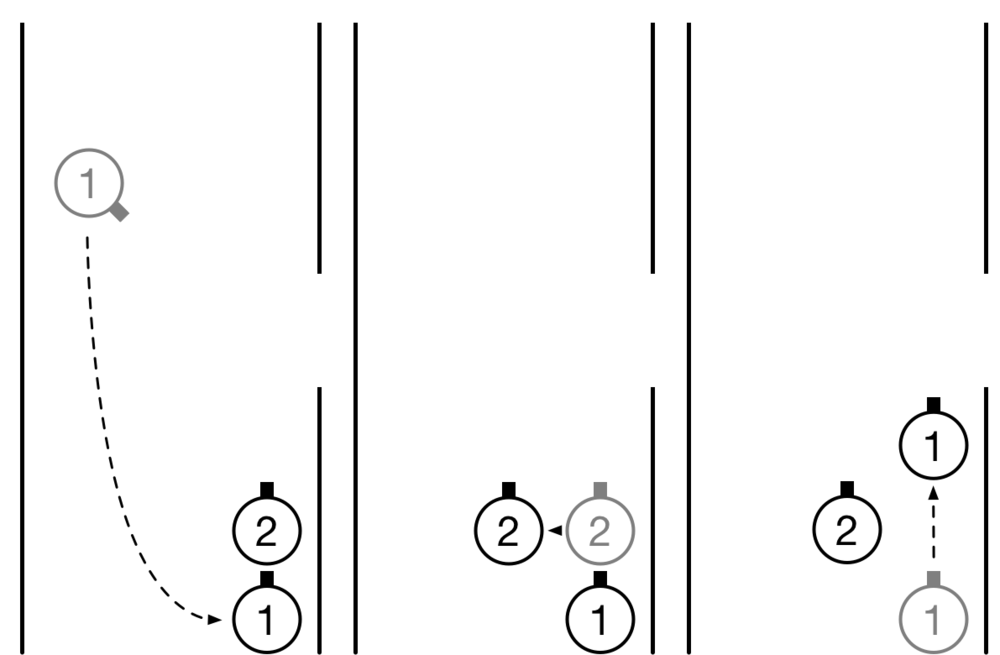
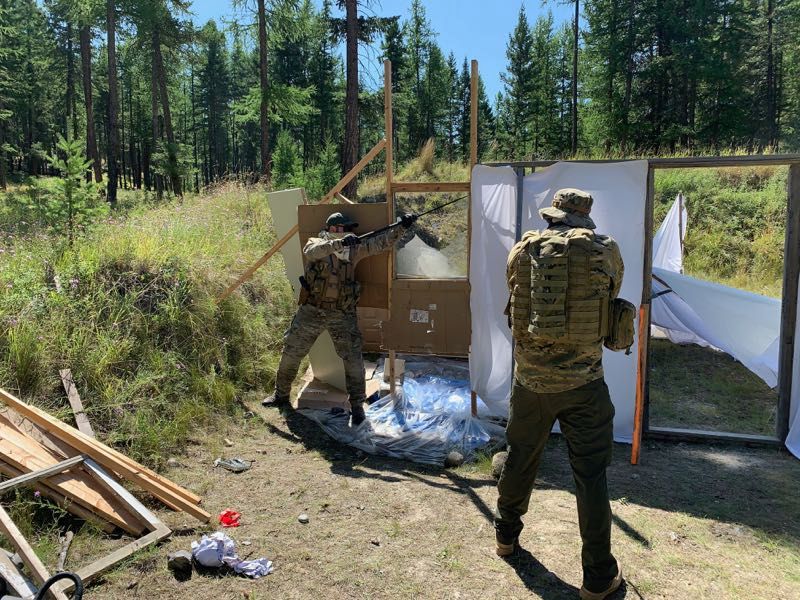
We ran some one-man room entries dry. Eric had a freestanding doorframe (without any door in it) and used some cones to mark out the corners of the room. We practiced going through the door and heading to each of the corners nearest the door, either cutting through the doorway diagonally and going to the corner on the far side (an “X” entry) or pulling a U-turn and going to the corner back on the same side we started on (a buttonhook).
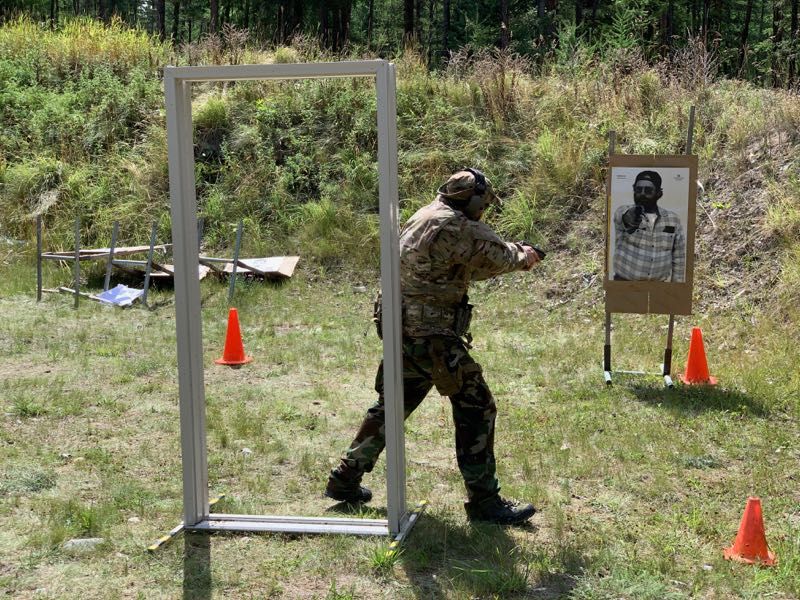
Once everybody had a grasp of the fundamentals, we went live fire. Eric set up a nice progression, gradually increasing the complexity of the problem starting with one target in one of the rear corners, then moving on to two targets in the back of the room, then one target in one of the front corners and one target in the rear of the room.
Thus far we’d been dealing with an open door (well, actually, no door in the doorframe at all). At this point, Eric introduced the problem of a closed door. The first order of business with a door is to figure out whether it’s inward opening or outward opening (looking for hinges is a good way to do this). All things being equal, it’s better to work a closed door from the knob side of the door rather than the hinge side, so you don’t have to reach across the door to open it. That said, it’s not always possible (the knob side might require exposing your back to a potential threat, for instance).
You can quietly wiggle the knob to do a “soft check” to try to tell whether the door is locked. Since breaching was a subject for the second day of the class, today we would always be finding the door unlocked.
If you’re doing a slow methodical clear (a static entry), you can throw the door open and back off a few steps, then start conducting your angular search. There’s a bit of an art to throwing open a door like this. You want to shove it hard enough that it will swing all the way open, but if you swing it too hard, it will bounce off the wall and close itself. If you’re doing a dynamic entry, on the other hand, you’re going through that door the moment it opens.
We practiced opening doors and did some live one-man entries.
Next up was two-man team entries. As with any team CQB, this is much less free-form than solo CQB. Instead, you’re executing predefined roles and following the “rules” of team CQB. The most important rule is “The #1 man is never wrong.” The first guy through the door is going to have to choose a direction, whether he’s going to go to the corner to his right or the one to his left. Regardless, the second guy’s job is to go in the opposite direction. #1 goes right, #2 goes left, and vice versa.
With a two-man entry, you can either position yourselves on either side of the door or stack up with both of you on the same side, one behind the other.
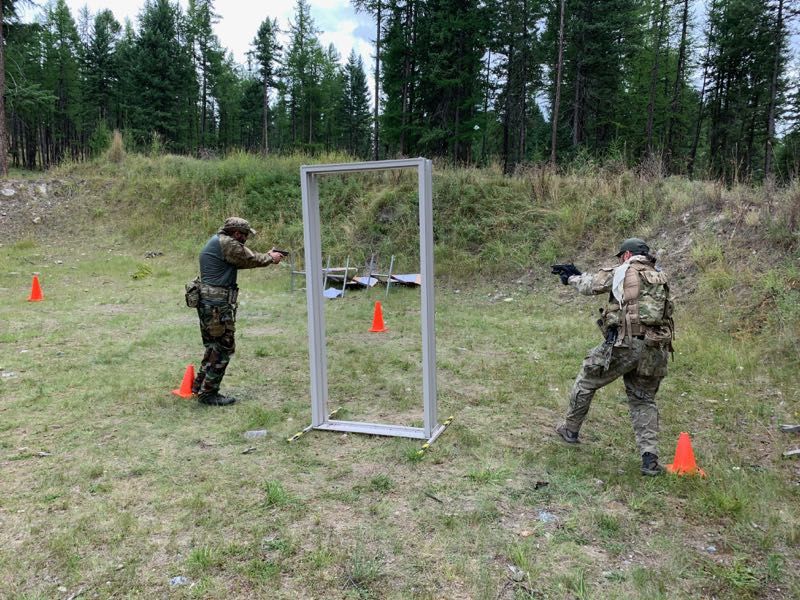
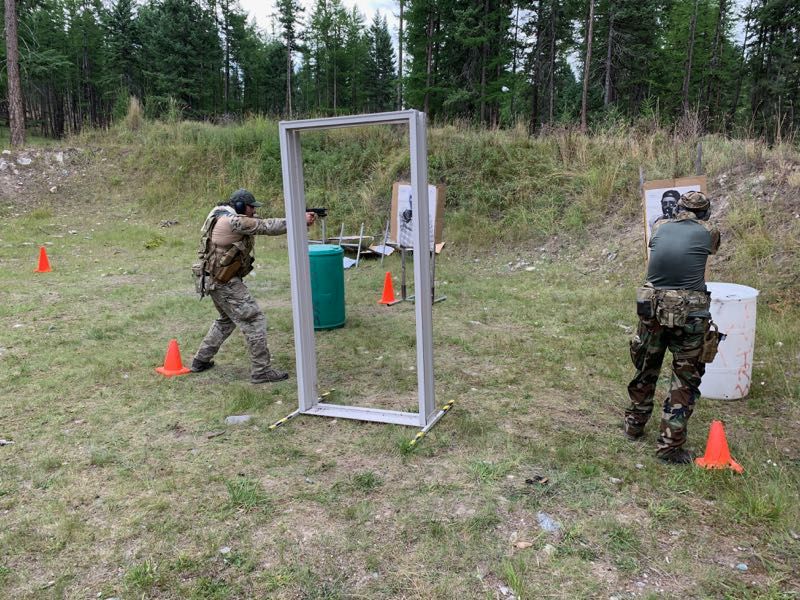
We did two-man entries dry until everyone was comfortable with it, then went live. Again, Eric had a nice progression. Starting with each student just shooting their “own” target (the one on their side of the room), then progressing to putting rounds into both targets one after the other.
Eric talked a bit about three-man entries, where the #3 man moves just inside the doorway, out of the fatal funnel but staying along the wall rather than going to the corner like the #1 and #2 men do.
Next, we moved out of the “shoot house” area Eric had set up to the floor plan that he’d marked out on the range with paint. Eric talked about how to handle corridors and hallways. In something like an active shooter situation where you have a compelling motivation to move quickly, you’re not going to be entering rooms or even conducting a detailed angular search. You’re just moving towards the sound of gunfire and directing your attention (and gun muzzle) towards potential threat areas as you pass. If you’re doing this as a solo operator, it will almost certainly mean leaving yourself exposed to potential danger areas and relying on movement to provide some measure of security. Eric had each of us move down the corridor at “active shooter speed,” addressing the danger areas as we moved.
In a situation where you’re conducting a more deliberate search, you can pie corners and clear rooms as you go. Still, if you’re a solo operator, this will involve exposing yourself to areas of unknown danger. When you can only look one direction at once, there’s not really any alternative in a complex environment.
When moving down a wide hallway in a two-man team, it’s best to have one guy on each side of the hallway providing cross cover. This means each man’s primary sector is actually along the opposite wall since this allows them to get a better view into rooms and side corridors.

As you come to open doors or side corridors, the guy on the opposite side will conduct the angular search. Where it gets tricky is when you have danger areas on both sides that need to be searched (a four-way “+” intersection or open doors directly opposite each other). In those circumstances, all you can do is search as much as you can without exposing your back to the other danger area. When the time comes to step out, each guy turns and addresses the danger area on their own side of the corridor rather than the opposite side.
One thing that Eric showed I hadn’t seen before was having the guy who did the angular search of a room slip back around behind the guy who’s covering down the hallway and step between him and the wall to become the lead man in the stack. This lets the guy who’s seen most of the room be the first one through the door.
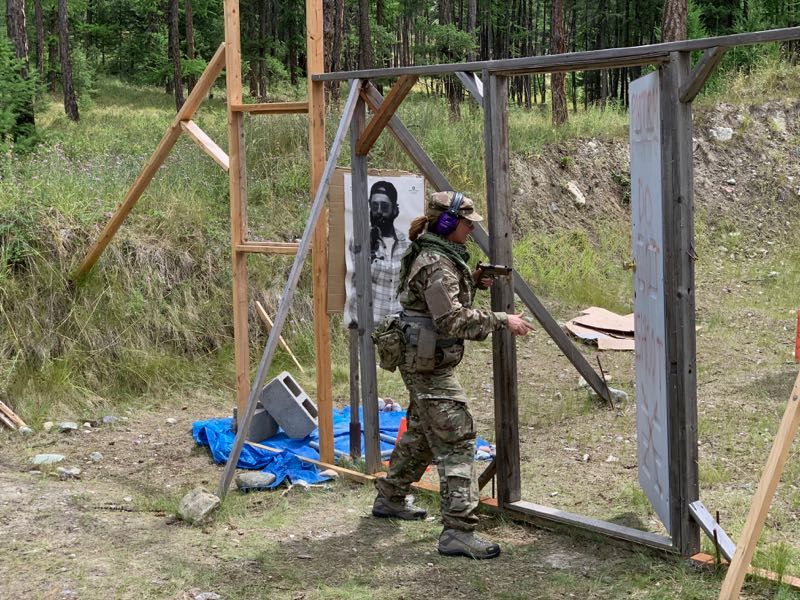
All of the rooms that we’d done thus far had been center-fed: the door was in the middle of one wall. Eric talked briefly about how to handle corner fed rooms where the door is up against one of the corners.
He also covered T-intersections. They have quite a few similarities to 4-way intersections, but you don’t have to worry about covering down the hall.
Finally, he talked about handling small rooms, like a janitor’s closet or similar that are too small for a full team. For these, you call out “Short room!” To let your teammates know that you’ll be going in solo. Depending on how confined the space is, you may even transition from a carbine to a pistol.
This covered all of the features that Eric had marked out in the floor plan, so we paired up into two-man teams and cleared it using the skills we’d just been taught.
We moved over to the front door of the house where there was half a flight of stairs and Eric talked about how to clear them. With one man they’re a tough problem. This is one of those situations where you need to move quickly and deliberately to get through the danger area. With two men, you can have one cover from the bottom of the stairs or the landing while the other moves up the stairs. Once he gets to the top, the first man can move up.
We did some dry work on the front steps, then moved inside and did a pair of half-flights with a landing as a two-man team.
I asked Eric about dealing with stairs with open treads (so someone could be hiding behind the stairs and see your ankles as you come down) especially when working from the top of the stairs, like down into a basement. Eric noted this would be a great time for a mirror on a stick. While most of us don’t usually carry around mirrors, he noted that the selfie cameras in our smartphones essentially turns them into mirrors (he uses them to subtly look behind him when doing PSD work).
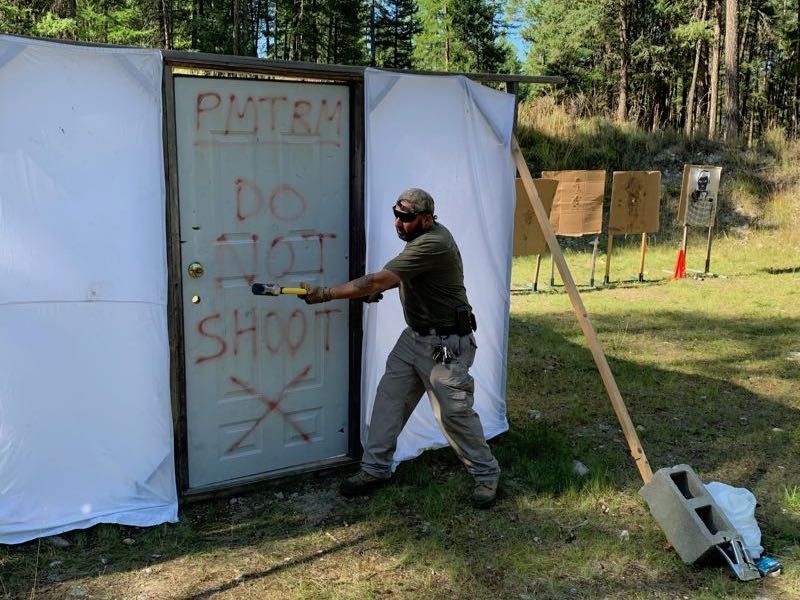
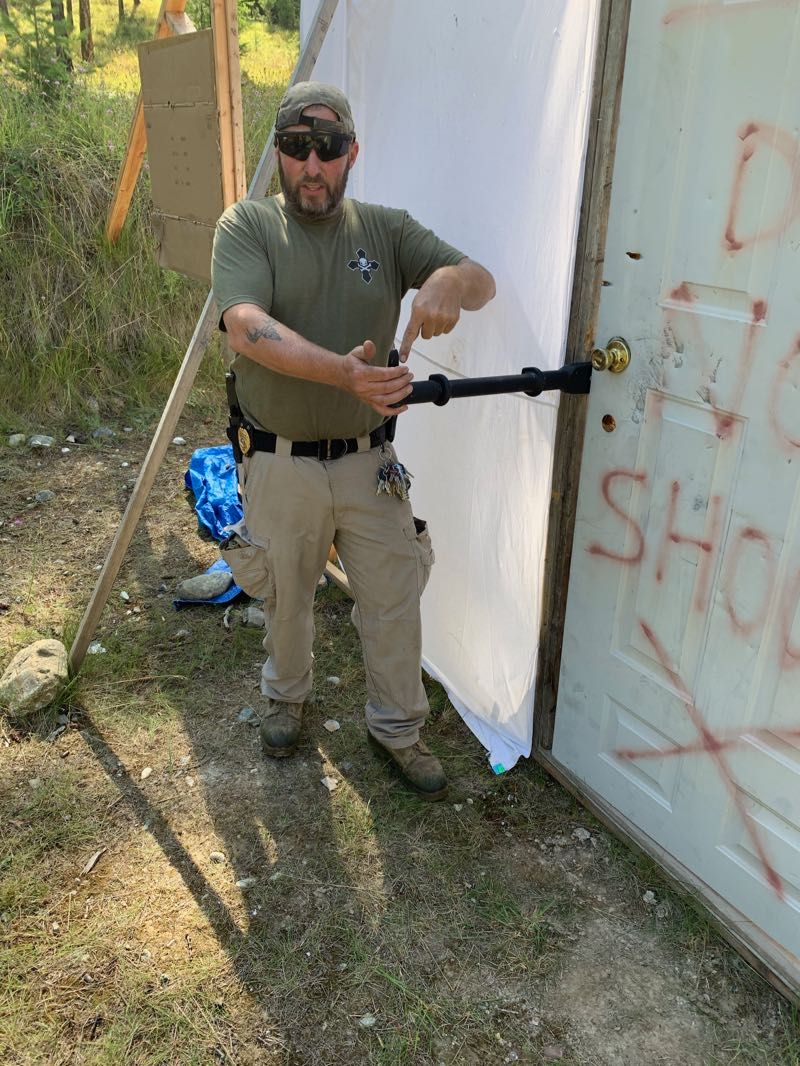
To close out the day, Eric talked about mechanical breaching tools that we’d be using tomorrow. While he showed off some of the high-speed SWAT stuff a lot of it was stuff you can buy at Home Depot.
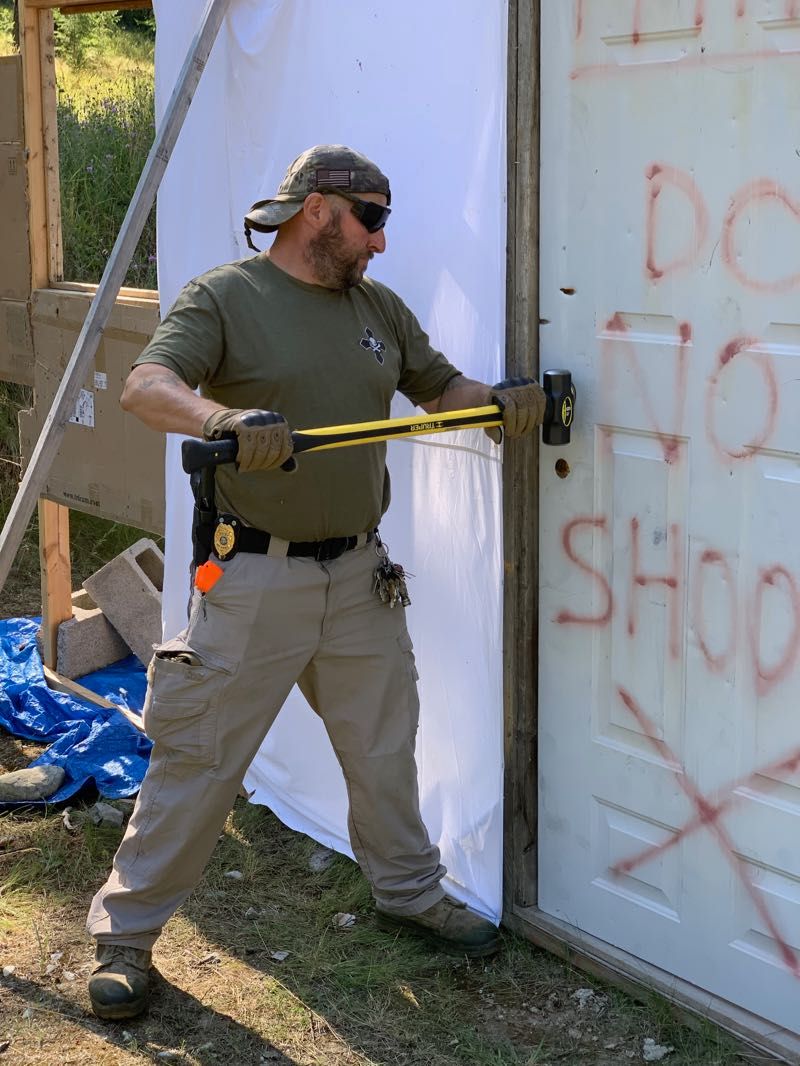
Probably the most versatile tool he mentioned is a simple sledgehammer in the 6-10lb range. It can be used both as a hammer and an improvised ram. You can cut the handle down to about 18 inches to make something that can easily be carried by an assaulter on a simple loop of webbing or paracord.
Prybars are another widely available tool with lots of breaching applications. A fence post setter makes a good improvised ram (particularly if you add some weight to it). Wrecking hammers and chainsaw wedges are more accessories than primary tools, but they are quite useful. Given the penchant for active shooters to chain and padlock doors shut, perhaps one of the most useful breaching tools is a pair of bolt cutters.
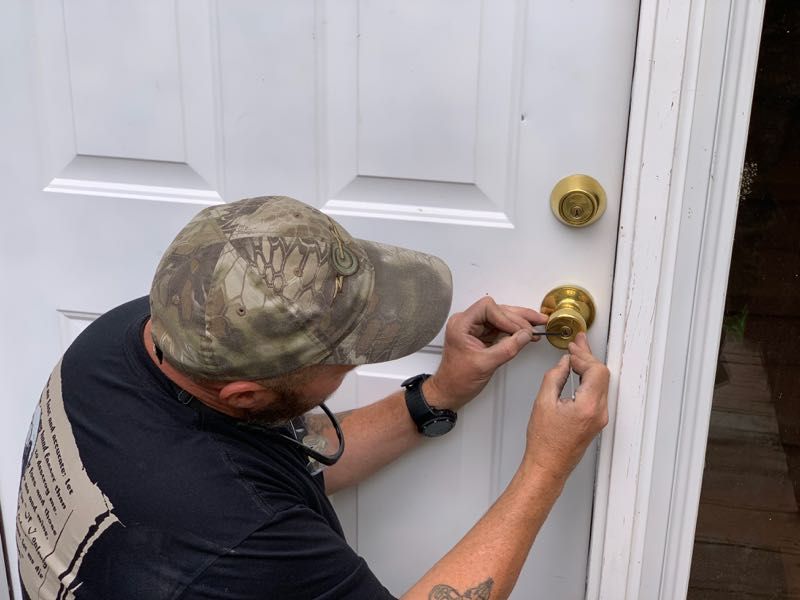
On the professional side of things, the multitool of the breaching world is a Halligan: a bar with a prybar like fork on one end. The other end has a hoe-like blade called an adze and, sticking out to the side 90 degrees from the adze, a sharp spike. There are also “tactical” versions of the hammer and ram which are arguably somewhat better (for ten times the price). Finally, Eric showed off a set of lock picks, which are useful for stealth entries.
With this, Eric called a formal end to the training day. We adjourned to the house to enjoy some adult beverages and watch some breaching videos. Eric had some great examples of firefighters breaching hardened doors. After the videos, we adjourned to a local brewery for dinner and some beer before heading home.
Sunday
Eric and I rolled out about 7 am. After we got to the range and everyone got their gear squared away we watched a few more of the videos that we hadn’t been able to see the previous evening. Eric took the opportunity to give a short lecture on using flash-bangs. We didn’t have any to play with for this class, but they are very useful tools.
Our first subject for the day was port and cover. This is when a team breaks out a window and has a team member lean through it to provide cover (and if necessary, gunfire) into the room.
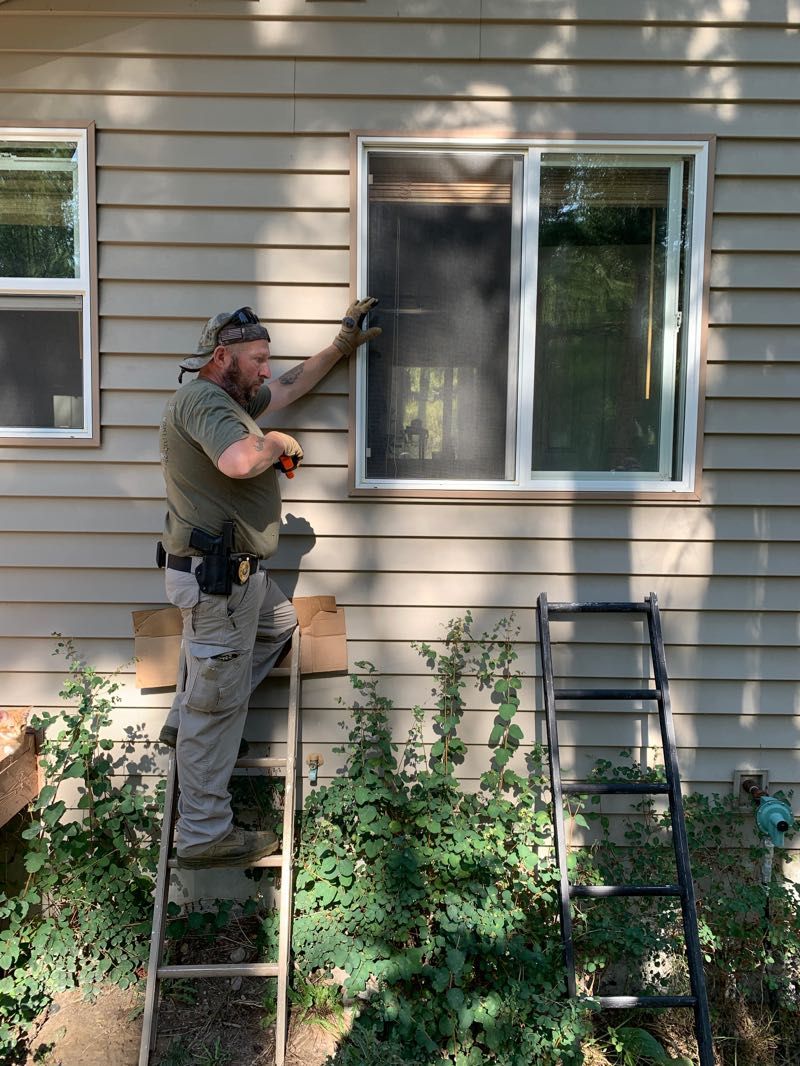
Problem #1 is that a lot of windows are too high to do this from the ground, especially on buildings built with crawl spaces or mobile homes. The easiest solution for this is the breaching ladder. Eric brought out a couple of his to demo. He prefers short (4-6’) sections of standard aluminum ladders rather than the specialized tactical ones. The ladders can also be used as racks to which you can attach other breaching tools, improvised litters, etc. They’re also often about the right height for reaching windows on a bus as well.
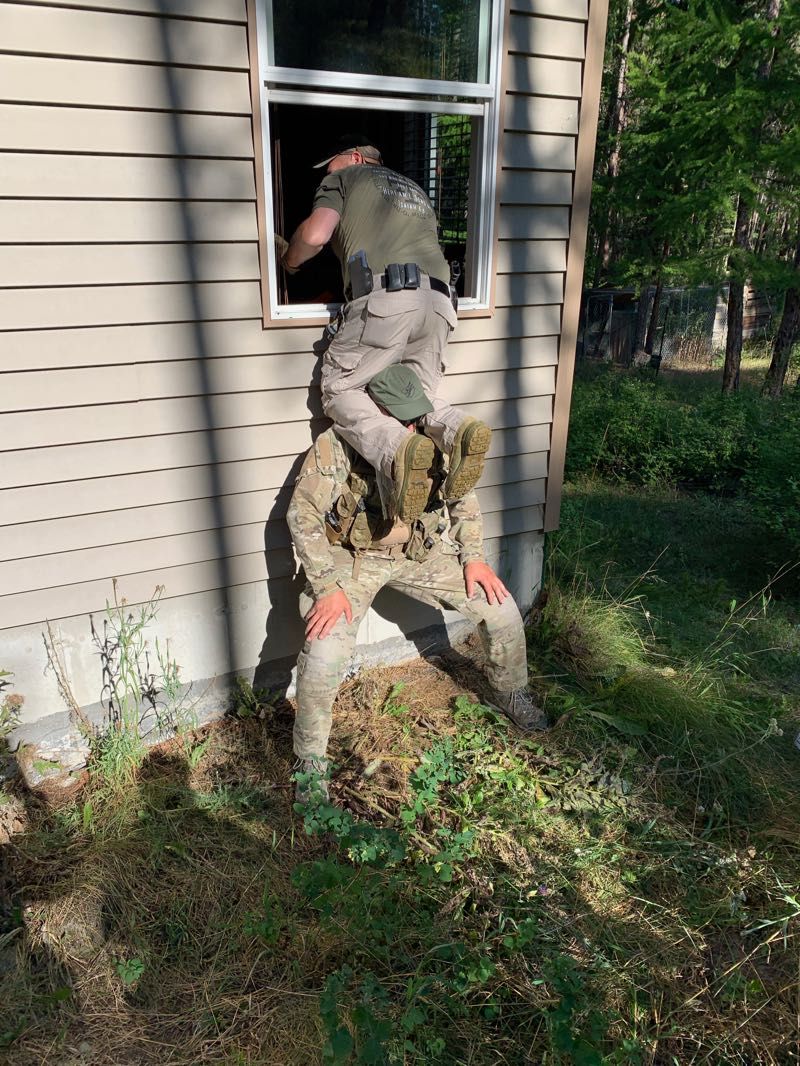
If you don’t have a ladder, Eric demoed a technique where one team member can sit back against the wall and make a saddle with his hands to boost another team member up where he has his knees on the bottom guy’s shoulders. This puts the top guy at about the right height for many windows. Another improvised technique is to jam the fork of a Halligan into the ground and lean it up against the side of the building, then step on the adze end and balance there.
We moved on to knocking doors open. As mentioned, Eric likes sledgehammers for this. He showed how to use them both as an improvised ram and as a hammer. Eric gave us the opportunity to knock open some doors using a hammer.
Next up were prying tools like the Halligan or a prybar. With these, you’re generally not so much prying the door open directly as you are bending the part of the frame with the locking mechanism away from the door. Chainsaw wedges can be a useful adjunct here, allowing you to pry an opening and use the wedge to hold it open while you reset the tool to pry further.
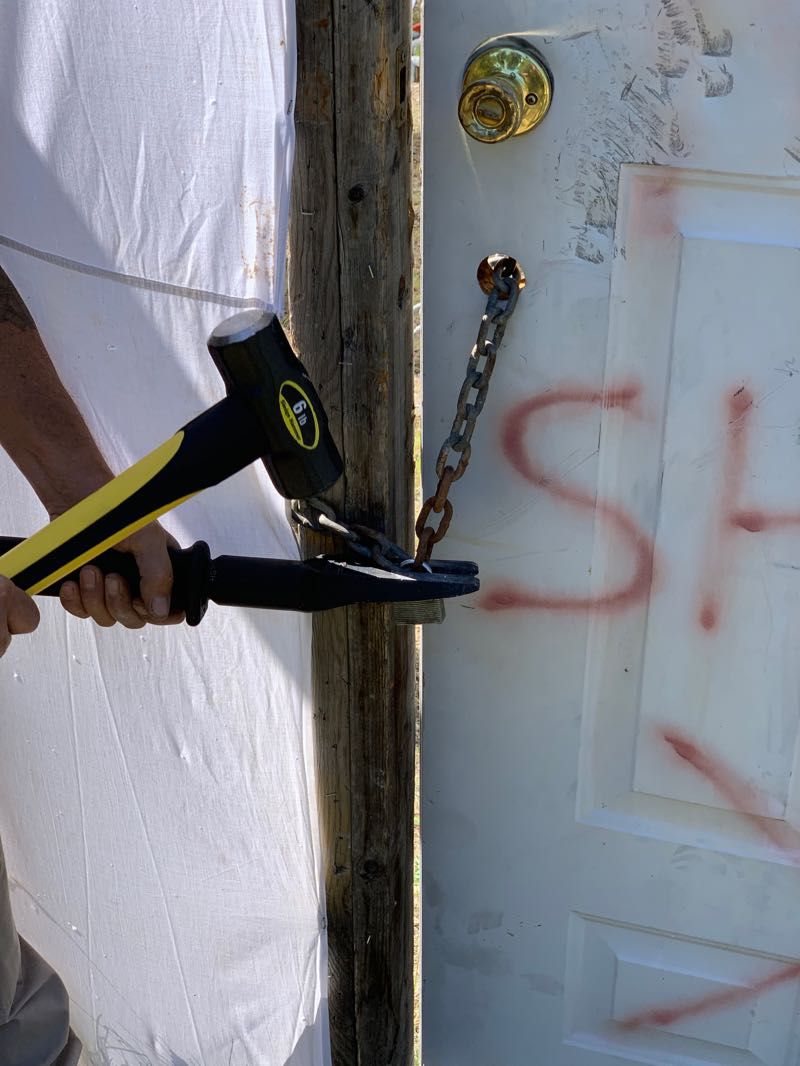
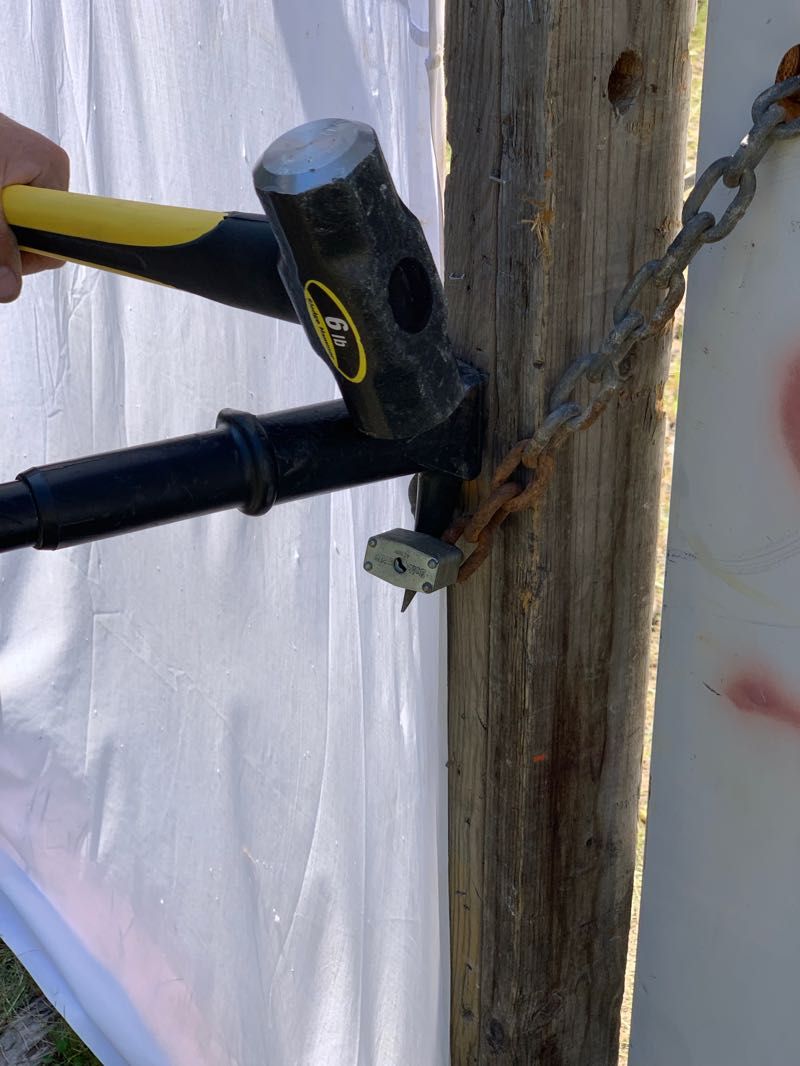
Eric showed how to use a Halligan to break padlocks, both using the tines of the forked end and using the spike through the hasp. Sometimes more specialized tools are better: in this case, bolt cutters will make shorter work of most chain than the Halligan will of the padlock. Eric even showed a technique for using bolt cutters one-handed, by bracing one handle against your body and pulling the other handle or using your body to press it against the doorframe.
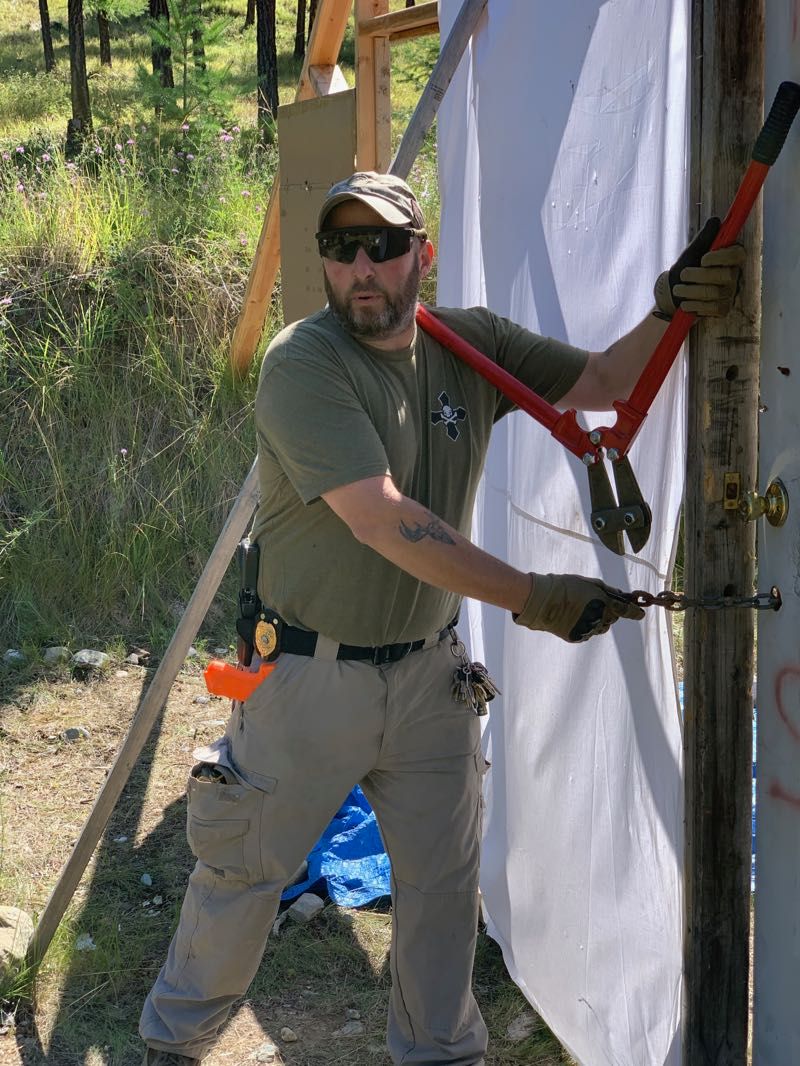
Eric gave everyone a chance to snip some chain with the bolt cutters and break some padlocks using the Halligan.
When we last left port and cover, we had covered the use of breaching ladders and other techniques for getting up to higher windows. We still need to get through the glass. The brake and rake is the purpose-built tool for this. It’s basically a long rod with a weight at the end and a hook to pull blinds or curtains clear. Being such a simple implement, there are a bunch of ways to improvise something, including using breaching ladders, rebar, big sticks, or even your rifle.
To use the break and rake, you stand with your back to the building and swing with your hips and torso. Unlike auto windows this is not safety glass, so breaking a window will leave lots of big, sharp, guillotine-like shards. Getting these out before someone sticks their torso through is critical. To do this we use a Z-shaped motion, bringing the break and rake vigorously to the upper near corner, driving it across the top of the window, bringing it down to the lower near corner, and driving it across to the far lower corner.
Eric covered how to use the rifle to break glass as well. While you can swing it like a break and rake (especially if it has a fixed front sight tower) a more effective method is to muzzle strike the glass in a pool cue like motion.
Everyone had a chance to use the break and rake to bust a window. I found the breaking part fairly easy, clearing all the glass shards with the Z motion was more difficult. After everyone had gone with the break and rake, Eric had two panes left for folks to try using the rifle. I volunteered for this and used one of Eric’s AKs to break the window. Muzzle striking through the glass was pretty straightforward. Knocking out the rest of the glass definitely left me longing for a longer implement than a 16” AK.
Despite taking measures to contain all the broken glass, we spent a fair bit of time getting it cleaned up. Once that was done, we moved back to shooting. After a brief warmup with our handguns, we brought the carbines out. We started with some simple pairs to the body, moving on to failure to stop drills, and transitions to pistol. As with the handguns yesterday we did a lot of work on turning and addressing targets to our sides and rear.
With the basics covered, we moved on to some simple two-man room entries. Again, Eric started simple and ramped up the complexity. Initially, each team member just shot “their” target. Then we moved on to shooting both targets, then threw in some proactive pistol transitions.
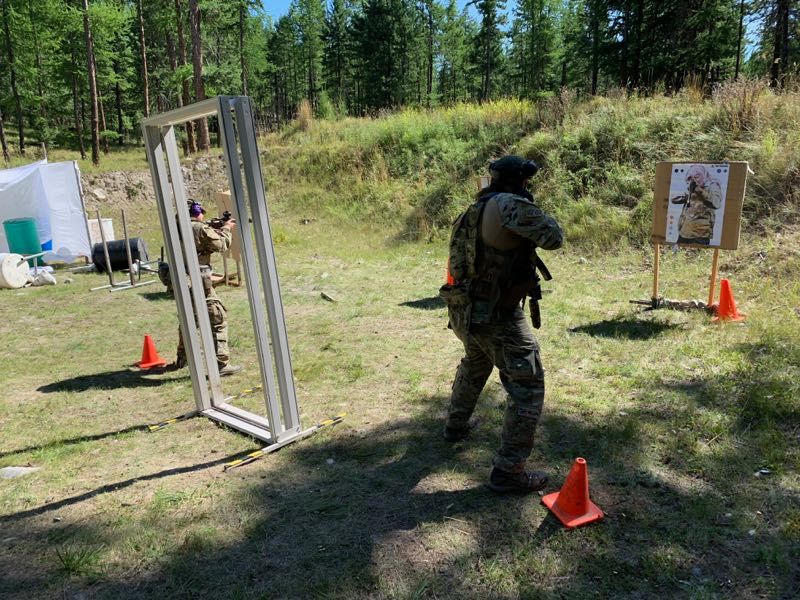
Eric set up a couple of scenarios in the shoot house. These emphasized decision making and target discrimination. They were set up for solo operators, and we shot the first scenario with our pistols. Eric had three targets set up in the first room, all hostile. Two were located where you could engage them from outside the door while pieing the room. The third was back in a hard corner where you had to make entry to get him. Out a door at the back of the room, Eric had set up a photo target of a uniformed police officer. I managed to ID her and not shoot. I did some verbal communication in an attempt to persuade her not to shoot me. At that point, Eric called the scenario.
For the second scenario, we ran with our carbines. Eric briefed us that this was an active shooter situation with ongoing gunfire, so we were required to make a dynamic entry.
I threw the door open and accelerated through the fatal funnel, then immediately decelerated when I was confronted with a target at close range in the hard corner that I was headed for. I spent what seemed like forever, but was actually less than half a second, trying to identify what he had in his hand. Failing to ID it, I moved on to the next target. This one was much more obvious: a terrorist with an AK-47. He got shot.
The third target in the room was a photo target of someone with a handgun facing away. Because he wasn’t shooting at me, I took a moment to go back to the first target and was finally able to ID the thing in his hand as a cellphone. I switched my attention back to the target facing away and moved up to see what he was shooting at. It turned out to be another AK armed terrorist, who I shot. I then told the target facing away from me to drop the weapon, and Eric called an end to the scenario.
I have to say that Eric did a great job using the photo of an armed individual facing away in a context where it absolutely made sense. I’ll give myself some kudos for not shooting the guy with the phone or the guy facing away from me. However, I have to take some of those kudos away because I totally missed the fact that the guy facing away from me had a badge on his belt. I tunnel-visioned and missed it.
Every other student shot the guy with the phone, leading to some discussion from Eric about “outrunning your headlights” during the debrief.
Next up was the instructional block that really started it all for me, ballistic breaching with a shotgun. Eric talked a bit about shotgun ammo, showing off some breaching rounds (and some of the other specialty rounds he had in his kit). For our purposes though, Eric said that buckshot was just as effective as the specialty breaching rounds at a fraction of the price.
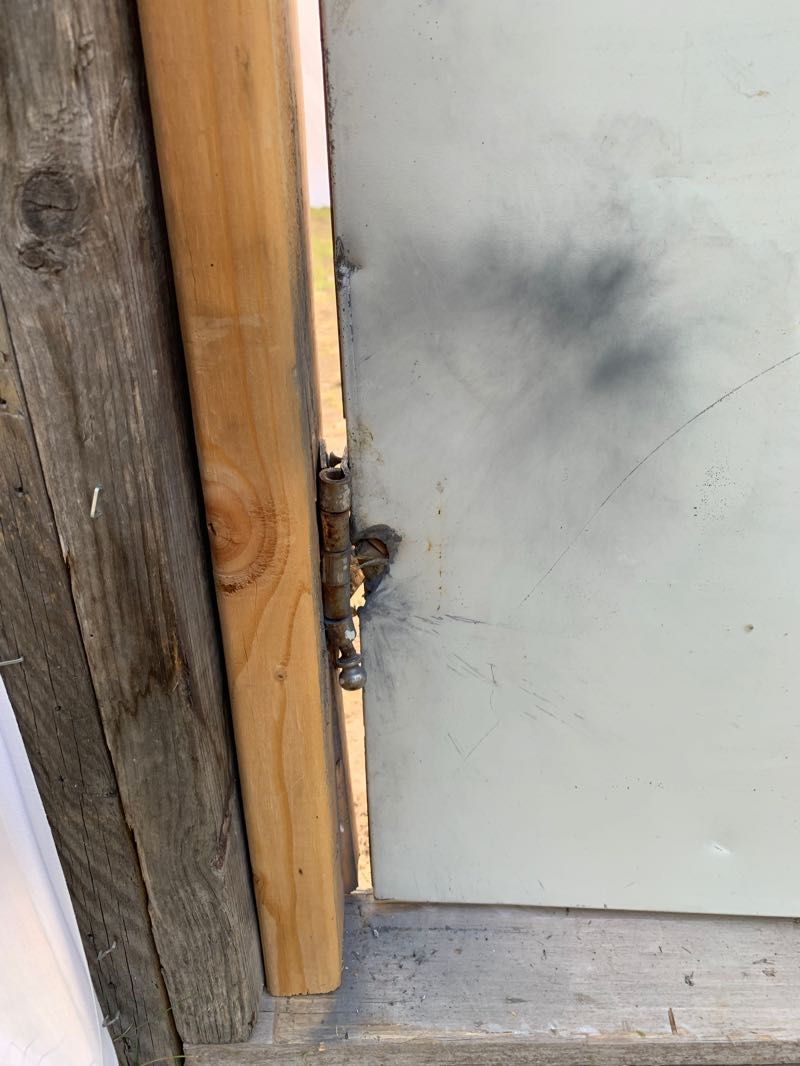
When breaching with a shotgun, the primary technique is to attack the hinges. You want to do this at about a 45-degree angle to the door, so the doorjamb will help contain the buckshot and hinge hardware rather than posing a danger to anyone in the room. For the top and bottom hinges on a door you also want to angle upward or downward at 45 degrees as well, for similar reasons (for middle hinges on 3-hinge doors you’re going to be closer to horizontal).
When doing ballistic breaching, you definitely want to have the assaulters stack up on the knob side of the door, away from the line of fire. This does leave the breacher standing right in the doorway, which means he needs to work fast (Eric did talk about potentially having a guy with a ballistic shield standing on the hinge side and having the breacher work around him, using the shield as cover). After shooting the hinges, the breacher kicks the door in, if necessary, and rolls off to the side, reloading his shotgun (or transitioning to his carbine if the breaching shotgun is a secondary weapon). He steps back into the stack at the back of the line.
We put up a fresh door with some hinges, and everyone had a chance to shoot at least one hinge. This really gave me an appreciation for what a shotgun breach is actually doing. We’re not destroying the door where the hinge attaches (the hinge is 3” long, and the shotgun round is only about 3/4”, since it hasn’t had any time to expand). We’re not destroying the hinge itself either. Indeed, we’re relying on the hinge as a whole to stand up to the shotgun blast (one of the reasons this doesn’t work with a more penetrating weapon like a rifle). Instead, we’re delivering a tremendous blow to the solid metal hinge, knocking it away from the door and stripping out the screws. This leaves the door dangling by a few stripped screws at most.