I recently had the opportunity to attend Eric Pfleger’s Total Gunfighter class in Paradise, MT. This was a three day multi-platform class covering pistol, rifle, and shotgun. Eric is one of my favorite instructors and a three day class makes it a bit easier to justify flying all the way from Kansas to Montana.
Eric also sweetened the deal by offering to put me up at his place and feed me lots of wild game while I was out there. At that point I could hardly say no.
While I’ve trained several classes with Eric, all of those have either been focused on long range marksmanship, or on infantry or reconnaissance type skills. I’ve never had the chance to take a straight up gunfighting class from him.
Gear
This class presented a difficult balance between bringing suitable equipment and avoiding paying the airline a fortune for all of my bags. So I tried to be fairly minimalist with my gear, while splurging in a few areas.
For the pistol portion of the class I brought an iron sighted Glock 17, and ran it in a Dale Fricke holster with a couple of Dale’s mag pouches. I ran the same rig during the shotgun portion of the class. With the rifle, I ran a Safariland ALS holster, mounted to my belt with a dropped and offset attachment to keep it clear of my chest rig.
On the rifle side, I brought my SBR AR with the Lancer handguard extending over the suppressor and an Aimpoint mounted forward. I had some problems with this gun during a previous class, but using a borrowed carbine weight buffer seemed to help until it got dirty and a bit dry. Since then I’d put in one of my own carbine buffers and swapped back to the FailZero bolt (with a liberal coating of lube).
Generally, I’d prefer a war belt for work like this, but my HSGI belt is pretty bulky. There’s really no way to make it very compact for packing. Instead I brought a chest rig. It’s a fairly compact model, with four rifle mag pouches and some MOLLE on either side that I’ve used for a pistol mag pouch, Glock knife, BOK, tourniquet, and multitool. One new addition for this class is a radio pouch for an i355. I didn’t anticipate any need for it (or even anyone else in the class having one I could talk to), but I wanted to experiment with having it mounted and seeing whether it, or the mic cord, interfered with my rifle mount or any of my other gear.
I also ran a Dale Fricke rifle mag pouch of my left side to give me something that’s a bit quicker to access than the bungee retained mags in my chest rig. The pistol in the Safariland holster and an EMDOM dump pouch at 6 o’clock rounded out my rifle gear.
Finally, for the shotgun I brought my 870 SBS. I got this gun set up last year and while I haven’t run it a ton I really like it so far. I bought the cut-down barrel from Eric, so it’s a bit of a return home for it. For support gear I brought a sneakybag kitted out with three elastic shellholder strips fitted with velcro. I also ran a couple of the Safariland two-shell shellholders on my belt.
Last but not least, I brought my PVS-14 night vision optic. I’d really been kicking myself for forgetting to bring it to my last class I took from Eric in Montana, and I wanted a chance to try bring it out, even if we weren’t going to do that much with it. In the past I’ve mounted it on a bump helmet, but that would have been way too big for my luggage, so I bought a Crye Nightcap, which packs up a hell of a lot smaller. To kit out my rifle for use with the NVG I brought an OTAL IR laser and a Surefire M300V IR light. For the white light portion of our night work I had my Surefire G2X.
Almost everyone in the class brought a Glock, with one student running a VP9. There were a couple of ARs in addition to mine, and we also had a Tavor and an AK in the class. Eric brought a panoply of rifles for demo purposes. For support gear we had a couple of battle belts, a chest rig, and a tactical vest. Shotguns consisted of a couple of 870s, a Benelli M4, and one Mossberg fan who brought a 590 and 930. Most of the other students just used a pocket full of shells for reloading.
Friday
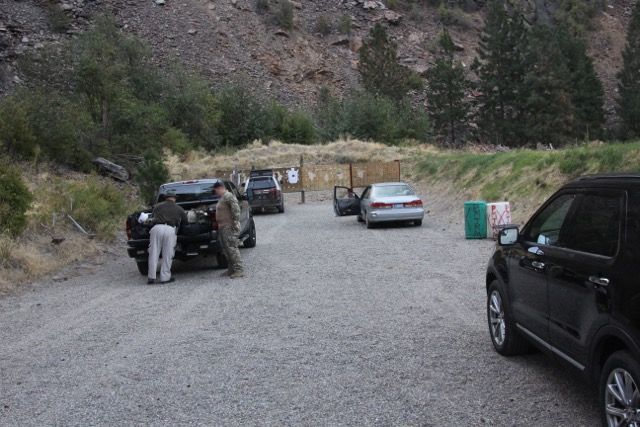
After flying out on Thursday I crashed at Eric’s place. We headed out to the range early to get do some setup.
Everybody else in the class rolled up around 9. After the usual administrative stuff (waivers, etc.) Eric did a thorough medical brief covering what would happen if someone were injured during the class. He also went through the four rules of gun safety in order to keep the medical plan from being needed. One interesting aspect that he mentioned in the safety brief was the “1 meter rule”. In his role on the SWAT team one of their SOPs is not to muzzle sweep nearer than 1 meter from a teammate or to fire within one meter of a teammate without having a hand on them for physical control.
Eric talked a bit about the class in general and how it would unfold. He described it as an intermediate level class with some advanced stuff thrown in. We would be working primarily pistol on the first day, rifle on day two, and shotgun on day three (no sense tenderizing everyone’s shoulders before shooting rifles).
With that, everyone got geared up and stepped out onto the range. Our first subject was unloading the pistol (so we could do some dry work). One unique bit about Eric’s unloading procedure was in the verification process: he asked us to unload the gun, verify the chamber and magwell were clear both visually and by sticking a finger in the gun. Then he asked us to look away from the gun, then look back and verify again. The idea is that looking away makes it more likely to realize if you some how messed it up the first time. Finally, for class purposes, he had us do a buddy check and verify someone else’s gun and have ours verified in return.
With verified empty guns Eric went quickly went through the drawstroke. This was review for everyone in the class, so he didn’t spend a lot of time on it. He did put some time into ready positions, however. One thing that Eric emphasized was that pointing guns at potentially hostile targets is perfectly OK, even if you haven’t decided they need shooting yet. In addition to Sul, he also mentioned leg ready (gun arm straight and at your side with the gun tucked behind the leg) and head ready (gun next to the head pointed up, what’s sometimes called the temple index). An aspect of the head and leg readies he emphasized that I hadn’t heard before was tactile contact between the gun and your body. This was to avoid your gun getting hooked on a teammates gear as they move by you and potentially getting yanked into pointing at something you don’t want them to.
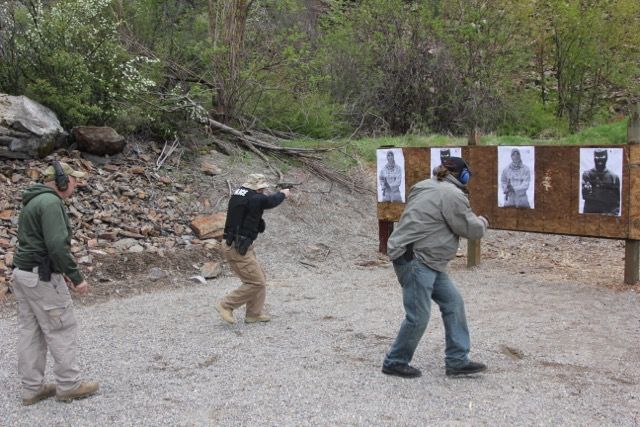
Heading downrange we moved on to live fire. We started with 5 rounds of slow fire from about 5 yards, just to verify that everyone had the fundamentals down (everyone did). After that we quickly progressed to doing some drawstroke work, including shooting the drawstroke zipper (starting to fire as soon as you have the gun level and pointed at the target and continuing to shoot out to full extension). We ran the zipper both two handed and one-handed, then started capping our zippers off with headshots.
We worked headshots some more directly from the holster, both one and two handed, from various distances. Then Eric had us run some reverse zippers, starting with the gun fully extended and bringing it back into close contact ready, simulating what we might do in response to an enemy closing in to gun grab distance.
Eric talked through how to transfer a pistol from one hand to the other. I particularly like the way Eric described laying it on to the hand that you’re transferring it to, “like flipping a pancake, not like putting a book on a shelf”. After some dry practice, we shot the passing drill: one-handed with the right hand, two-handed with the gun in the right hand, one-handed with the left hand, two-handed with the gun in the left hand. Repeat for a full magazine.
With our transfer skills polished up we worked on some movement to the right and left, going from two-handed to one-handed or to the other hand as appropriate.
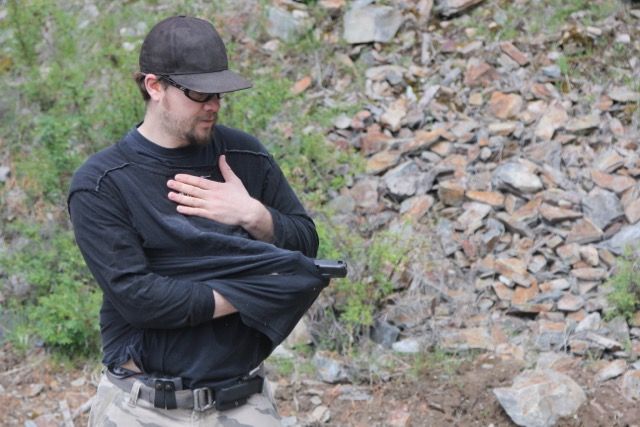
Next up was some very close range shooting, starting with the standard retention position. After we’d done a bit of that, Eric moved on to defending Sul: showing how to deal with a close range attacker grabbing you while you’ve got the gun in Sul and pointed downward. Most of these were a combination of an elbow strike with the support hand while bringing the pistol to bear and shooting with the primary hand. Care has to be taken to ensure that the bullet and your elbow don’t try to occupy the same space, of course. Eric emphasized how to orient the gun and keep it in contact with the body to ensure this didn’t happen.
One possibility when you’re drawing from concealment is that the gun will get hung up in your cover garment (particularly a closed front garment). The murphy drill (developed by Richard Coplin) is a way to handle this. You fire your first shot through the shirt and poke the muzzle through the resulting hole. This may cause a malfunction but if it doesn’t, keep shooting. In either case continue shoving the gun through the hole, ripping it bigger, and once you’re through pass the gun off to the other hand. Eric had some old t-shirts available so we could practice this.
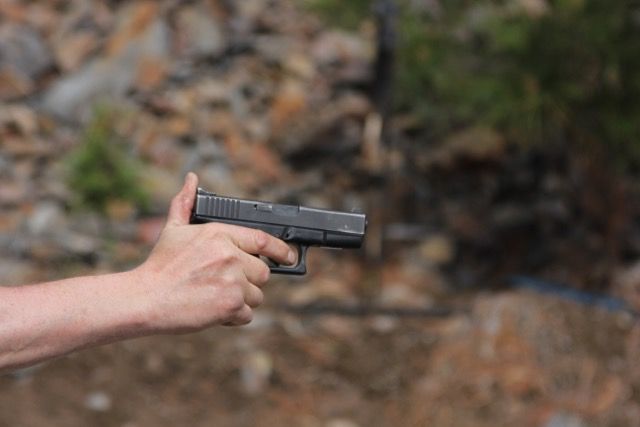
One issue that all this close range shooting brought up was forcing the slide out of battery by pressing the gun into the target during a contact shot. You can combat this by placing your thumb behind the slide and holding it closed. Of course, this means the slide isn’t going to cycle and you’ll have to clear the failure to extract manually, but that still gives you one shot to solve the immediate problem. Having the thumb behind the slide doesn’t even really hurt, as long as you don’t give the slide a running start.
We moved on to talking about using cover effectively. Eric talked a bit about the difference between cover and concealment, as well as how to work a piece of cover. This segued into talking about how to work a corner, including some basic team tactics for taking multiple corners with two shooters.
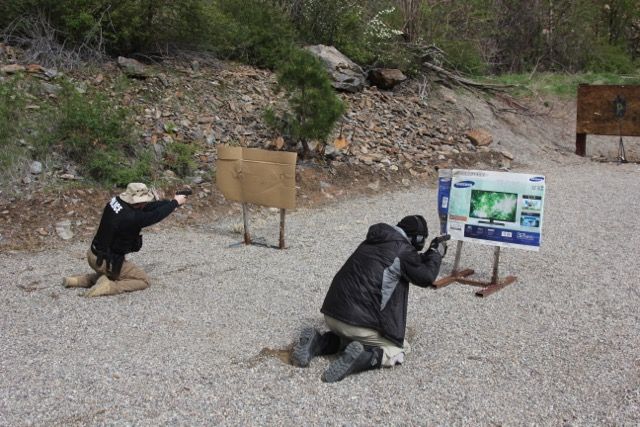
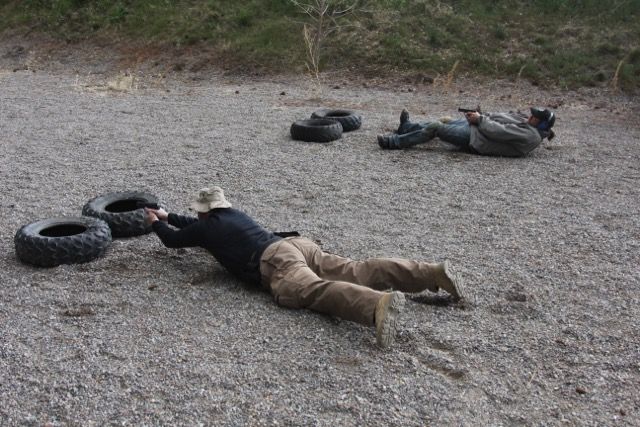
Eric had us do some live fire from cover on steel. He started with some standing height cover and had us work both sides. Then he moved that cover further back to increase the challenge a bit and added a second position closer up with some kneeling height cover. We had to work the standing height cover, then move up and shoot from kneeling. Next we slid both the kneeling and standing back and put a barrel at the front of the line, moving from one to the other and shooting around both sides of each. Finally, he added a position simulating shooting under a car (using a plank atop a couple of tires) back at the furthest distance and had us shoot from the four positions (prone under the car, standing, kneeling, and the barrel).

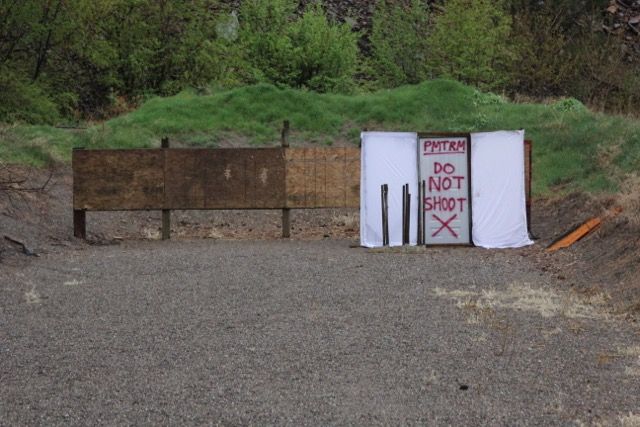
Moving beyond these small bits of cover, Eric had also set up a small one-room shoot house (shoot room?) on the range. It had a door set in a wooden frame and used some white cloth for walls. He showed us how to work a closed door from both the doorknob side and the hinge side. Although team tactics really isn’t a part of this class, he also showed some two-man entries with another police officer who was a student in the class. We did some dry work from both sides of the door, then Eric set up a quick scenario.
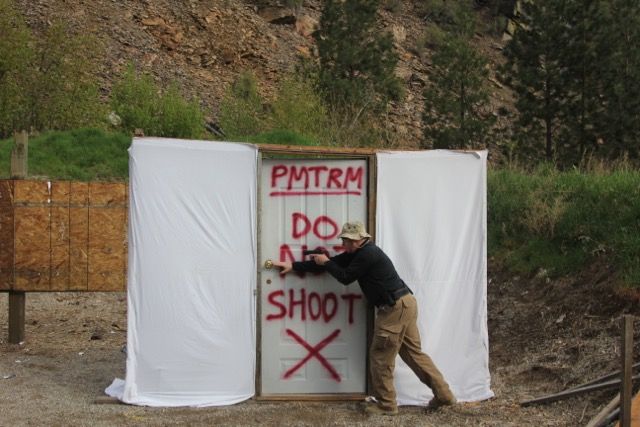
For our first run through the brief was to do our angular search and shoot from outside, without making entry. I managed to put one through the inside corner of his door (the one that has “PMTRM Do Not Shoot” on it in big red letters). I had to hang my head in shame a bit afterwords.
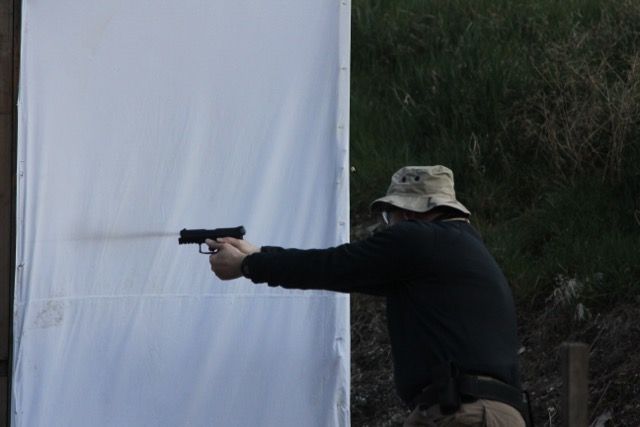
After he patched up the door so no one would cut themselves on the ragged exit hole we did another scenario, this time making entry. Finally, Eric reset the scenario with a set of barricades making the area outside the door like a very narrow hallway. I caught myself extending the gun a bit too far on this one, and another student thrust it fully into the room.
With that we headed out to dinner at a nearby restaurant. The food was excellent (I highly recommend the trout) and the fellowship even better.
We headed back to the range for some low light work. We had to wait a bit for darkness, so Eric took advantage and did some lecture. He talked about flashlight positions. He generally prefers reverse Harries, with the light on the support side of the gun, but he also showed off some others including neck index, classic harries, the cigar hold, and FBI. He also talked about techniques, including wanding or strobing the light when searching rather than constant on.
Eric also showed off some of his gear. In addition to some retina melting tac lights, this included several low lumen task lights for situations where you don’t really need or want a lot of brightness. He showed off some of his setups meant for use with night vision, including the PEQ-2 on his entry carbine.
By this point it was dark enough to do some real low light shooting. Eric spray painted one steel target black and another yellow to give us some experience on contrasting colors. To keep this as safe as possible he used some glow sticks to set up a firing line and another to designate a safe area for non-shooters. We only had one shooter firing at a time. Most of this was individual self-paced exploration, but Eric encouraged us to try some different light techniques and to do some shooting in the fading twilight without a flashlight. He also had us flash the target then move, plant, and shoot a burst, but the distances we had to do this against steel was beyond my point shooting capabilities (especially without much of a visual reference). For the last live fire we did Eric set up some lights to backlight the targets. For me this is where night sights really shined, since flat black irons really faded into the backlight targets.
Finally we broke out the NVGs and IR gear. Another student and I both had PVS-14s, and one also had an NV scope mounted to a rifle. I kitted my rifle out with my Surefire IR flashlight and OTAL IR laser and used it to demo the IR light/laser combo for students who were looking through the other PVS-14. I did have a bit of trouble initially though. I thought I needed a new battery in the OTAL, but as it turned out it was just the fact that I hadn’t taken the lens cap off the IR laser (forgetting this was probably a sign I don’t use this stuff enough).
With that we broke for the evening and headed out. I rolled pretty much straight to bed on this one to grab some shut-eye before the next day’s class.
Saturday
We rolled back out to the range again on Saturday morning. Before we got started Eric went through he medical and safety briefs again. Eric also did some gear checks focusing particularly on students’ rifle slings. He really emphasized the need to feed the free end of the sling back through the buckle to prevent it from working loose (he’s seen enough rifles dropped on the deck this way).
Eric started out with a gear lecture. As usual he organized it into various tiers, with Tier 1 being the stuff on your belt and in your pockets. Tier 2 is your LBE (chest rig, battle belt, etc.). Tier 3 is stuff in your pack. For this lecture he also briefly talked about Tier 4 (stuff in your vehicle or some sort of centralized location) and Tier 5 (caches).
He brought a bunch of examples of Tier 2 gear, including his own SWAT duty gear (hard armor with mag pouches and other gear attached), a battle belt setup, and a chest rig set up for one of his HK91s. He talked about how to use these sorts of rigs in combination, such as using a chest rig with a big ruck, or wearing both the chest rig and the war belt for an extra-heavy fighting load.
One interesting idea that he showed off was a drop leg magazine pouch rig. I’m not a fan of drop leg holsters, so ordinarily I wouldn’t have much interest in this, but the way Eric runs this on duty is to keep just the belt attachment on his regular belt (under his duty belt). The drop leg rig rides in his cruiser, clipped to a second belt attachment that’s attached to a convenient spot on in the car. If he needs access to the mags he can unclip it from the car and clip it to his belt, gearing himself up with some rifle mags very quickly.
The other neat thing he showed off is one of Sneakybags TOT bags with an AR pistol using the Law Tactical folding stock. In addition to a bunch of rifle and pistol mags, it also has a Level IIIA kevlar panel in there to provide some protection.
In regards to specific gear, there were a couple of things Eric feels are absolutely necessary to have in your fighting rifle kit. One is a cleaning rod of some sort. Bore snakes and other pull cord cleaning tools work fine for cleaning, but they don’t work if you need to clear an obstruction out of the barrel or dislodge a stuck case. Most of his fighting rifles have a cleaning rod attached in some form, whether it be a built in rod like the AK or a sectional rod duct taped to the forend or stock. He even showed off his HK where he had a sectional rod tucked inside the forend between the heat shield and the plastic handguard. He also showed the Rapid Rod, a sectional cleaning rod that locks together very quickly and easily.
Next up, Eric talked a bit about slings. He’s a firm believer that every fighting rifle needs a sling, “a sling is to the rifle as the holster is to a handgun.” Staring with the standard 2-point sling, Eric talked about African carry (support side muzzle down) and American carry (primary side muzzle up). He generally prefers the former. He’s not a huge fan of tying yourself to the rifle in most circumstances, but he did talk about 1-point slings and demo a genuine HK 3-point sling with his HK93.
Eric also covered working the safety, laying out his philosophy that when the rifle is in hand with the intent to use it, the safety should be off. Whenever the rifle is proactively placed on sling, the safety needs to be engaged. We did some dry drills slinging and unslinging and working the safety.
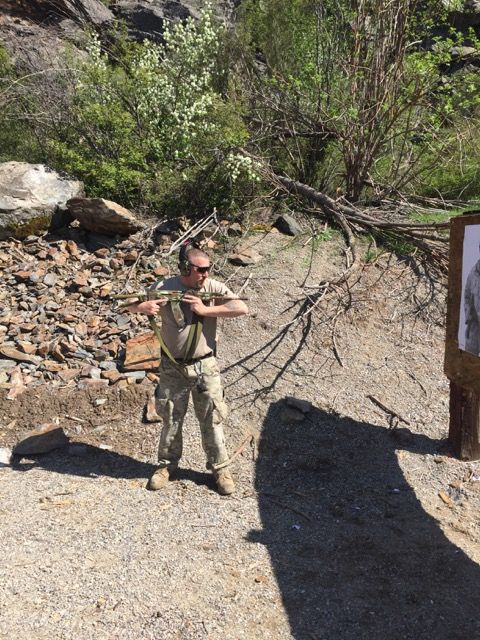
We talked about various movement positions with the rifle. For longer movements, patrol ready (gun at about stomach level, pointed down and to the support side) is generally the default. Muzzle high readies like port arms and high noon (rifle straight up in one hand) work much better if you have to run (or in really thick, low brush). He also showed cradle carry (magazine well in the crook of the support side arm) and carry at the balance (grab at the junction of the magwell and the forend). One that I hadn’t seen before was cradling the gun under one arm, with the forearm between the magazine and pistol grip (similar to the way a lot of shotgunners carry their shotguns). Finally, he showed off rifle Sul, emphasizing the need to get the muzzle pointed in front of you and no further to either side than your feet.
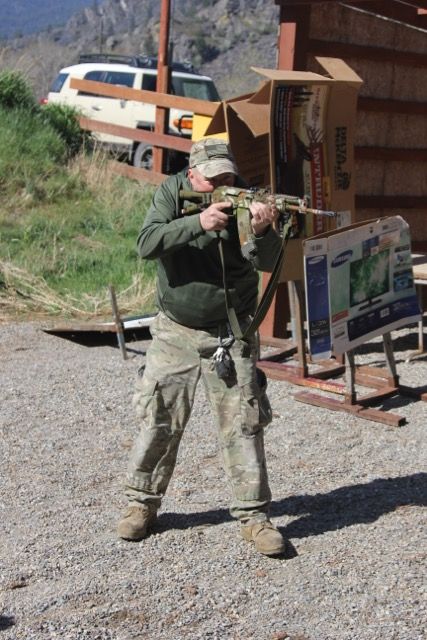
Moving on to shooting positions, Eric demonstrated contact ready (rifle shouldered, but lowered enough to see over the top of it) and underarm assault. Eric’s shooting positions are a bit of a study in contrasts from the class I took in Vegas a couple of weeks ago. Colby is very much a proponent of gripping the forend fairly far out (not a full-on Costa C-grip, but getting the left hand out there a good ways). Eric is definitely more of a magwell hold type of guy. One reason for this might be the platforms they use. Colby seems to be pretty heavily an AR guy, while Eric uses a much wider variety of platforms, including some (MP5, AK) that don’t have very long forends. That might account at least in part for the differences.
One interesting thing Eric mentioned that I hadn’t really considered before is how in a team environment ready positions can be a form of communication. Rifle Sul indicates that a team member doesn’t have any immediate work. The rifle shouldered but in a lower ready position indicates they’re covering a danger area but don’t have a target. Pointing in indicates a specific target.
We started out shooting by verifying our zero at 25 yards. Everyone was pretty much on target so we didn’t have to spend a lot of time on this. We also shot at 5 and 15 yards to test our mechanical offset, seeing where we needed to hold on the faces of these photorealistic targets to put a round right between the eyes.
Eric had us shoot a bit from underarm assault, then put those mechanical offset skills to use and transition from underarm to shouldering the rifle and taking a headshot.
For confined spaces, Eric demoed a technique that puts the muzzle of the rifle just past the crook of your elbow. The key with this is to know your rifle and figure out the exact spot on the forend or magazine well to grab to ensure that the muzzle extends just past your elbow (so you don’t shoot yourself) but not so far past that you’re adding extra length. We ran this both on our regular targets and did some work with it on the door that Eric had set up. One tricky bit when doing this left handed is to make sure you don’t bounce rounds off your body and back into the ejection port. I had a malf doing this before I figured out that my rifle liked it better if I rolled the ejection port more upwards when going left handed.
Next up were shoulder transfers. Eric demoed the technique, then had us do it dry for a bit. After everyone was comfortable we went live. We shot a similar passing drill to the one that we’d done with the pistol the day before: Shoot from the right shoulder, do a partial transfer (move the stock to the opposite shoulder but don’t switch your hands) and shoot, complete the transfer (switch the hands so you’re a mirror image of your regular stance) and shoot, then do the partial transfer back to your primary side shoulder and shoot. Complete the transfer and repeat until you’ve run through a full magazine. We put these shoulder transfer skills to use by doing some shooting on the move while moving to the right and left.
Eric went through the shooting positions, starting with standing. Obviously, we’d been doing a bunch of shooting from standing already today, but Eric noted the differences between the more gunfighting oriented standing position that we’d been using and the classical marksmanship oriented standing position.
Moving on to squatting, Eric emphasized the need to keep the feet flat (even if that means widening your stance a bit) and to put your elbows inside your knees rather than having hard surface on hard surface. He demoed the position and allowed some time for students to try it out dry.
Kneeling was up next, and Eric demoed a high kneeling (upper body upright enough that you can’t use your knee to support the elbow), a more conventional kneeling, reverse kneeling (raising the primary side leg and using it to support the firing hand elbow), and double kneeling.
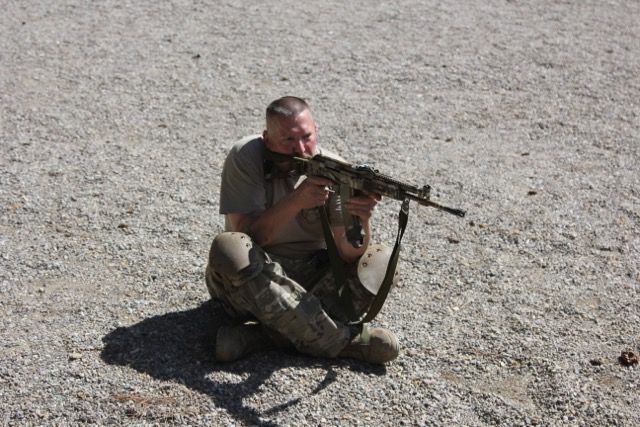
After the class practiced the kneeling positions dry, Eric moved on to sitting. He demoed both cross legged and open legged sitting positions, as well as getting in and out of sitting. Since one of the things sitting is particularly good for is shooting downhill, he had us go over to the berm and try out sitting aiming down the slope, as well as other improvised positions shooting upslope or cross-slope.
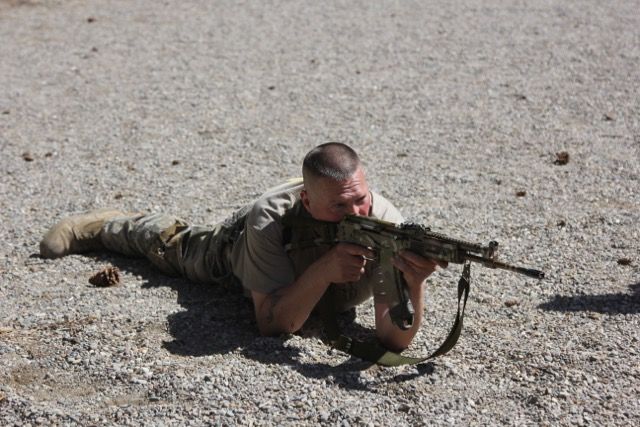
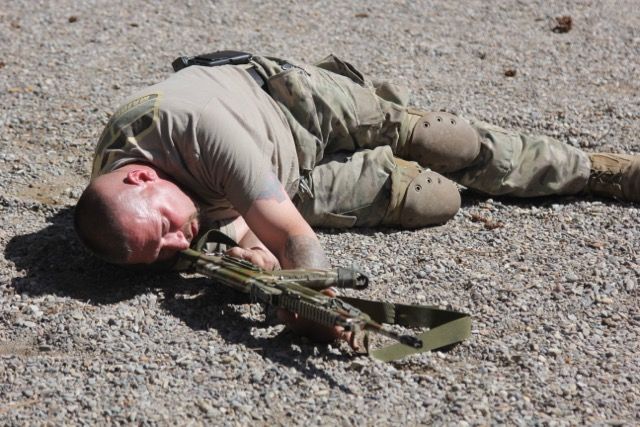
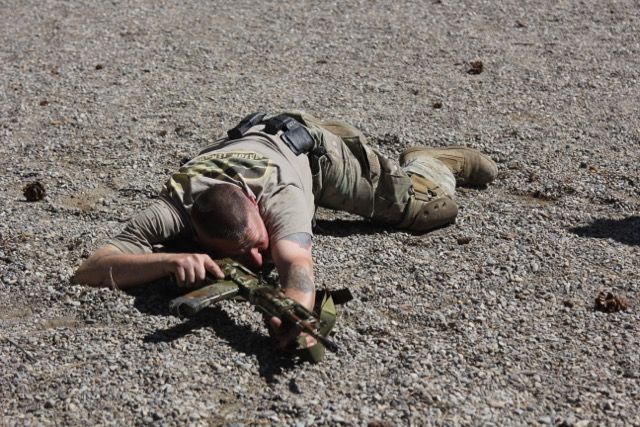
Finally, prone. Eric demoed both conventional prone and using the magazine to support the rifle. He also showed off SBU prone (with the rifle rolled over towards the support side to lower your profile) and rollover prone (lying on your side, generally to shoot under an obstacle). One that he demoed that I hadn’t seen before was rollover prone with the rifle reversed (rolled over onto the opposite side), sort of a cross between rollover and SBU.
Eric dragged out a spool that’s about the same size as a big truck tire and had us practice taking cover behind that.
The next block of instruction was on defending these shooting positions from threats that emerge to the side or rear. From squatting you can drop into a kneeling position to react to threats from either side, and spin around into sitting to engage to the rear. From kneeling you can drop a knee and then bring the other one up to get a really big range of motion, extending this still further by twisting at the torso. Finally, from prone you can go to either rollover prone or supine to engage to the sides or rear. We practiced all of these dry.
After all this dry work we ammoed up and went live. Eric had us shoot all of the different positions on steel at about 40 yards. He encouraged us to try out some of the more unconventional variants to get a feel for them as well.
Eric set up some scenarios for us using the “shoot room” from yesterday. We ran it three times, with Eric changing up the scenario for us between each one. Each time we had to negotiate the closed door, shoot targets that became visible during our angular search, then make entry. The scenarios included a mix of no-shoots, terrorists, and hostage targets.
Overall I was pretty pleased with my performance. Because of the way the scenarios were set up (and a preference for working the hinge side of the door) I ended up doing quite a bit of left handed shooting. Many of the targets required headshots either because of partial exposure or having a hostage in the way. Despite this I found I didn’t have to put a whole lot of thought into accounting for mechanical offset. I’d done enough that aiming at the hairline or the top of the head to put rounds in the face came without a lot of conscious thought.
Eric did manage to get me with one no-shoot. He took a common bad guy target (one with a mulleted guy in a black tank top holding a revolver) and stapled the wrapper from a package of glow sticks over his gun. I immediately ID him as a BG target and lit him up, without processing the glow stick package instead of the gun.
I caught a dog target that Eric had hidden behind the door, but I did miss one other sneakily placed target (this one outside the door, placed in the inside of a barricade that formed a hallway).
For our final exercise Eric put more than half a dozen pieces of cover out on the range, including standing height barricades, kneeling barricades, planks on tires that simulated shooting under cars, barrels, etc. We had to shoot from each piece of cover (including both sides), the move up to the next. As we got closer we had to make a proactive transition from rifle to handgun (largely because Eric didn’t want us shooting the steel with rifles from too close). The various types of cover demanded getting into and out of quite a few different positions including standing, kneeling, prone, and rollover prone. It was a fitting and active end to a good day of training.
We all headed back to Eric’s place and he threw some venison steaks on the grill. Linda also cooked up a storm for us, including some very tasty pasta with bear sausage. We broke out the beer and the bourbon and generally had a great time with some great fellowship among like minded folks. This was one of the highlights of the class for me.
Sunday
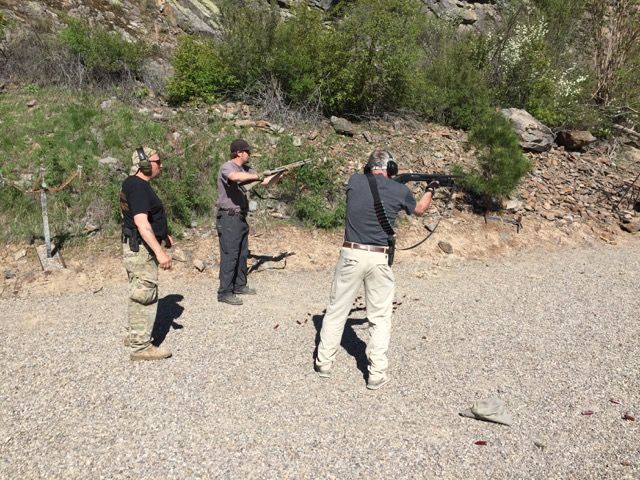
On Sunday morning we broke out the shotguns. The shotgun really isn’t a go-to weapon system for me, but I do enjoy doing some training with them on occasion.
Eric reviewed the safety brief and medical plan, then launched into his shotgun lecture starting with methods for carrying extra ammo. He covered bandoliers, bags, cards with elastic loops that you can slip into an AR mag pouch, as well as methods for carrying extra ammo on the gun, like sidesaddles and speedfeed stocks.
With an overview of how to carry ammo, we talked quite a bit about different options for ammo to carry. Eric feels pretty strongly that buckshot is the natural load for the shotgun. He doesn’t see any need for magnum shells; against human targets they’ll beat up your shoulders without really providing much benefit in terminal effect. The preferred size is either 00 or 000.
While other types of shells play second fiddle to buckshot, they do have roles to play. Slugs are great for longer ranges or shooting through stuff. Eric also passed around (and later demoed) a buck and ball shell with a spherical 0.65″ round ball and six pellets of #1 buck. He mentioned that this might be a good winter load for folks in Montana, given the prevalence of multiple layers of clothing.
He showed some shorter shotgun shells, both 2 1/4 and 1 3/4 varieties. The former will cycle in most pump shotguns and are short enough that they’ll buy you an extra round of capacity in most guns. The latter are a bit more chancy when it comes to proper operation.
Next, Eric moved on to some non-lethal options. He passed around beanbag and CS rounds from his duty loadout, and talked about rubber buckshot and scarecrow rounds (noisemakers). He also covered specialized breaching rounds which are designed to take out locks and hinges then break apart into a fine powder so as not to endanger anyone in the room beyond. While these can help eliminate liability, he said that buckshot does just as good a job of actually getting the door open.
Finally, he showed off a shotgun shell sized metal insert that holds .38 Special cartridge with a short (snubby sized) length of rifled barrel. This seems like a pretty neat option for certain types of training.
Moving on from ammo to the shotguns themselves, with some discussion of short barreled shotguns versus their full length counterparts. Eric also talked about sighting systems, including the advantages of shotguns that have rear sights rather than just a bead up front. Round out the discussion was some talk about accessories. Eric regards a sling and light as absolutely necessary on a shotgun for defensive use.
Time for some shotgun manipulation, Eric demonstrated how to put a shotgun in cruiser ready (full magazine tube, empty chamber, hammer forward). He also showed loading and unloading procedures. On the loading one difference between what Eric taught and the other way I’ve seen it done is that he advocates single loading the first round into the ejection port and closing the action rather than putting it in the tube and racking the gun.
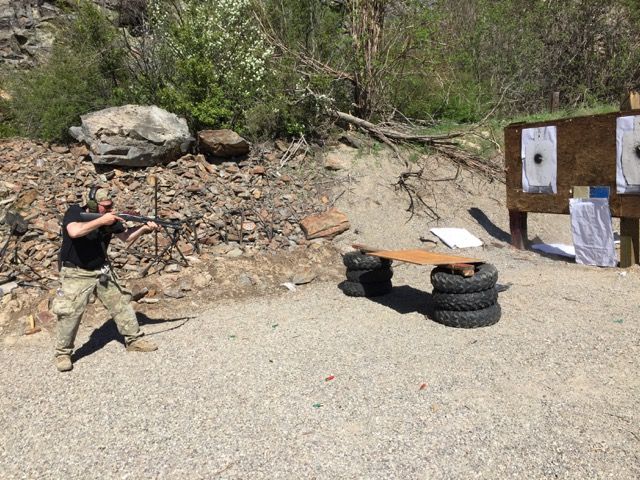
We loaded up with buckshot and headed out to pattern our shotguns. We shot 5 rounds at distances ranging from 4 to 45 yards. My SBS did pretty well out through 15 yards, but beyond that it was pretty clear that it was beyond the limits of where I could reasonably engage with buck.
When you’re too far for buck, or you need to shoot through stuff, slugs are the obvious choice. Eric taught two methods for doing slug transitions. One was to rack out a round, shove the slug into the magazine tube, then rack another round out and chamber the slug. The other, for proactive transitions, was to ease the forend back, pluck out the partially ejected shell, load the slug through the ejection port, and close the action.
We did some dry drills, then shot some slugs at various distances. One thing that quickly became clear was that while a bead (or big dot sight) was workable, those with sights definitely had an easier time of it at longer distances.
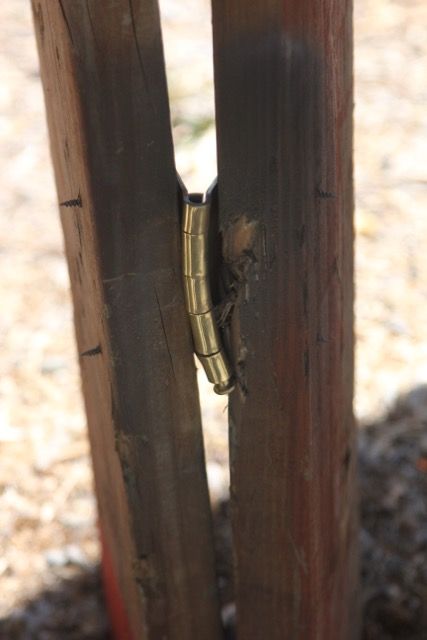
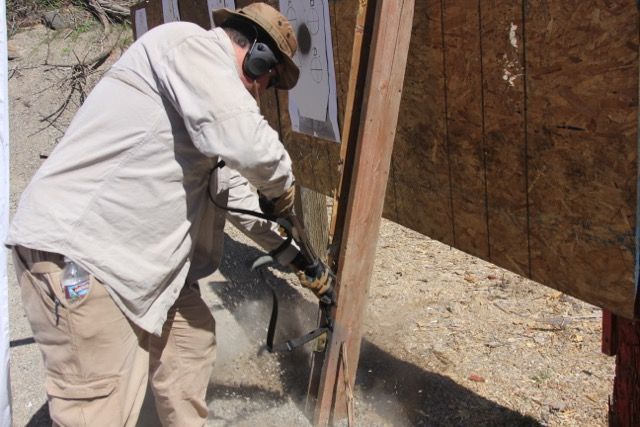
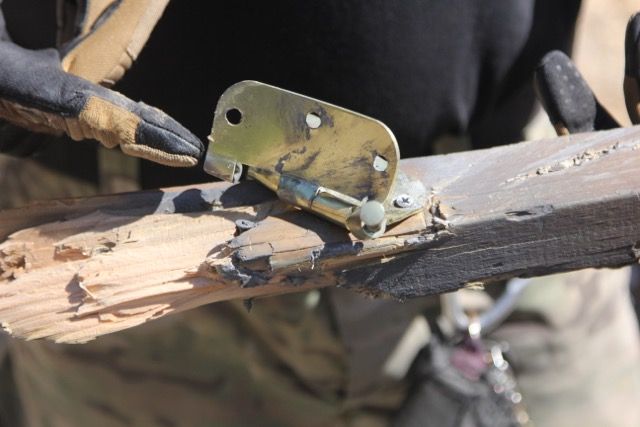
Next up was ballistic breaching. As mentioned earlier, he said that buckshot is about as effective as specialized breaching rounds for taking out doors. Similarly, specialized breaching chokes are useful, but not mandatory. The idea is to destroy the integrity of either the latching/locking mechanism or the hinges. The way to do this is to hold the shotgun at a 45 degree angle from the horizontal (usually pointed down, though for the top hinge it will be pointed up) and 45 degrees from the door itself. This makes it likely that the buckshot and door fragments will be directed into the doorframe rather than the interior of the room.
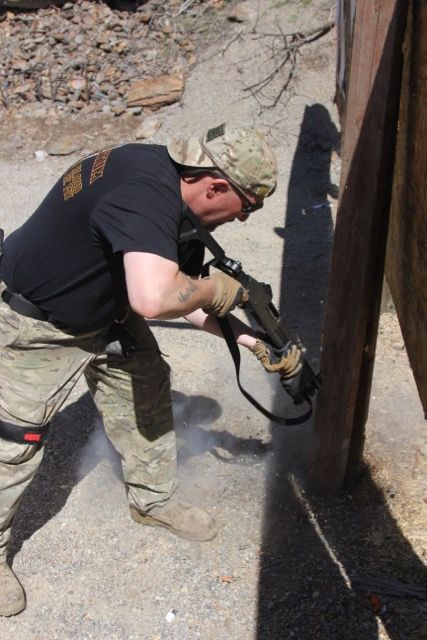
Eric didn’t want us shooting his door, so he put together a mockup using a hinge and a pair of 2x6s. He shot it for the demo, then let us shoot it (it was pretty trashed by the time we were done with it). I’d love to do a full-on breaching course, with the opportunity to do a bunch more of this.
After the breaching demo, Eric set up some another scenarios for us. This time he had us start with an empty chamber, full tube, and a cocked hammer. We simulated a breaching shot on the doorknob, kicked the door open, and went to work. He had two BG targets set up. On one of them he’d also stapled the front panel from a ballistic vest (just the carrier, no kevlar) as a prompt to go straight for the headshot.
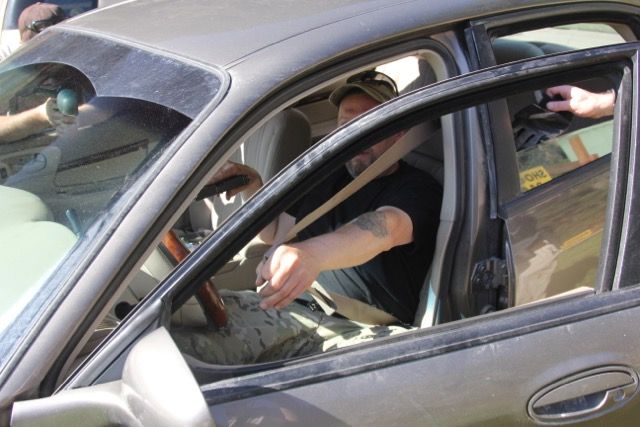
Since we had a bit of time, Eric added in some material that we hadn’t gotten to the previous day, talking for a bit about shooting from a vehicle. He talked about this a bit both from the individual carjacking defense standpoint and from the team tactics point of view. This was just a brief taste of the material, he’s got a Vehicle Operations class on the schedule in August that’ll go into this in a bunch more depth.
We set up some tires and a plank to simulate a vehicle and Eric talked a bit about skipping buckshot. It’s a good technique for shooting under vehicles. A load of buck in the ankle probably wouldn’t be lethal, but it may put them down where you can put a load into a more vital area. Since we were on dirt and gravel, Eric laid down a steel target and used that to bounce the buck off of.
One thing worth noting is that this is a good demo of the fact that ricochets do not act like billiard balls: the angle that they bounce off at tends to be much shallower than the one they came in at.
He also bounced a load off of the gravel surface. This didn’t put as many pellets on target, but a load of high speed gravel in the shins isn’t going to do someone any good.
For our final drill of the class, Eric told us to put our shotguns in cruiser ready and load up four rounds in the magazine tube. He got two students on the line, shooting on steel. Whenever he called, “up”, we had to put a round onto the steel. Whenever he wasn’t calling “up”, we had to keep loading.
Initially I fumbled a bit, grabbing for shells from my sneakybag when it would have been much easier to go from the sidesaddle. After a few rounds I settled down and got into a rhythm. I actually got my magazine tube completely loaded at one point (albeit a short mag tube on the SBS). By the time Eric was done I’d gone through my sidesaddle, the six rounds on my belt, and the top row of shells in the sneakybag.
We packed up our gear and helped Eric load up all of the range equipment. He passed out the certificates and we all headed out. Most of the class stopped by Eric’s house on the way out to pick up some leftovers from the previous night’s dinner. It’s a long drive to anywhere in Montana, so most of them couldn’t stay very long. One student was staying the night in town and driving back the next day, so he hung out with Eric and I for a while (we dragged out Eric’s NVGs and played with them a bit).
The next morning Eric dropped me off at the airport and I headed home.
Summary
This was an awesome class. I have to say that Eric is every bit as good an instructor of the fundamentals as he is at teaching sniper skills or team tactics. We had a really good batch of squared away students and Eric really took advantage of it to cram in a bunch of material. The drills were all applicable and well designed and the shoot house scenarios were fund and thought provoking.
This class was a really great opportunity for fellowship, and a big part of that was they way Eric supported it through going out to dinner on Friday night and dinner at his place on Saturday (a great bunch of students helped as well).
Of course, I also need to thank Eric and his family for putting me up for this class, and driving me hither and yon across Montana.
There were definitely some real take-home points from the class for me. Drilling the no-shoot with the glow sticks in his hand definitely let me know I was shortcutting that decision making process based on having seen these targets so many times. I also like his method for administrative unloading. I think I’ll be incorporating the “look away then check again” into my own practice.
While this was a class focused in individual skills, in keeping with his SWAT background, Eric had some good insights about operating in a team environment. I was also really happy to get to play with my NVG gear a bit. I’d love it if Eric would teach a full-on NVG based night class. The breaching stuff was cool, and another thing I’d like to see a full class of.