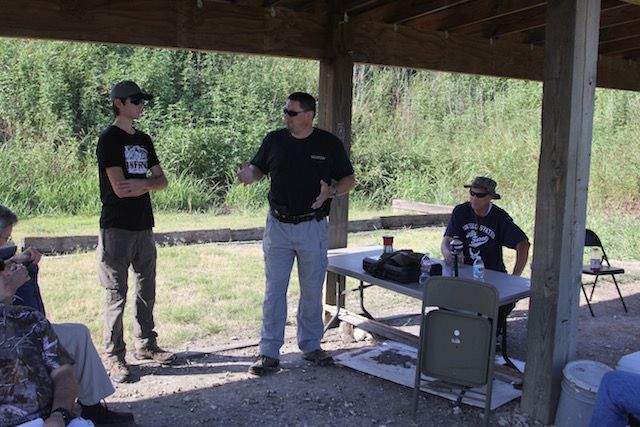
I recently took a pair of classes from John Chambers down in Texas. Saturday was Vehicle Gunfighting, which was a great class (you can read about it here). For me, though, the main event was the Sunday class: Defensive Shotgun. I’ve taken the S.I. shotgun curriculum several times from Alex Nieuwland in South Carolina in both one-day and two-day formats. Those were a while ago though, and I recently got my tax stamp back on a Short Barreled Shotgun, so I had to come down and get some trigger time with it.
My main shotgun for the class was my SBS Remington 870. This gun started out as a Wingmaster from the early ’50s. When I picked it up in a pawn shop it was pretty rough, but with a bit of elbow grease it cleaned up nicely. In addition to the 14″ barrel, I added a XS Sights big-dot front bead, Mesa Tactical sidesaddle, Wilson +1 magazine extension, and a synthetic youth stock (shorter to make it handle a bit better). For a backup I brought my 18″ 870 Express Tactical, with a big-dot front sight and a Choate entry stock.
Unlike some previous shotgun classes where almost everyone was running Remington 870s and Mossberg 500s, there was quite a bit of variety in people’s shotties in this class. One student did bring a Mossberg, and another had an 870 (his in 20 gauge), but we also had a Benelli Nova bird gun (with a really long barrel), a VEPR, and a Beretta 1301 Tactical. In addition, John brought a bunch of his own shotguns including several 870s, an Ithaca 37, and a pair of High Standards.
For extra ammo I brought a Hawkepack rifle fighting bag. The ‘rifle’ features on the bag (mag pouches) obviously aren’t useful in this class, but the main compartment does have velcro on the inside. I attached three 7 loop shotgun shell holders. I keep the top pair filled with shot (birdshot for training, buck for serious use) and the bottom one filled with slugs. Other folks brought a variety of means of carrying spare ammo. Most had some sort of shoulder bag or dump pouch into which they dumped a box of shells. The fellow with the VEPR had a sneakybag that he used for the magazines. John had an interesting solution that I hadn’t seen before: two-shell belt holders made by Safariland. He used these to demo and they seemed to work quite well. I may have to pick some of these up.
The Class
After getting the waivers out of the way, John started the class with his opinions on various types of shotguns for tactical use (both modern and “retro-tactical”). He moved on to talk about the general fighting characteristics of shotguns: The shotgun’s big advantage is power. Compared to handguns and even rifles one shotgun round packs a much greater punch. As John puts it there’s nothing better for removing meat from the bone at close range than buckshot. The “close range” caveat in the previous sentence gets to one of the the disadvantages of the shotgun: lack of range. This, combined with limited ammo capacity make the shotgun a speclaized weapon. But for fast, up-close and personal encounters, there’s nothing better.
John recounted his experience when he was deployed in the Balkans. As a Designated Marksman he was issued a M16A2, which is kind of long and unwieldy for clearing buildings. He managed to get issued a Mossberg 500 (probably on the books as a breaching tool) and swapped the barrel for a shorter one for building clearing.
He noted that most shotguns are not really up to the same standards of ruggedness as military rifles. They are modified hunting guns and require a certain level of maintenance.
With the opening lecture out of the way, John segued into the safety briefing. While the same rules of gun safety apply to the shotgun as to any other firearm, John specifically noted that due to their power an accidental close-range shooting with a shotgun is going to be life altering (if not life-ending). Muzzle and trigger discipline are, as usual, paramount.
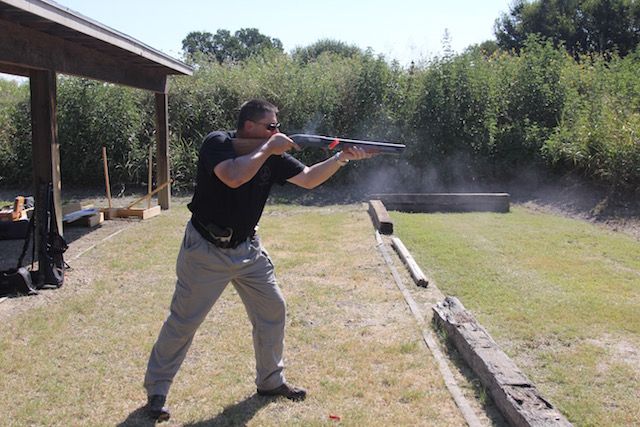
John went through the shooting fundamentals (much the same with a shotgun as with any other weapon). One thing he talked about that’s shotgun specific was using isometric tension for recoil control: rearward pressure with the primary hand to hold the buttstock in the shoulder pocket combined with forward pressure from the support hand to help absorb recoil. He referred to this as “stretching the shotgun”.
With a pump shotgun John emphasized the importance of immediately working the action to load a new round into the chamber. Practice this enough that it becomes automatic. With any tube fed shotgun it’s important to top off at any and every opportunity. You’ve got so few rounds in the gun to start with and have to reload them one at a time, so keeping the gun as close to full as possible is a priority. One thing that some students took a bit of work to really get was reloading the gun up in the workspace (the same way we do pistols and rifles).
We started out our the live fire portion of the class by patterning our shotguns with buckshot at 3, 7, 15, and 25 yards. I ran into a bit of a complication here. Rather than a traditional crimp the cheap Estate buckshot I was using has a small plastic disk that’s held in place by the front of the plastic hull. This makes them a bit longer than standard 2 3/4″ shells. Just long enough to turn my 5 round tube into a 4 round tube. I’d only intended on using this stuff for training anyway, but this certainly cements that decision.
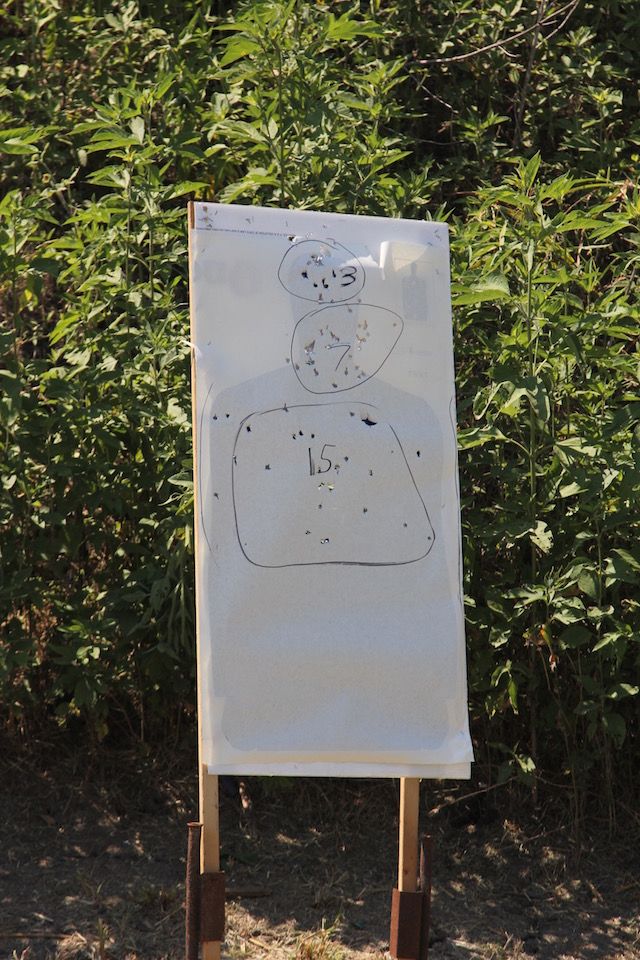
With the short barrel (which really doesn’t make as much of a difference in the size of the pattern as some people think), cylinder bore (bigger difference), and cheap buckshot (probably the biggest difference) my pattern spread pretty rapidly. It was effectively covering the full width of the target at 15 yards and expanding off the target at 25. I really need to get some high quality (Remington or Federal) buck and pattern it in this gun.
There was quite a big difference in pattern sizes, based on varying levels of choke and different types of buckshot. The tightest was definitely the Nova with the long bird barrel on it, though the Beretta wasn’t far behind.
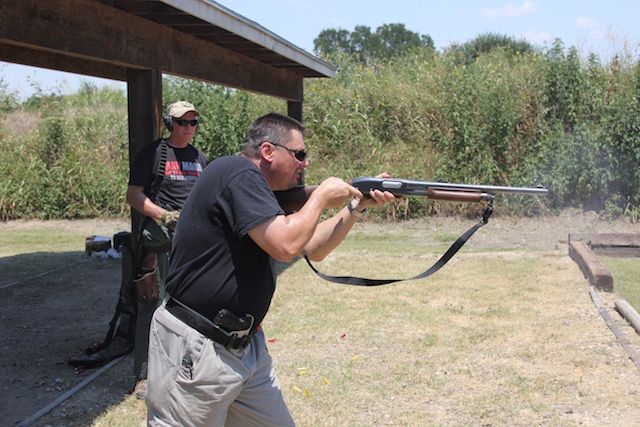
We switched from the paper targets to steel (and from buck to birdshot) and started doing some “shoot one load one” drills. The idea is to ingrain immediately topping off the gun the first chance you get. You fire one round, operate the action (if you’re shooting a pump gun), then immeadietly load another into the magazine tube. For the fellow with the Saiga, this was basically a proactive reload drill. Next up was “shoot two, load two”. Pretty much the same deal, except you get to practice repeat shots. Then “shoot three, load three” (I think you can figure this one out).

During these drills I had a bit of trouble with some feeding issues. After having John watched me shoot he said the aluminum base, low “brass” birdshot I was using was probably just a bit sticky. I just needed to be more vigorous cycling the action. I kicked it up a notch and didn’t have any trouble for the rest of the class. This emphasizes an important point about the shotgun, especially a pump shotgun: It’s a very physical weapon. You can’t be namby-pamby with it.
While the goal with drills like “shoot one, load one” is to always keep the shotgun topped up, sometimes that’s not going to be possible. Indeed, if there are enough targets without a lull you may even shoot the gun dry. To get the gun back into operation as quickly as possible, John demonstrated how to load a single shell through the ejection port. You open the action (it should already be locked back for a semi-auto), feed the round in, run the slide forward (or just hit the release for a semi) and fire. We did some practice with these emergency loads.
The last thing John covered before lunch was conditions of readiness for the shotgun. As usual, if the weapon is in your hands and you are in a fight or imminently expecting action: fully loaded magazine tube, round in the chamber, safety off. When the weapon is slung or in your hands when you are not expecting action: fully loaded magazine tube, round in the chamber, safety on. Finally, when a shotgun is being stored in a ready condition but not in your direct control: fully loaded magazine tube, empty chamber, safety off, with the hammer down (so that on a pump gun the action can be cycled without hitting the slide release). This lets you make the gun ready to fire just by cycling the action.
We broke for lunch. John and I drove in to a convenience store in town where they do a pretty nice hamburger.
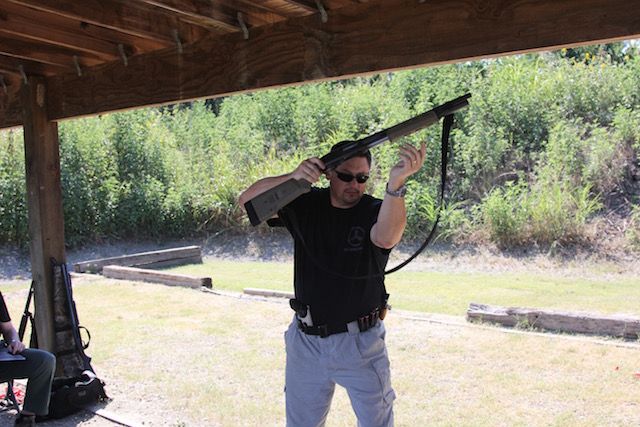
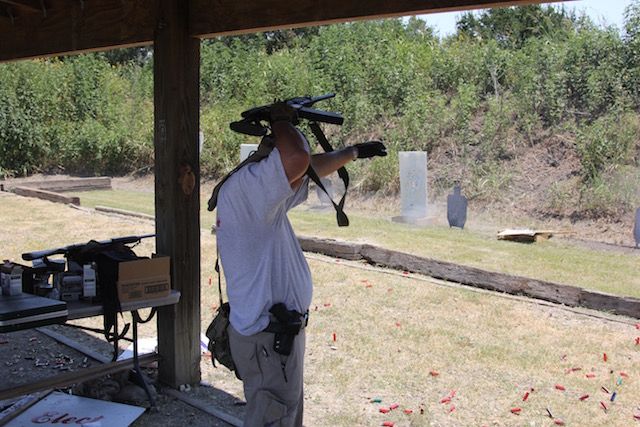
After lunch we started on pistol transitions. Given the shotgun’s low magazine capacity and the fact that if you’re in shotgun range you’re also in pistol range, I’d say good transition skills are even more important with a shotgun than they are with a rifle. We started off working the standard S.I. long gun transition: passing the rifle above your head and dropping it so it hangs diagonally across the back. Everyone practiced this dry a good number of times before we went live with it.
We did have a couple of sling issues. One student had a fairly short sling that couldn’t be made longer. It was really too short to do the over the head transition with. John loaned him another shotgun for the transition drills. Another student had one of the sling mounts break on his Saiga. I got him back up and running with a Blue Force Gear Universal Wire Loop (one of the most useful pieces of kit out there).
For situations where you don’t have a sling, or your sling is too short to do the over the head method, John also demonstrated another way to transition to your pistol. You bring your support hand back to the receiver (to the balance point) and tuck the buttstock under your support side arm. This frees up the primary hand to draw and fire your pistol. While this limits you to one handed pistol shooting, it does get the shotgun out of the way even if it doesn’t have a sling.
Next up was some ambidextrous shooting. John demonstrated the shoulder transfer, taking care to call out a few aspects that were shotgun specific, such as moving the hand off the forend when you do the partial transfer. One issue is that the shotgun is a lot less tolerant of poor stock positioning on the support side shoulder than a .223 rifle would be. If you get it in the wrong spot it will beat you shoulder up. We went through some a couple of iterations of the shoulder transfer drill, dry first, then live.
Moving on, we put these transfer skills to use in the lateral walking drill, practicing moving to the 3 o’clock and 9 o’clock directions, transferring the shotgun to the other shoulder as appropriate.
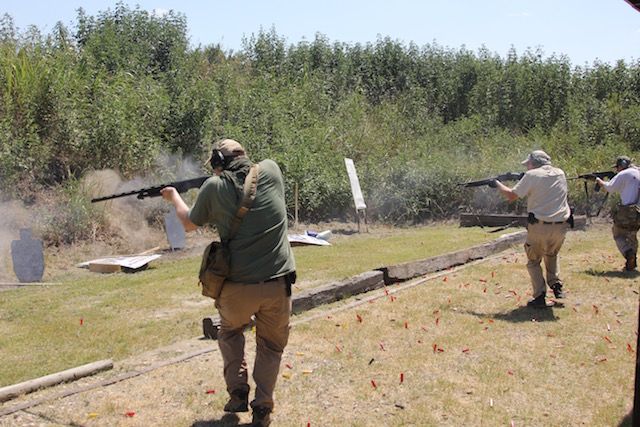
Everyone in the class had been through at least one S.I. class so John skipped the whole, “this is why you want to get off the X” spiel. Instead we moved right to getting off the X to the 1 o’clock and 11 o’clock directions. Dry drills first, then live.
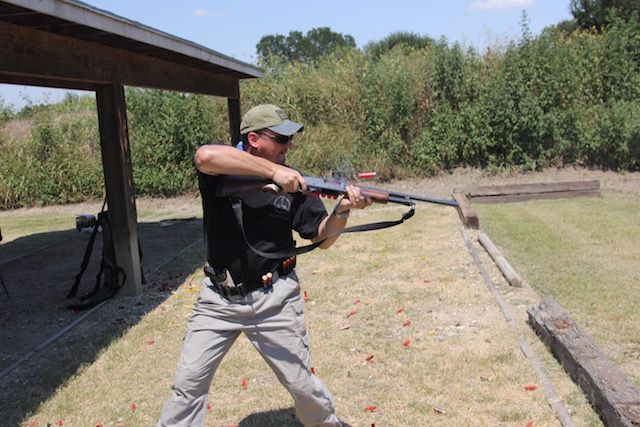
Moving on to the 5 and 7 o’clock, John demonstrated a couple of interesting techniques for these directions. When going to the 5 (for a right handed shooter) it can be difficult to get a solid mount with the long gun. With a .223 rifle this really isn’t an issue, but a shotgun is a lot less forgiving of a poor shoulder mount. John demonstrated a technique that I’d used in other contexts, but hand’t seen applied to the shotgun before: “floating” the shotgun stock. Rather than mounting the stock on the shoulder, he put it above or below the bicep and used his arms to absorb the recoil. This makes it easier to bring the gun on target without beating up your shoulder with a less than perfect mount.
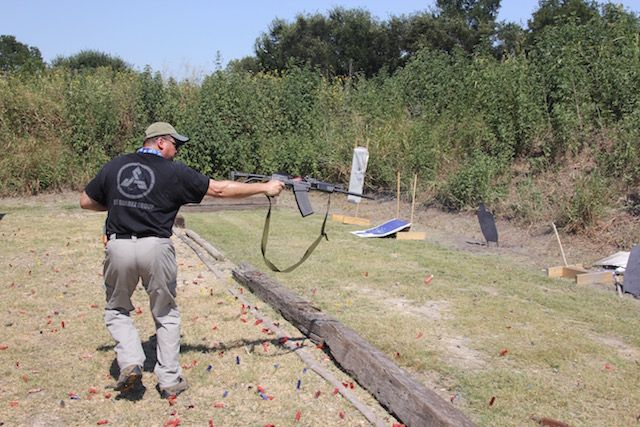
For going to the 7 o’clock (for a right handed shooter) he demonstrated going one-handed with the shotgun. Obviously for a pump gun this is a first shot only technique, but with the Saiga you could empty an entire magazine this way.
We did some dry practice going to the rear oblique angles, then ran it live.
For the final exercise, John set up a team drill. Pairs of students started, one with a full gun, the other with an empty one. The fellow with the full gun had to fire on the targets while the other guy loaded up (by which time the first guy was probably close to empty). Once you had both guns up, one guy provided covering fire while the other moved laterally down the line. I’ve done this sort of drill with rifles before, but with tube fed shotguns its a very different deal. It really places a premium on getting the gun (re)loaded quickly and smoothly. Every team ended up with one guy doing single loads through the ejection port while the other fellow loaded his shotgun and most ended up transitioning to pistol at least once.
With that, we wrapped up. John handed out the certificates, we picked up an enormous number of shotgun hulls, and everyone headed out.
Conclusion
This was a great class. It had been quite a while since I’d done anything shotgun related and it was great to give those skills some exercise. John always does a great job teaching, but you can really tell he has a special affection for the shotgun.
One thing that really stood out in this class was the variability in ammo quality, particularly when it comes to cheap training ammo. Several guns just ended up completely choking on one brand or another of cheap birdshot or buckshot. Some ammo (Spartan buckshot) hardly ran in anything. For serious use, make sure you get quality ammo and test it in your shotgun. Even for training, it’s probably a good idea to run a box or two of your chosen training ammo through your gun before bringing it to class. Otherwise you might end up fighting your ammo through the entire class. I was lucky that the relatively minor issues I had could be solved with the use of a bit of extra oomph when cycling the action.
Unlike a rifle class, where you might have almost everyone show up with an AR or AK, the students in this class brought quite a variety of different shotguns. Getting to handle and shoot this variety of guns was a highlight of the class.
One of the 870s that John brought had the Magpul furniture on it. This was the first time I’d handled a shotgun with the Magpul stock (I’ve already got the Magpul forend on my 18″ 870. I have to say I like the Magpul quite a bit. John had his set up at what I’d regard as just the right length and it has some of the advantages of a pistol grip stock while maintaining a conventional shotgun stock configuration.
I also had a chance to shoot John’s Ithaca 37. I hadn’t really appreciated how light the design is. This would be a great shotgun for carrying around all day. Of course that light weight comes with a price when you shoot it. Firing this with 2 3/4″ buckshot feels about like firing a 3″ magnum out of an 870.
John brought a pair of High Standard pump shotguns: one with a standard length tube and a riot gun with an extended tube. These guns are incredibly slick. The standard test for how slick a pump gun is is to hold it muzzle up, hit the action release, and see if (and how far) the action will slide open just under the influence of gravity. John’s High Standard will fall all the way open. That’s a slick shotgun, but John’s demo wasn’t over yet. He pointed in at a target and fired it without a hand on the forend. The recoil alone opened the action all the way and ejected the empty shell. These are basically stunts rather than practical applications, of course, but I did some rapid fire shooting and the slick actions make them a joy to fire.
As I mentioned, one student brought a Beretta 1301 Tactical. I have to say I’m pretty impressed with it. We fed it every kind of crappy ammo we had at this class and it digested all of them with ease. Absolutely no malfunctions. The maxim has always been for absolute reliability in a shotgun you want a pump, but the Beretta was running fine on ammo that I saw pump guns choking on. I had a chance to put some rounds through it as well. It was smooth, quick, and pointed very well. I think one of these is going to find it’s way into my gun safe sometime soon.
All in all, this was a great class. I really like the one-day shotgun course in general, and John did an excellent job of teaching it. I would highly recommend it.