Last month I took Daniel Shaw’s Patrol Rifle Problem Solver class. I’ve trained with Daniel before, most recently his Carbine Vitals class last summer. Some of the side discussions in that class got me interested in Patrol Rifle Problem Solver class, particularly the 2-day version. I was very happy for the opportunity to take it.
Gear
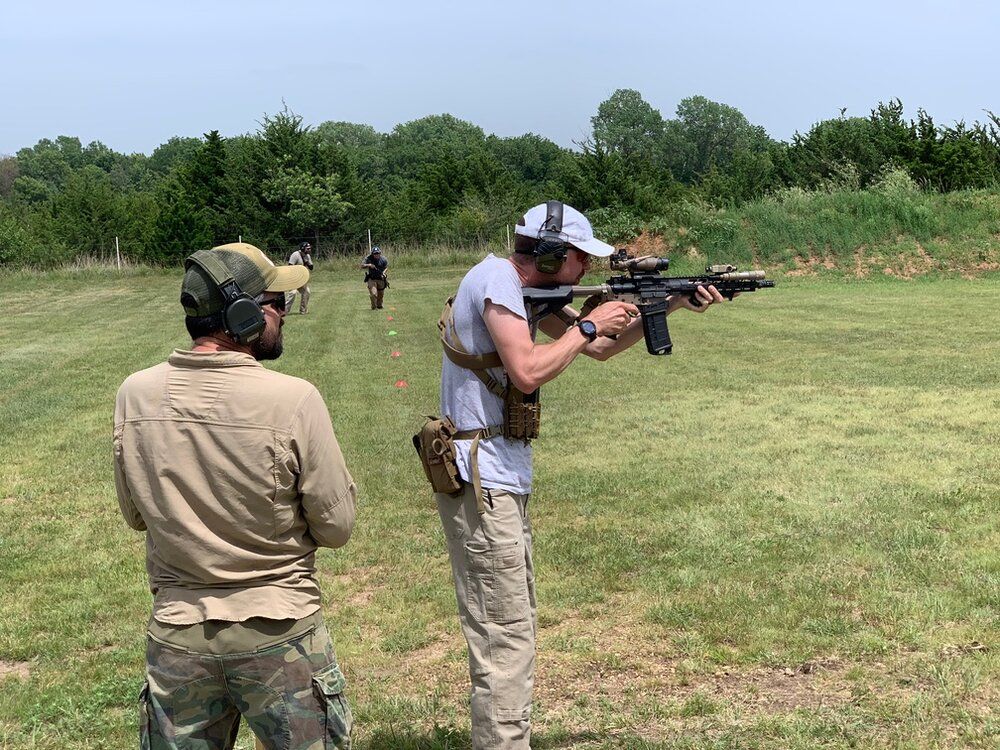
My primary rifle for this class was my 14.5″ AR, with a Leupold Mark 6 1-6 optic in a tall mount and an AAC Mini4 suppressor. I also brought my new .300 Blackout SBR. However, I didn’t anticipate shooting it much since what it really needs is a reliability test. Daniel has a habit of artificially inducing malfunctions during drills (which makes it hard to tell a genuine malfunction from an induced one). Because I wasn’t planning to shoot it, I didn’t clean or lube the gun before class, which would come back to bite me a bit.
The class includes pistol transitions, so I brought a Glock 19X with a red dot (Trijicon RMR), KKM compensator, and a Streamlight TLR-1HL light. I ran all Magpul 21 round mags. For support gear, I had an AWS Light Assaulter’s Belt with two rifle and two pistol mag pouches (both the excellent Tyr Tactical Happy Mag pouches) and a Safariland dropped and offset holster, along with a TQ, trauma kit, multitool, and dump pouch.
The class was all ARs, with one in .300 Blackout and the rest in .223. Most folks were running red dots, but there was one other LPVO and an ACOG (the guy running the ACOG hit a local gun shop for a Holosun red dot and swapped it out before the second day). There were a variety of pistols, including Glock, HK, and M&P, many with red dots.
Saturday
Daniel started by laying down the Patrol Rifle Problem Solver class’s fundamental mission statement: “The better you are at the fundamentals, the more mental bandwidth you have to think tactically.” This idea of mental bandwidth to make good tactical decisions is precisely the sort of thing I’m looking to get out of this. He went on to say, “What really separates the rock stars from the groupies is gunhandling.” This is a theme we’d come back to throughout the class.
In particular, this class has a big emphasis on muzzle discipline, and not just in terms of avoiding muzzling non-threats. You also want to orient your muzzle in relation to potential threats, either pointed at the threat or danger area or at least in a position where you can quickly get the gun oriented should a threat develop. This is something that’s come up in other classes, but Daniel laid it out explicitly in a way that I hadn’t heard before. One of the primary tools for doing this would be a lot of two-man team drills with a partner.
He noted that it was going to be a pretty warm day today, over 95 degrees. This is a very physical class, especially the second day, and the temperature was going to make it a real ass-kicker. Hydration would be essential.
This is not a class where we’d be going downrange to check our groups. Nevertheless, Daniel encouraged us to hold ourselves to a high standard of accuracy. As he would say a bit later in the class, “Accuracy is a choice.” None of the shots we’d be taking are beyond our abilities as shooters. It’s just a matter of whether we devote the time and concentration to get the hit.
Moving into the safety brief, Daniel phrased the rules of gun safety in a way that highlighted their application to this sort of class. He emphasized relentless muzzle awareness and the fact that foreground and background are dynamic and can change as you, the target, team members, and bystanders all move. In the event someone does get shot, he laid out a medical plan and assigned roles to students to ensure that medical aid gets rendered, 911 is called, etc.
Since Daniel mentioned that he wouldn’t be inducing any malfunctions during this morning’s drills, I decided to run the .300 Blackout.
Out on the range, our first subject of the day was ready positions. Daniel went through low ready, high ready, high carry (with the rifle pointed straight up) and extreme low carry (what I would call rifle Sul). As an aside, I’ve been incorporating the high ready more and more into my gunhandling, to the point that it’s probably my most common ready position. He also went through the equivalent positions with a handgun. He emphasized that there is no one do-all position that solves every problem; you need to adopt the position that meets the needs of the moment.
Daniel declared, “The best solution is to solve the problem before it occurs.” The way to solve a host of “I’m not ready to shoot,” problems, whether in a class or on the street, is to have a loading procedure and stick to it. He suggests:
- Look at your mag and check which side the top round is on.
- Insert the mag in the rifle and tug to be sure it’s seated.
- Pull the charging handle all the way to the rear and let it fly forward.
- Remove the mag and check which side the top round is on. If it switched sides, that means you’ve successfully chambered a round.
- Reinsert the mag and tug to be sure it’s seated.
- Check any ancillary gear like lights, optics, lasers, night vision, magazines in mag pouches, etc.
If you do the full procedure every time, you won’t miss anything.
He noted that some units have an SOP that once you complete this process, you close the dust cover on your rifle (don’t close it at any other time). This way, the dust cover serves as a visible signal to you and your teammates that you are ready to go.
We loaded up our rifles and did some shooting from the ready position from about 3 yards (Daniel reminded us of mechanical offset, but didn’t go into detail on the subject since everyone seemed to have it down). We worked through a full mag, firing one shot at a time, alternating between low ready and high ready. Moving back to 50 yards, we did the same thing again on steel targets. This also functioned as a rough zero check. Some folks had some issues with their zero, but despite not having shot this rifle beyond 25 yards, my zero was good enough to ding the steel at least. However, after blazing away at 3 yards, I did have a bit of trouble slowing down enough hit consistently at 50.
Next up was a bit of movement. Something thing Daniel has emphasized in multiple classes I’ve taken from him is landing in a good shooting position. If you’re going to move, then stop to shoot, you don’t want to stop, then orient on the target, then fix your foot position, then mount the rifle, then finally shoot. Instead, coming to a quick stop, oriented on the target, with your feet already in position, fluidly mounting the gun so that the moment you come to a halt, you’re on target and ready to press the shot. This is something that I’ve incorporated into my dry practice since taking his carbine course last summer.
Daniel set out half a dozen cones at roughly 5-yard intervals from the targets. He ran several drills that had us moving up and moving back, eventually throwing in complications like switching up the direction of movement or having us run pas several cones to get to a shooting position. I did much better on these drills than in the carbine class last summer. The dry practice I’ve done over the past year landing in shooting positions helped quite a bit.
As I mentioned earlier, I hadn’t cleaned or lubed the .300 Blackout before class. I did have a couple of instances where the bolt hung up partway forward when chambering the first round on a new magazine. Adding some lube during a break between drills fixed that right up.
Next up was malfunctions. One of Daniel’s pet peeves is setting up certain malfunction drills in ways that don’t truly represent how those malfunctions happen in real life (and can lead folks to “shortcuts” that don’t necessarily work on the real-world versions of those malfunctions). For example, a common way to set up a “double feed” in training is to drop a live round in the chamber, insert a mag and send the bolt forward. This is closer in concept to a failure to extract than a double feed, but in an actual failure to extract, the chamber will be occupied by a fired case that’s stuck in there firmly enough that the extractor couldn’t pull it out. A nice slick live round that will probably slide out of the chamber as soon as you lock the bolt back and raise the muzzle doesn’t have the same characteristics.
Instead, Daniel prefers to set up double feeds in training by pulling the bolt back and easing it forward just far enough to dislodge the top round from the feed lips (with the rifle held level, so the round neither slides into the chamber nor falls out the ejection port). Then pull the bolt back and let it fly forward, stripping another round from the magazine. This results in something much closer to a real-world double feed, with two rounds nosed into the barrel extension, jammed in place by the bolt.
Similarly, many people set up a failure to eject or “stovepipe” by chambering a round, then easing the bolt back far enough to fit a spent case in there, hanging out like Humphrey Bogart’s cigarette. The problem is because you fully chambered that round, the extractor has a firm grip on the cartridge, meaning you can either knock the stovepipe out and the round will slide into the chamber or you can cycle the action and both the stovepipe and the round in the chamber will probably be thrown clear. With an AR, actual stovepipe will prevent the next round from chambering, meaning the extractor won’t have a grip on the rim. The next round often ends up wedged quite firmly under the spent case. In these conditions, trying to knock the stovepipe out without locking the bolt back is an excellent way to cut your hand, and cycling the bolt may just leave the spent case and round wedged in place.
To set up a more realistic failure to eject lock the bolt back with a magazine inserted, insert a spent in the ejection port, perpendicular to the barrel (with the base of the case against the left side of the receiver) and hit the bolt release. That should wedge things in there pretty good.
Of course, Daniel didn’t just show us how to set up these malfunctions; he also showed us how to clear them. In addition to double feeds, failures to eject, and simple failures to fire, he also took us through various permutations of rounds caught between the AR bolt carrier and the charging handle. One thing I hadn’t appreciated before was the difference between malfunctions where the base of the round is caught between the bolt carrier and the charging handle with the tip angled downward, and malfunctions where a round or spent case is either entirely in the charging handle channel or the base of the round is on the bolt face and the tip is angled up. The former is much more difficult to clear because the way the round is wedged binds the bolt carrier and charging handle together, immobilizing both unless you apply a lot of force. In the latter two types of malfunctions, the bolt carrier and charging handle are bound together only by spring pressure, and can generally move freely enough that you can lock the bolt back.
At this point, I swapped back to my 14.5″ 5.56mm AR. We worked the various malfunction types dry, then broke for lunch.
After lunch, we move on to reloads. In the morning, when we were doing our first drills of the class, Daniel noted that everyone seemed to be able to reload their rifles without too much trouble, so he skipped over the mechanics of doing a reload entirely. Now we focused on doing reloads in the context of a two-man team, communicating with your partner before you take your gun out of the fight. There are many different ways to verbalize this, but Daniel prefers “Cover!” to declare that you want to do a proactive reload. A reply of “Okay!” indicates that you can take your gun offline for a moment. Once you have the gun reloaded, “Up!” lets your partner know you’re ready to fight.
For a proactive reload, you are asking your partner for cover and waiting for his reply before proceeding. If your gun is empty or you have a malfunction, “Cover!” is more of a plea for help, and you should go straight to fixing your problem, hoping your partner is in a position to provide some cover fire for you.
We teamed up and did some proactive reloads, alternating between teammates and practicing the verbiage each time. After we got some reps in, Daniel started calling out “threat,” and we had to deliver two rounds to our own target and, if our teammate’s gun was down, to his target as well.
During this drill, I found my trigger was occasionally a bit reluctant to reset. I’ve run into this problem in a previous class. While the JP Modular trigger I have in this gun is very nice, it does seem to be a bit more sensitive than the Rock River triggers I ran previously. I scrubbed the trigger group out a bit with a brush, and the issue cleared up.
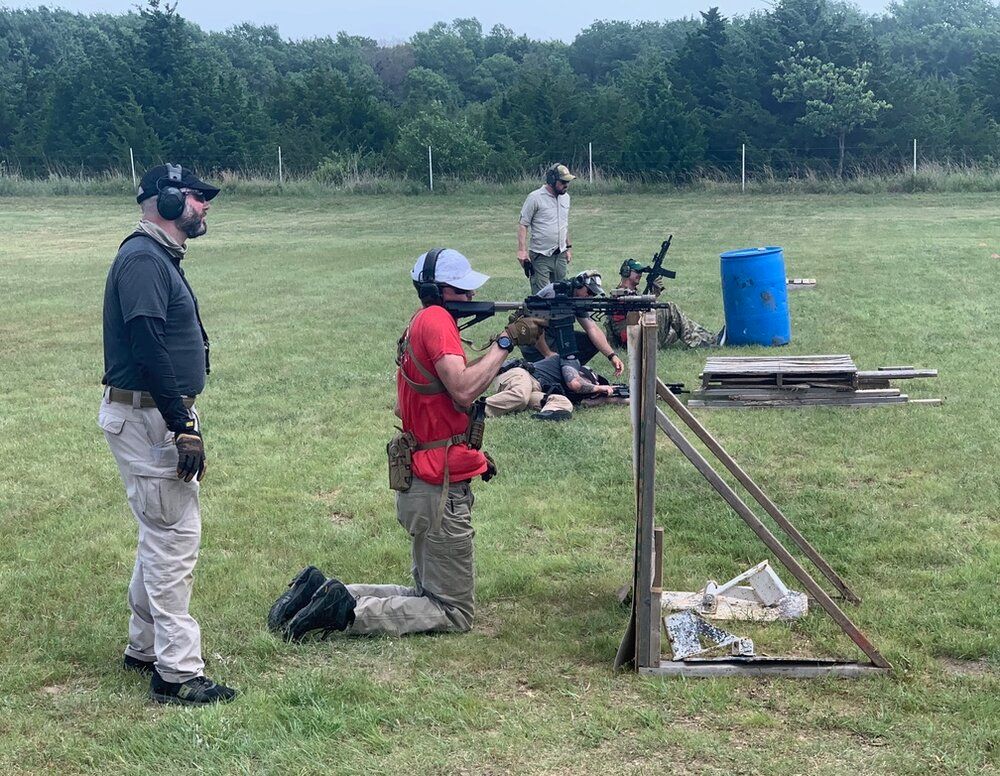
Moving back to 50 yards, we did the same drill on steel. This time, rather than waiting for Daniel to call out “threat,” the goal was to deliver a steady cadence of fire on each of two steel targets. Daniel used a stick to interfere with our ejection ports, causing double feeds and stovepipes. If your partner’s gun was down, you had to deliver fire on his target as well as your own. Daniel’s pretty good with that stick, so if he wanted to put pressure on you, you wouldn’t get off more than 3-4 rounds between malfunctions (he was careful to give each student only as much pressure as they could handle).
The next step was to take this same drill and add movement. Daniel had us running laterally across the line, stopping at cones to deliver fire on targets, then running back to your starting point. By the end of the drill, you’re running all the way across the range. At the same time, your partner is doing the same thing starting at the opposite side of the range, so you have to yell nice and loud to communicate. As you are each running to further and further cones, you have to start moving around each other, posting up next to him when you are both trying to shoot from the same cone, etc. And, of course, Daniel is there wielding that stick to make sure you have plenty of malfunctions to clear on the move (he deputized one of his regular students to do the same to the other shooter so both get plenty of malfunctions).
This drill piles on the stress both physically and mentally. You’ve got to shoot, move, communicate, remain aware of your teammate and his status, clear malfunctions, keep track of which cone you’re running to, etc.
One big issue we ran into on this drill was the long distances between shooters. This meant you had to yell pretty loud to communicate, especially over gunfire. This is where having redundant channels of communication comes in handy. In addition to the verbal commands, you’re sending a message whenever you’re shooting (“my gun is up, and I can cover you”). Similarly, it helps to have a visual communication channel by remaining aware of your teammate in your peripheral vision or glancing over in his direction when necessary.
This was another drill where all my dry practice came in handy. My malfunction clearance was much more up to par than the last time I trained with Daniel, and it showed. Not only could I get my gun up more quickly (even on the move), but it freed up mental bandwidth for all of the other things I had to do. This ties back to that very first thing Daniel said in class this morning, “The better you are at the fundamentals, the more mental bandwidth you have to think tactically.”
After this drill, we had some great discussion, covering everything from how it was generally better to clear malfunctions muzzle up than muzzle down (let gravity help you get stuff out of your rifle) to some students experiencing tunnel vision and auditory exclusion as the drill consumed their mental bandwidth. For instance, towards the end of the drill, my partner and I both needed to shoot from the same cone. I stepped around behind him before posting up about a yard to his left and engaging the steel. Afterward, he said that he didn’t even notice me until I started shooting.
This had been where Daniel planned to end the day. Since we had a group of squared-away guys and were able to get through the curriculum a bit quicker, he decided to have us do some of the handgun stuff he planned for first thing on Sunday. This is primarily a carbine class, but to practice transitioning from rifle to handgun, we need to demonstrate that we have at least some modicum of pistol skills. We did some slow fire on paper at close range, then backed up to about fifteen yards and did some draws on steel. Everyone easily met the basic level of competence required for us to move on to rifle to pistol transitions tomorrow, so Daniel took the opportunity to give some students a few pistol shooting pointers (he also asked to try out the KKM comp on my G19X).
With that, we wrapped up for the day. I got all my gear loaded up, cranked up the AC, and headed home. That evening both rifles got cleaned and lubed (with particular attention to the trigger groups).
Sunday
We reconvened a bit earlier on Sunday morning, to try to avoid the heat of the day. Thankfully, as the day wore on, some light cloud cover and brisk wind helped temper the temperature a bit.
Having demonstrated everyone’s basic competence with a pistol the day before, we started out talking about rifle to pistol transitions. Daniel emphasized that the rifle is your primary weapon system. Getting it back up and running should be a high priority. Accordingly, his transition drills don’t end after you’ve shot the target with your pistol. You need to get that rifle fixed, which requires reholstering quickly and safely. In a class full of things that would give most range nazis aneurysms, the most dangerous thing we’re doing is probably reholstering our handgun during these drills.
In a team environment where you’ve got a buddy covering you, it’s OK to holster up and direct your attention to your rifle. When operating solo, Daniel prefers to bring the rifle up to eye level with your support hand and glance in the ejection port to assess the malfunction while you’ve still got the pistol out. This way, you can have a plan for how you’re going to get that gun up and running as quickly as possible after you holster that pistol.
Finally, after you’ve holstered your pistol and fixed your rifle, if you shot a significant portion of that pistol mag, you may want to think about topping off your handgun.
Doing a rifle to pistol transition with a round in the chamber is neither safe nor realistic, so Daniel had us set up double feeds in our rifles. The drill was to attempt to shoot (so we get the stimulus of a mushy trigger), transition to pistol, engage the target, fix your rifle, and top off your pistol if necessary.
Of course, if your rifle goes down, you want to let your teammate know so he can cover you. So, calling “Cover” when we found our rifle was down and “Up” when we had it fixed.
The next step was to actually run the drill with a teammate. Since both shooters suffer a malfunction, it’s time to get the pistols out and solve the immediate problem. Then you need to coordinate with your teammate about who’s going to fix his rifle first, while the other covers with his pistol. Then the other guy fixes his rifle, and you do the same topping off your pistols, always keeping one guy covering.
After doing a couple of iterations with a teammate where we set up the malfunction in advance, the stick came out. Daniel had us keep up a slow cadence of fire on the target, and he’d come by with the stick to induce a malfunction. The team member who’s gun he malfed has to communicate that fact, transition to pistol, and get the gun back up (by which time Daniel has probably induced a malfunction in his teammate’s gun).
After running this drill on paper up close, we stepped back to 50 yards and ran it on steel. Same dynamics, but more demanding of your shooting (particularly with the pistol).
Something I want to mention here that Daniel does on many of the drills is the distinction between him calling “all targets are down” and “safe and hang.” “All targets are down” means you don’t have to deliver any more fire on the targets, but it doesn’t mean the drill is over. You still have post-fight actions to take care of (scanning, applying medical aid, calling 911, topping off rifles and pistols, picking up stuff you dropped during the drill, moving to a more survivable position, setting up magazines, etc.). For team drills, all of this should be coordinated with your teammate, so at least one of you is covering the whole time. Even in individual drills, you should keep awareness and come back to being “on the hunt” after taking care of this stuff. You don’t get to relax until he calls “safe and hang,” and you can make sure your rifle is on safe and sling it.
Next up was some position shooting. After demoing kneeling (including strong side knee down, support side knee down, and both knees down), squatting, and urban prone, Daniel ran a drill where he called out shooting positions. We had to deliver 2-4 rounds to the target from that position, then work our way back to standing. One thing he emphasized was doing a 360 scan both before and after changing to a higher elevation. Before, both to look for additional threats and make sure you’re not standing up into a teammate’s line of fire and after because from a higher position, you can see more. Getting up from prone might involve multiple 360-degree scans (one from prone before you go to kneeling, one after you get to kneeling, one before standing up, one after you stand up).
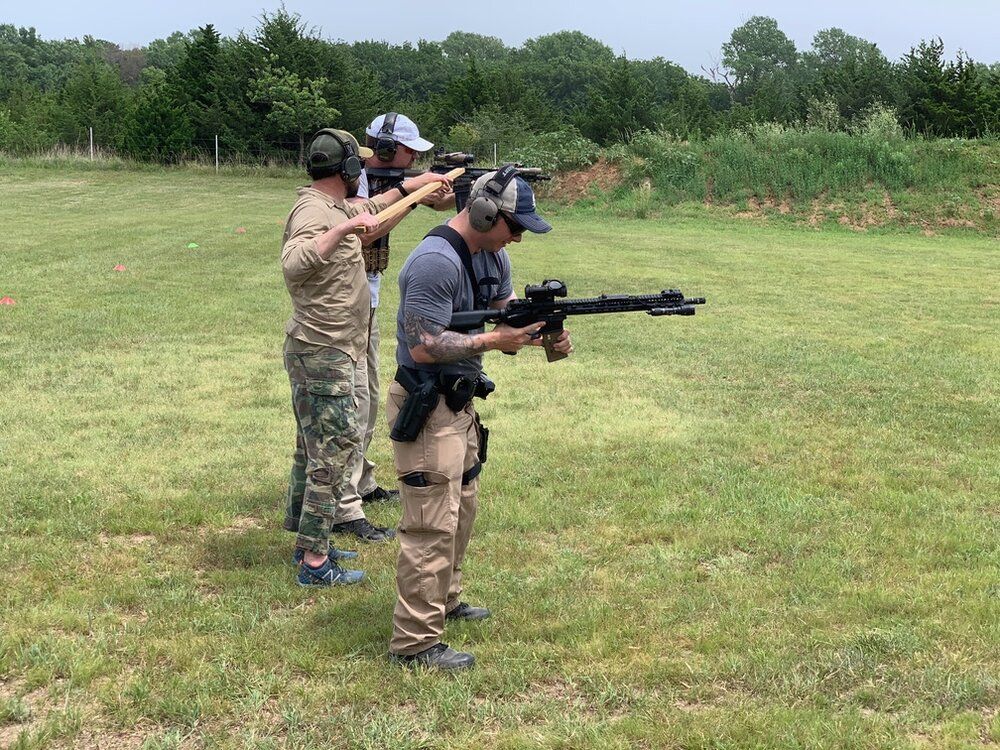
Daniel introduced the concept of shooting from your support side shoulder. He started by talking about why you might want to switch shoulders to accommodate cover and demonstrated both a partial transfer (moving the stock to the opposite shoulder without changing hand positions) and a full transfer. We practiced these live, switching from a partial transfer to the support side, to a full transfer, to a partial transfer to the primary side, to a full transfer back to the primary. While I’ve practiced shooting from the support side a lot, one thing I found difficult was remembering to reengage the safety before transferring the rifle.
To practice support side shooting in a more dynamic situation, Daniel set up a variant of the cone drill we’d shot the previous day. This time Daniel wasn’t inducing any malfunctions, but every time you fired from a cone that was more than halfway across the range, you had to do it from the support side shoulder. This had you switching back and forth plenty of times as you ran from the further cones back to the starting point, then on to the next cone. As with yesterday, we also had a teammate in the mix that we had to maneuver around and coordinate with when we needed to reload.
Having laid the groundwork with position shooting and support side shooting, Daniel dragged out various pieces of cover. He talked a bit about the fundamentals of shooting from cover (get into your shooting position before you roll out, don’t expose yourself in the same place every time, expose the minimum body are for the minimum amount of time). Since we had multiple pieces of cover, he also emphasized how to move between cover. You want to explode out from behind cover, so by the time the opponent has a chance to catch sight of you, you’re already moving as fast as possible. To do this, he talked about getting set, orienting your hips in the direction of travel, etc. Think about a sprinter setting up in the starting blocks ready to launch themselves. Similarly, you want to keep moving as fast as possible until you’re all the way behind cover. Don’t slow up as you approach.
We had cover representing a curb, a barrel, a vehicle to shoot under, and a half-height section of wall to kneel behind. For each piece of cover, Daniel asked us to shoot from multiple positions. We ran through these four stations, practicing shooting from the various positions at each.
Effectively using cover and the various rifle shooting positions is a very physical exercise. Shooting a long gun one-handed utilizing cover and various shooting positions is even more physical. After a demonstration of some techniques for doing this, we reran the drill using only our primary side arm.
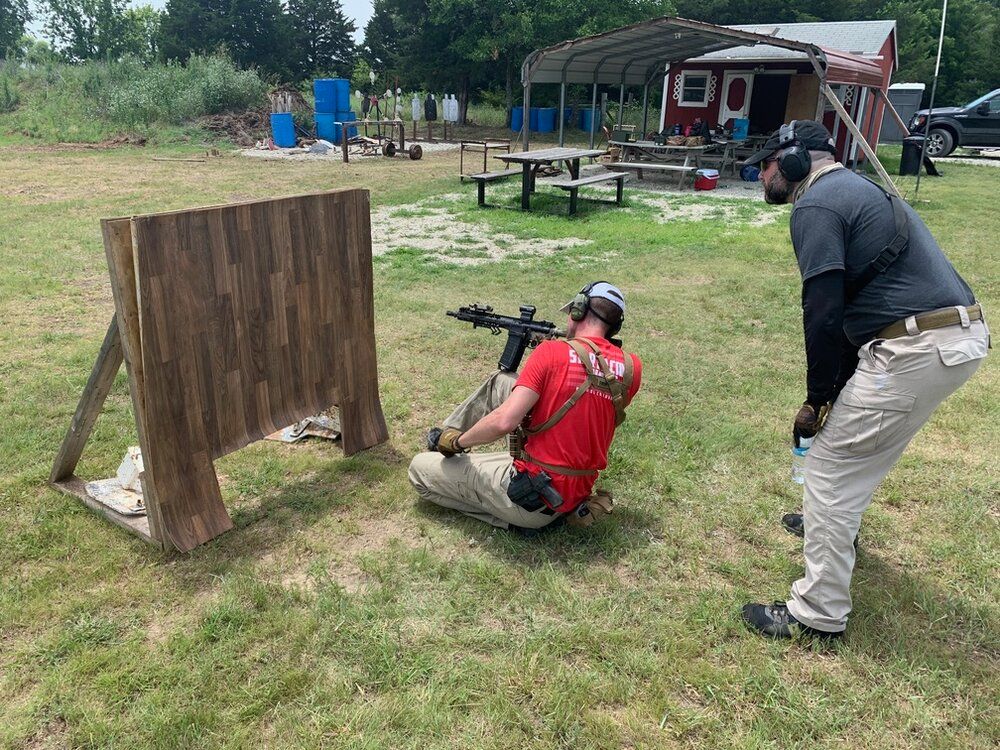
Holding up the rifle with only one hand on the pistol grip is a real bear, you need to rely on other sources of support. If the cover allows, using it for support is usually easiest. This is simple when you can simply plunk the rifle down on the cover itself, as with a barrel or a piece of low cover. Sometimes the cover is at an odd height that complicates things. For instance, with our pallet representing a curb, I had to shoot with the stock planted in the middle of my chest and looking through the optic with my left eye to get the elevation right. After Daniel’s carbine class that I took last summer, I added an aggressively textured hand stop to the end of my AR to make it easier to support the rifle one-handed when shooting around either side of cover.