Last weekend I had a chance to take the Winter Warrior course from Eric Pfleger. This is a class that I’ve been asking Eric to teach for many years, and I was very excited to see it on the schedule.
Gear
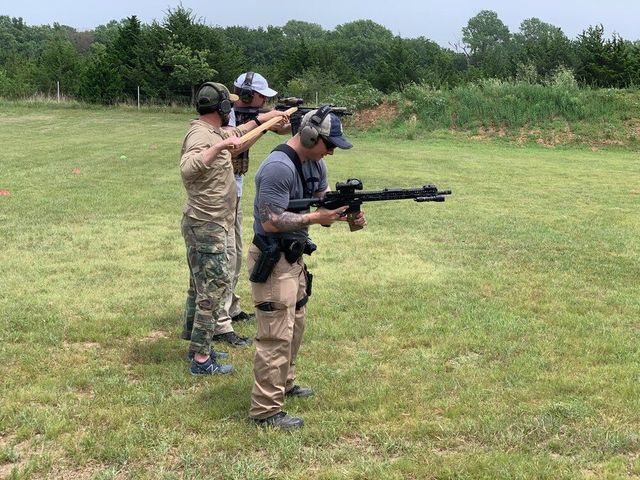
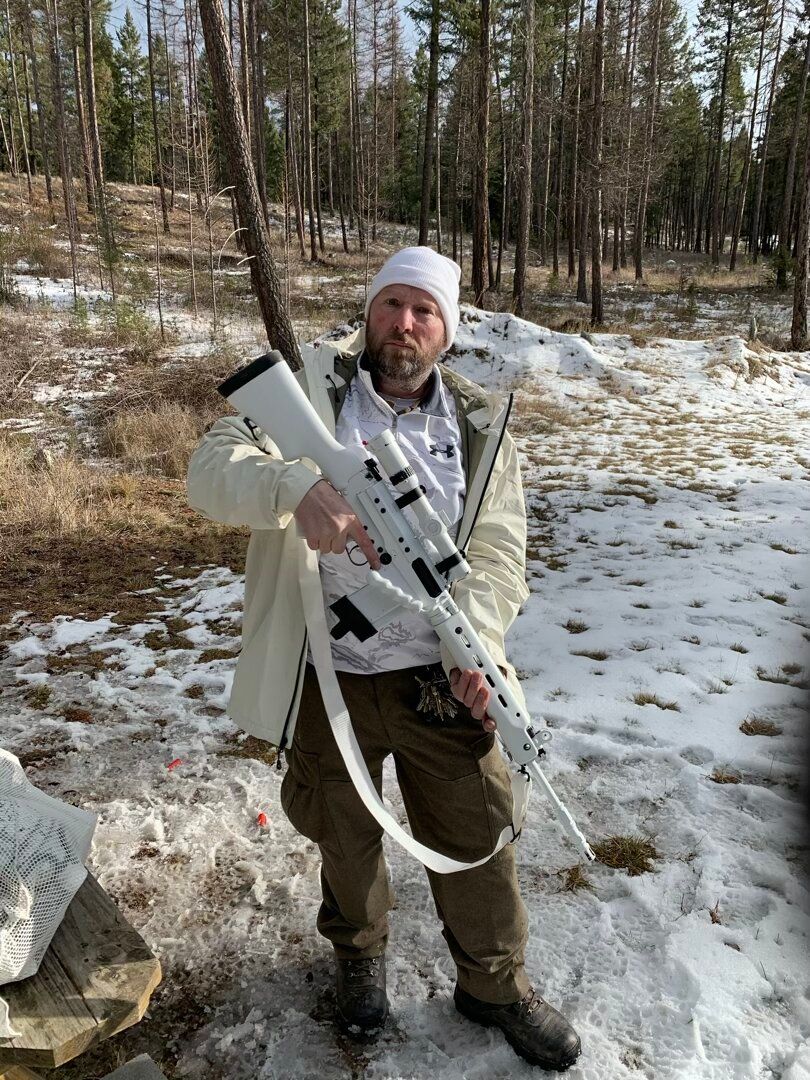
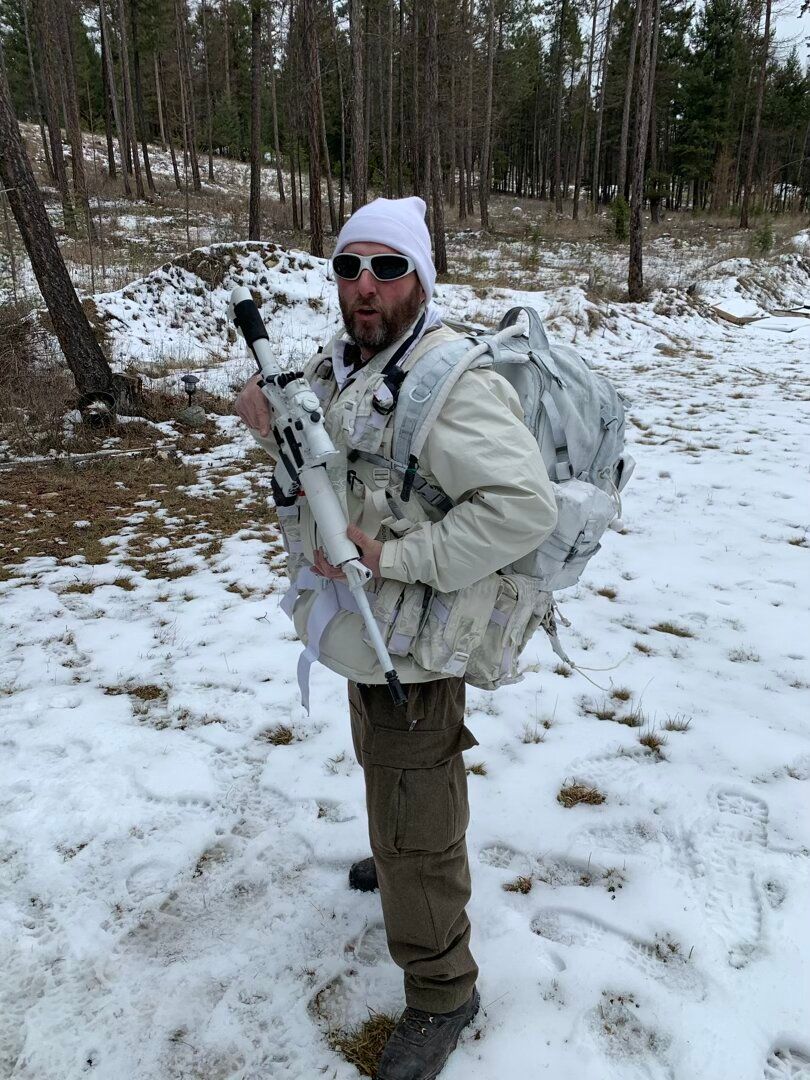
This is a shooting class, not just a winter survival exercise. I brought my PTR-91GI. The G3 design makes it easy to change out furniture, and I have some extra stocks and forends for it, so I took advantage and painted a set white. I ran an extra Leupold Mark 6 1-6 scope and Dead Air Sandman-K suppressor.
I bought my usual woods pistol, a 10mm Glock. One thing I did a little differently is to run it in a regular kydex belt holster rather than the dropped and offset rig that I usually run in the woods and tactical classes. This was so I could keep it under an outer layer of clothing to protect it, rather than packing the holster full of snow every time I went prone.
Before the class, I did some shopping for a chest rig in white or a snow camo color scheme, but I wasn’t able to find anything that would take 7.62x51 mags. Instead, I just brought my multicam Velocity Systems UW Gen VI chest rig. A belt-mounted mag pouch and dump pouch and a Ronin Shinto fixed blade rounded out my fighting gear.
Given that this would be February in Montana, I knew staying warm would be important. I’d learned some good lessons from my hunting trip back in November and had added to by cold weather kit. These included a set of Cabela’s Wooltimate jacket and pants, as well as the set of wool pants I’d picked up from Eric. As Eric proved last fall, it is possible to wind up too warm in this sort of kit, so I also brought some BDU tops and Crye multicam pants. A multicam goretex jacket with a fleece liner, goretex pants, and goretex gaiters would keep me dry if things got soggy. Throw in a couple of pairs of merino wool long underwear, and I figured I’d be able to layer and adapt to a wide range of temperature conditions.
All this multicam might not sound like a particularly good color scheme for winter in Montana. A few weeks before the class, another student linked to a sale on Kryptek overwhites in their Wraith snow camo scheme. I jumped right on these.
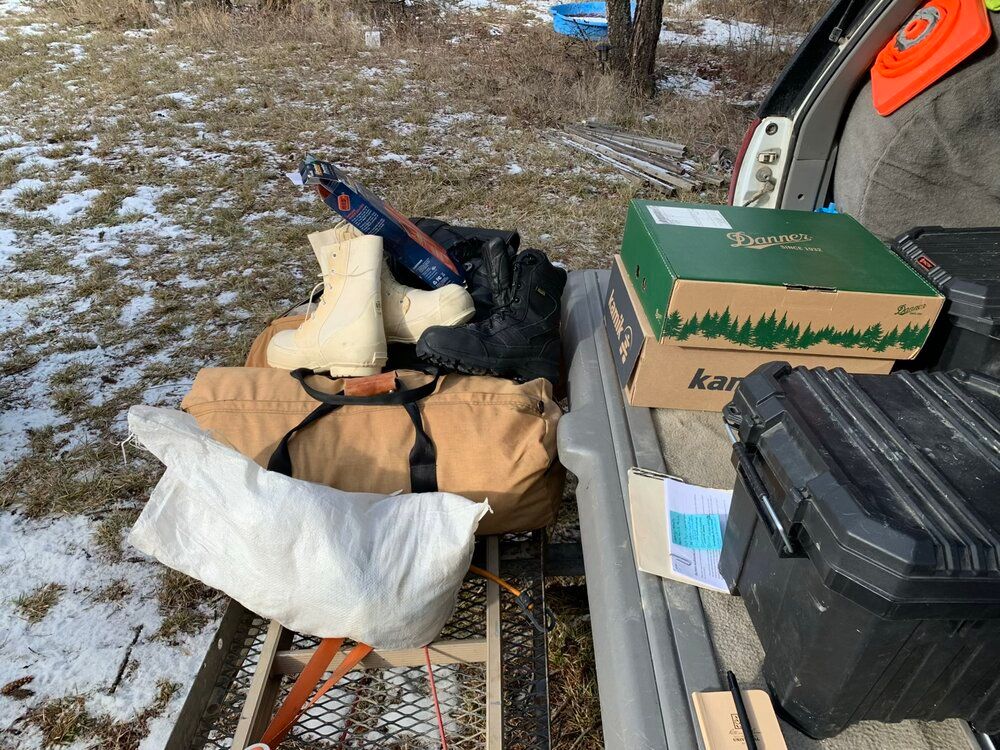
My fingers and toes tend to get cold easily, so I brought a wide selection of gloves and mittens, ranging from thin liners to big insulated mittens with goretex shells. To top things off (literally), I brought a couple of fleece watch caps and a thin liner than can be worn alone or underneath other headgear. The big purchases I made specifically for the class were two pairs of boots: 1000 gram Rocky hunting boots and some 2000 gram Cabela’s Inferno boots. Back in November, I’d tried some chemical foot warmers, but for this trip, I decided to splurge on some electrically heated insoles like the ones Eric uses.
We’d be spending a night outdoors, so the class also required cold weather camping gear. Since I don’t have a 4-season tent, I just brought my little nylon hiking tent. However, I’d stashed my zero-degree sleeping bag at Eric’s last fall. Combined with a thermarest and an inflatable pillow to keep me off the cold ground and I figured I’d be able to stay warm. Also important, a Jetboil for cooking dinner, breakfast, and some warm beverages.
Speaking of, operating in these conditions can burn a lot of calories. I brought plenty of calorie-dense snacks (nuts, M&Ms, Clif bars, pretzel pieces, and jerky) and some instant oatmeal and hot chocolate for breakfast. For dinner, I brought creamy chicken with herb stuffing and cranberries. To cap it off, Eric had been holding on to a bottle of bourbon that I’d brought for the CQB class last August that we hadn’t gotten the chance to crack open.
To carry all the kit for the overnight, I brought my Mystery Ranch Blackjack 80 backpack. I did a five day trip in the Bob Marshall wilderness with this pack last summer, and I’ve been very happy with it. Again, the multicam isn’t the most subtle color in the snow, so I picked up a Kryptek Wraith pack cover for it.
In addition to the rifle optic, I brought a pair of Vortex Viper binoculars. I also brought along my night vision gear (a PVS-14 monocular, Norotos INVG Mount with the dual dovetail adapter, and a Crye Nightcap). Unfortunately, the PTR isn’t set up for use with night vision, so the NVG would be for navigation only.
This was a lot of kit, even more than I brought to Eric’s sniper class. The amount of space low temp sleeping bags and warm clothes takes up is just huge. I shipped two big boxes of gear and had two checked bags weighing in right under the limit. The only reason I was able to do that is that I’d left the big zero-degree bag with Eric last fall.
Friday
A cold front blew through Wichita on Thursday. When I got up at 4 o’clock on Friday to leave, it was just 12 degrees out (this would be the lowest temperature I’d encounter all weekend). Thankfully, I hadn’t shipped out quite all of my warm clothing, so I was able to bundle up for the trip to the airport.
My flight to Denver went smoothly and got some work done during the long layover there. We were a few minutes late leaving for Missoula, but not too much. It was a very bumpy ride coming into Missoula, though.
Eric picked me up at the airport, and after a couple of stops, we met up with his family for dinner at a Mexican restaurant in Polson. We met up with a couple of the other students in the class and enjoyed a great night of fellowship (and homebrewed beer) at an AirBnB in Lakeside.
Saturday
After a breakfast of instant oatmeal and some muffins thoughtfully provided by our host got my kit together, and we headed over to the location for the first day of the class, a private range owned by one of Eric’s regular students.
Temperatures were a relatively balmy 35 degrees or so. They would remain in that range with a dusting of snow on and off throughout the day. I was running some merino wool long underwear underneath a BDU top and they Crye pants. With a goretex parka and fleece liner, and I was pretty warm the whole day.
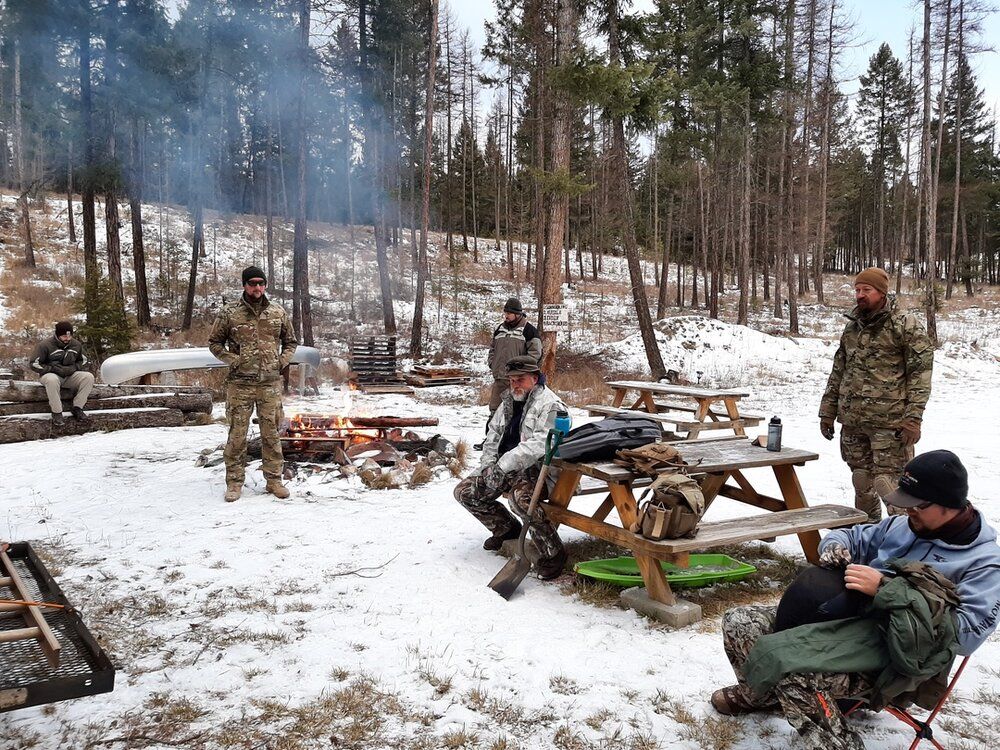
The range owner had a fire going when we arrived, which was welcome. Even though it wasn’t that cold (for a Winter Warrior class, anyway), we wouldn’t be doing a whole lot of vigorous activity, so being able to warm up by the fire was nice.
Everyone in the class had trained with Eric before; I’d met all of them in his previous classes that I’d taken. Eric passed out the waivers, and once everyone had signed, we got to work. We started with the medical brief. In addition to the “what to do if someone gets shot” stuff, Eric talked about cold-weather injuries and hypothermia. We went over the symptoms like lethargy and slurred speech.
With the medical stuff covered, Eric talked a bit about the class. This is a curriculum he’s had in mind for a long while, but this is the first time he’s had a chance to teach it. Day 1 would be mostly lecture, talking about the considerations for winter warfare and winter survival. He said it would probably end up costing us a lot of cash (it usually does when Eric starts pulling out all his cool gear). Days 2 and 3 would be more practical application.
Eric talked a bit about his background when it comes to this sort of subject matter. He’s been doing stuff outdoors in winter conditions his entire life, both for hunting and recreation and for law enforcement. In the latter capacity, he’s also had a chance to work with some folks who have experience doing full-on infantry operations in cold conditions. This includes some former Canadian military who are probably the best at arctic warfare this side of Norway.
Moving on to the subject matter at hand, Eric talked about the fundamental considerations of winter warfare: maintaining our comfort, mobility, food & hydration, and medical.
We started talking clothing, which is a significant element of comfort in these conditions. In this environment, we’re asking quite a few different things of our clothing. It may seem obvious that we want clothing that keeps us warm. However, Eric pointedly referred to this as thermal regulation, not just staying warm. Part of our clothing’s job needs to be keeping us from getting too warm as conditions change or we change our levels of physical activity. Clothing needs to provide insulation, manage moisture coming off our body, provide ventilation, and block wind and water.
If you’re just going to step out the front door and perform a discrete task in a single set of conditions, matching clothing to conditions and activity isn’t that hard. In winter warfare, we’re rarely going to get that luxury. We’re probably going to be outside for a long while, potentially many days, with conditions and our activity varying the whole time (snowshoe in to an objective, lay up in a sniper hide overnight, have a blizzard blow through, then move out to somewhere where we can be extracted). Accordingly, we want our clothing system to be customizable, interchangeable, and adjustable to activity type and season.
The key to this is layering. Layering provides adjustability, as well as allowing layers that are optimized for particular purposes. Moving from closest to the body outward, we start with our base layer. This may or may not have insulating properties, but it is absolutely critical for managing moisture. Even when we’re not actively sweating to cool down, our body still puts out moisture that we need to deal with. If we don’t, we’re just going to end up cold and damp. We want our base layer to be moisture-wicking and breathable. Finally, our base layers need to be non-binding. All the layers above them need to slide smoothly, so we don’t end up like Randy in A Christmas Story.
Next, our mid-layers ramp up the insulating properties. These layers still need to be breathable and able to move moisture out, but these characteristics aren’t quite as crucial as in the base layer. Depending on conditions, we may have one or two mid-layers for varying levels of insulation. If we’re wearing more than one mid-layer, generally, the outermost one will have the heaviest insulation, such as a puffy down or synthetic jacket.
Finally, our outer layer provides wind and water resistance. The two main choices are softshell and hardshell. Softshell is more breathable but less water resistant. It works best in dry conditions or solidly sub-freezing temperatures where we don’t have to worry about sleet or melting snow. Hardshells like goretex offer better water resistance but are less breathable. They can also be much noisier. This is something Eric pointed out with my multicam Goretex parka when we were hunting last fall. Particularly when branches scraped across it, it could be quite noisy. Not much of a problem on the conventional battlefield that most military gear is designed for, but when you’re trying to be sneaky, it can be an issue.

We lose heat through radiation, respiration/evaporation, convection, and conduction.
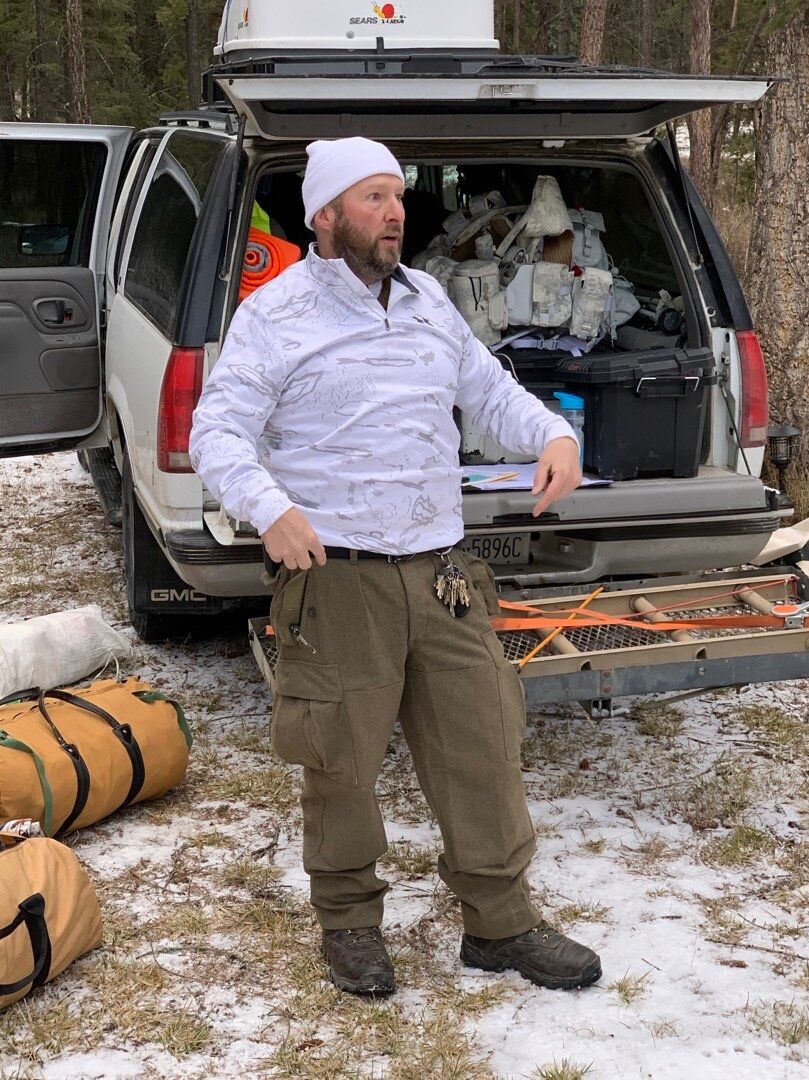
With the fundamentals covered, Eric broke out a couple of big duffle bags of clothing to show some examples. I’ve reorganized it a bit here by layer. Fair warning: this is going to be a bit long and detailed, even by my standards. Eric gave out a ton of useful info, and I want to have it in one place as much for my benefit as anyone else’s.
Base Layer
Merino wool base layers are warm and tend not to stink even after being worn for extended periods. Eric likes Minus33 (as do I), but other brands like Smartwool and Ibex make good stuff as well. The other option for a base layer is synthetic materials, such as the Under Armour HeatGear or other similar products. These tend to have better moisture-wicking properties, so they can be well suited for vigorous physical activity like snowshoeing. However, synthetics tend to generate significant odor after they’ve been worn a while. Eric also pointed out that the Under Armour base layer doesn’t have a fly in the bottoms, which is an issue when spending an extended period in the field.
Eric is very enthusiastic about a forthcoming base layer from First Light: bottoms that have zippers all the way up the outside of each leg so that you can change out of them without taking off your pants or boots. This presents lots of possibilities for adjusting for various levels of physical activity or changing out a wet base layer.
Mid Layers
Eric likes down or synthetic puffy jackets as heavy mid-layer insulators. They aren’t very durable (I saw the rear sight of Eric’s Glock wear a hole in one when we were hunting last fall), so you probably don’t want to wear them as your outermost layer. On the flip side, this means that we can look at a broader range of colors for these (check places like Columbia or LL Bean in addition to hunting or military clothing makers). Fleece is also a good option for insulating mid-layers.
Another simple, inexpensive solution for these sorts of layers is wool. Eric had a set of surplus German wool pants that kept him nice and warm during the 30-degree temperatures we encountered in this class.
The military has a new cold-weather system that includes some zip off mid-layers, with options in both fleece and primaloft that Eric showed off.
Outer Layer
We’re relying on our outermost layer to block wind and moisture. As mentioned earlier, there are both hardshell (usually goretex) and softshell options.
One decision to make is whether you want any insulating properties in our outermost layer. This can require fewer layers but cuts down on your flexibility to accommodate varying activity levels or temperature conditions. If you decide to go this route, Eric showed off some Columbia Granite insulated white pants, and a white Mountain Hardwear insulated parka and overpants. Another option is the 5.11 Aggressor Parka, though this exact model is no longer being made.
In addition to providing wind and water blocking properties, we’re also relying on our outermost layer for camouflage. Before the class, one of the students had posted a link to a sale on Kryptek overwhites in their Wraith snow camouflage. Several of us were rocking those.
The surplus US military overwhites can do a good job camouflaging you, but if they get wet, they tend to stay that way. Overwhite ponchos, such as the surplus German ones, are not Eric’s favorite for wearing. However, they can be useful for throwing over packs and bivvies, using them more like small tarps.
One option for very light, packable overwhites are the Tyvek suits they use for painting and such. They’re kind of noisy, but quite inexpensive and easy to through into various packs and kits.
Eric noted that some of the Under Armour basketball gear comes in white (often broken up by some sort of gray pattern), which make good overwhites. He is not a fan of snow ghillies. They tend to get heavy when wet or snowy and flutter unnaturally in the breeze.
Socks & Boots
Eric recommends wool socks over some sort of moisture-wicking liner. You can vary the thickness of the sock depending on conditions. Smartwool makes good stuff, but so do others. Students in the class also recommended Darn Tough and Farm to Feet.
One option that Eric advocates having on hand are some waterproof socks. That way, if your boots get wet (going through the ice on a stream crossing, for instance, you can at least have dry feet inside wet boots.
Many boots are rated in terms of the grams of thinsulate insulation per square meter. For the 30 degree temperatures that we were in today, Eric likes 600-gram boots. My feet tend to get cold easily, so I was happy to be rocking 1000 gram boots in these conditions. For even colder conditions, they make boots up to 2000 grams, like the Cabela’s Inferno boots I brought.
The military issues cold weather combat boots with removable insulating booties. Eric recommends getting multiple pairs of the booties so you can wear a set while airing out the other. The other military surplus option are “mickey mouse” boots. These are white rubber inner and outer boots with insulation sandwiched in between. They’re available quite inexpensively and make excellent options for throwing into a vehicle kit as a “just in case” option.
Pac boots with thick felt liners offer even warmer options (Eric has a pair that are essentially designed for Antarctica) but are less suited to mobility. Danner makes a hybrid set of boots that are built like pacs but lace up like more conventional boots.
One thing Eric emphasized is that your boots should not be too tight. Lace things up too tightly, and you reduce circulation, which will make your feet colder. For stationary work (and maximum warmth), you should be able to slip four fingers down into your boot tops. If you’re going to be walking a bunch, you’ll have to tighten them up for ankle support and to prevent rubbing, but the activity will also help keep your feet warm.
Eric really likes the Thermacell electrically heated insoles. These have rechargeable batteries built into the soles. You turn them on or off with a remote control that goes in your pocket. He’s got several pairs. He also mentioned Little Hotties insoles (be careful when you google that), which contain both felt insulation and a reflective layer to help keep cold ground from sucking the heat out of your feet.
There are also chemical foot warmers. These aren’t as comfortable as insoles, and you can’t turn them on or off as necessary. Eric using them to help keep your boots from freezing solid during the night. They also make chemical toe warmers that stick to the inside of the top of your boots. In very cold conditions, sandwiching your toes between a heated insole and a toe warmer can be very effective.
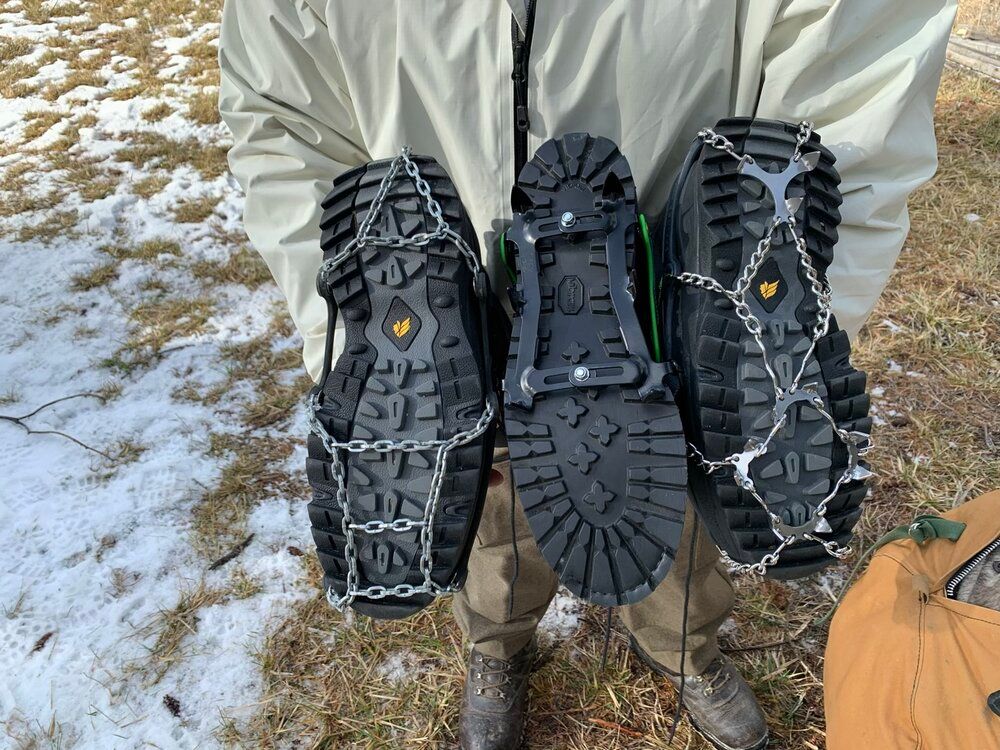
In addition to keeping warm, proper footwear is also critical for staying mobile. Many boots don’t offer enough traction in snowy or icy conditions. There are various options for enhancing traction, including boot chains, Yaktrax (a grid of rubber cables with wire wound around them), microspikes (chains with little spiked cleats), and full-on crampons.
Another critical element of winter warfare footwear is staying dry. While all winter boots should be waterproof if you’re doing water crossings or in an especially wet area, more specialized gear is required. I’ve got both some Cabela’s neoprene waterproof boots and some rubber overboots, but both are pretty bulky to carry if a water crossing is only going to be a small part of your movement. One option Eric passed around was a pair of cheap PVC waders. They’re probably basically single-use, but they fold flat and don’t weigh much.
Gloves & Mittens
Eric likes glove liners quite a bit, both for their wicking qualities and for adding a bit more warmth to a set of gloves. As a good, basic glove, Eric recommends medium weight thinsulate insulated gloves.
For fighting in very cold conditions, Eric showed off a pair of Cabela’s Canada Stand Hunter mittens. These come with a pair of glove liners and have a short zipper that allows you to stick your trigger finger through the mitten.
Eric will often put grommets in the sleeves of his jackets so he can dummy cord his gloves to them. In cold conditions losing a glove can mean losing a hand.
Much like with footwear, chemical hand warmers can help keep your hands warm in harsh conditions.
Headgear
Cabelas makes some nice, inexpensive white knitted watch caps. For a lighter weight option, Eric has a white Under Armour skullcap he calls his Norwegian yarmulke.
On the non-tactical side of things, old school Mad Bomber fur hats with ear flaps can be quite warm.
One option that Eric showed off was a heavy insulated head tube type balaclava. These can be worn as a balaclava or neck gaiter, or even as a watch cap if you can tuck in the face hole.
Balaclavas don’t necessarily need to be heavily insulated to be useful. Even lightweight ones can provide camouflage. Cabelas makes a white balaclava as part of their Guidewear line. It’s intended to keep offshore fishermen from getting sunburned, but it makes for nice camouflage in warmer conditions when you don’t necessarily need a lot of insulation.
Neck gaiters can do an excellent job keeping you warm without committing to a full balaclava.
Eyewear
Eye protection is also essential, both in terms of protecting them from the environment (wind, reflected sunlight) and all the crap that gets thrown around once the fight starts. Eric had some big Oakley ski goggles and a pair of compact Wiley X goggles in white frames.
Fogging can be an issue, particularly during physical exertion. Eric recommends Cat Crap anti-fog compound (yes, that’s what it’s called). You apply it to the inside of your glasses or goggles, and it makes them less likely to fog up.
Medical Gear
In addition to chemical hand warmers (and their toe warmer and heated insole cousins) intended to keep your extremities warm, there are also larger and more powerful chemical heating systems that can be used to warm up casualties or for other purposes. Instant Hot Packs intended for treating strained muscles and the like only last for a short time compared to hand warmers, but generate a lot more heat.
On a larger scale, Ready Heat casualty blankets cover a much greater area and are intended for rewarming exposure casualties. Eric recommends using it in conjunction with a Mylar space blanket. The North American Rescue Hypothermia Kit and the Doctor Down Rescue Wrap offer even more capable rewarming bags.
Winter warfare has all the risks of ballistic injury as warfare at other times of the year, so we need to be ready to deal with that. The temperature does have an effect on some of our gear and treatment options, however. Bulky clothing can impede tourniquets’ ability to compress arteries, so you may want to upgrade to one with a ratcheting mechanism. IVs are vital for replacing lost fluids, but you want any fluids you introduce to be as close to body temperature as possible. Giving a patient a freezing cold IV is a direct ticket to hypothermia. Similarly, you need to consider environmental exposure when cutting away clothing to get at injuries. Don’t turn someone with a gunshot wound into someone with a gunshot wound and an exposure casualty.
Cold conditions can make us more vulnerable to illness, so it’s important to include cold and flu medicine, decongestants, and the like in our winter kit.
Another consequence of the cold is chapping and cracking on the skin, particularly the mouth, nose, and hands. Eric recommends stuff like Blistex, Chapstick, and Carmex for mouth and nose. O’Keefe’s Working Hands lotion and Aquaphor are good for cracking skin on the hands.
Stoves, Lanterns, and Heaters
Our next big topic was stoves, lanterns, and lighters. These can help keep us warm directly (holding your hands up to a lantern to warm them) or indirectly (warming food and water before eating) as well as providing illumination during those long winter nights.
Eric started by talking about different types of fuels, particularly in cold weather. You might think that when you’re setting something on fire, the starting temperature doesn’t matter that much, but certain fuels need to be at certain minimum temperatures to burn or to convert from a liquid to a gas.
Propane works well in cold temperatures, but requires large, heavy canisters and poses a danger of asphyxiation in confined spaces. For mobile use, burners and Black Cat heaters that can screw on small propane bottles are good choices.
Your other traditional camping fuel is white gas (Coleman Fuel). White gas stoves and lanterns are a bit more fiddly than propane, but can be more compact and easily refilled. While there are a wide variety of types, Eric likes the dual-fuel stoves that can burn white gas or unleaded gasoline in vehicle emergency kits.
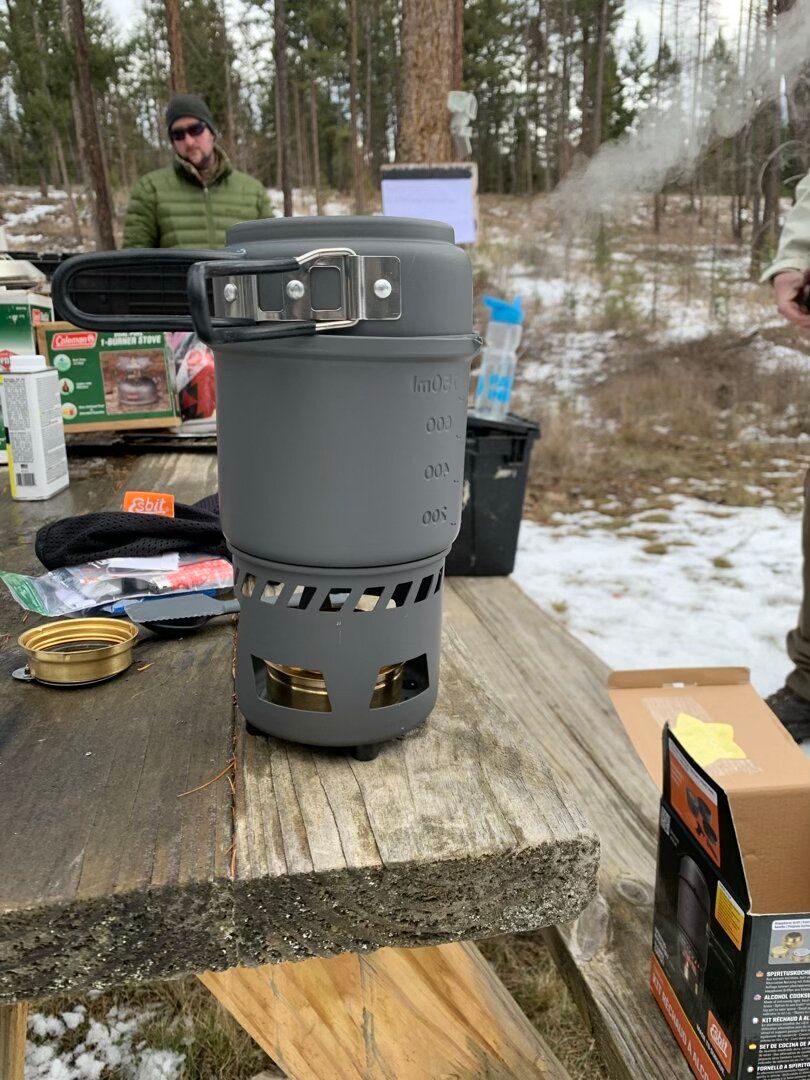
Denatured alcohol burns very cleanly and scent-free, but it will not ignite when cold. Eric suggests keeping a small bottle of fuel on your body where it will stay warm. Since it requires a bit more care and feeding, Eric demoed an alcohol stove. He pointed out that alcohol flames burn invisibly, which can be a safety issue if you’re not careful.
Eric showed off a small stove that takes sticks or other burnable material (it can also be used with solid fuel tabs like Esbits).
Next up was isobutane/propane mixes, like Jetboil fuel canisters. These don’t do well in very cold temperatures (below 10 degrees), but you can warm them with body heat or by sticking a toe warmer to the bottom of the can. Eric showed off an MSR Pocket Rocket 2 as well as the traditional Jetboil and the very light Jetboil Sol.
He also had a couple of lantern options for these canisters, including a small F1 lantern and a more expensive Brunton lantern that has the advantage of not using fragile mantles.
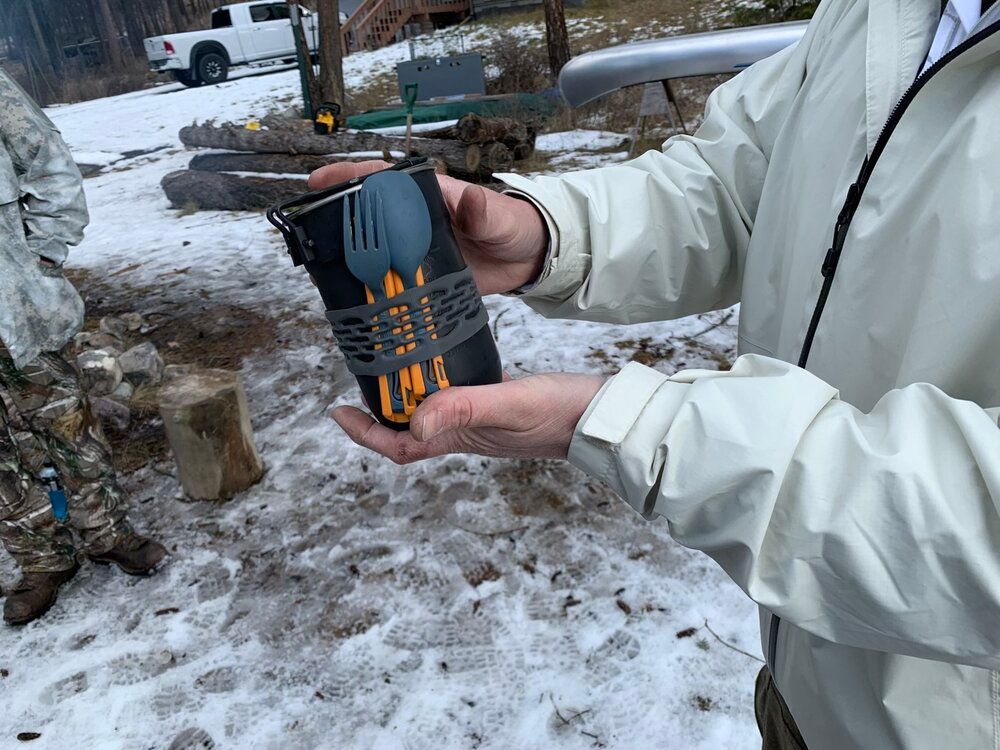
He had a neat setup built around a Stanley stainless steel cup with a couple of nesting plastic cups, some oatmeal, and a can of sterno. A complete emergency cooking system and some food in a package maybe 4” long and 2.5” in diameter.
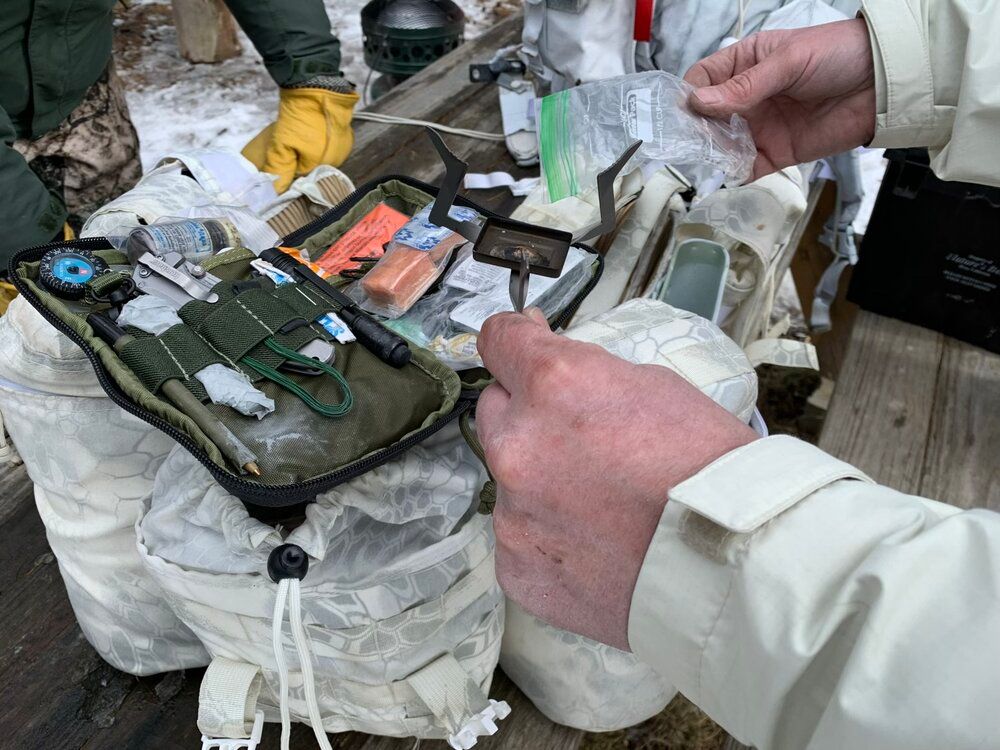
Last up, Eric talked about solid fuel stoves like the Esbit. He had a tiny little Esbit Titanium stove that goes in his pocket survival kit. It’s a little platform for an Esbit tab with three metal legs that fold out (I may need one of those). He also showed off a grill that you could use to hold wild game or other food above a bed of coals. Assembled, it’s probably about 10” square, but it breaks down into a 1” diameter tube.
One thing Eric mentioned is that black stove paint works well to make stainless pots or water bottles a more subtle color while resisting heat from a stove burner.
Once you get food warm, you probably want to keep it that way. Eric had some insulated pouches from Big Sky International to help keep food and other stuff warm.
Food
Of course, the primary purpose of a stove is to warm up food before eating. Operating in cold environments can require massive amounts of calories. Up to 6000 calories per day in extreme cold, even if you’re relatively sedentary. Vigorous physical activity can push that to 8,000-10,000. You want lots of very calorie-dense food like nuts and sweets to help fuel your body.
For ease of preparation, Eric likes freeze-dried food like Mountain House. Other quick cooking foods like instant oatmeal or rice work well too. On the other end of the spectrum, Eric brought some cracked wheat. Cooking this on the stove would require 25 minutes or so, longer (and more stove fuel) than we want to spend. Instead, Eric put some in an insulated mug, filled it with boiling water, and left it overnight. We’d give it a try tomorrow morning.
You can juice up the calorie levels of lots of foods using stuff like grapeseed oil to both add calories and stretch out the time over which your body burns them.
Eric noted that it’s best to introduce foods as close to body temperature as possible. The problems with cold food and liquids are obvious, warming them up in your stomach saps body heat. They can also interfere with your internal thermostat, causing your body to work overtime to try to warm itself when it’s not necessary. Excessively hot food and beverages may not seem like a problem (as long as you don’t burn your mouth), but they can mess with the body’s thermostat in the opposite way, tricking your internal warming mechanisms into slowing down when you need them most. Warming up some foods can also make them more palatable, even if it’s just sticking them in a pocket for a while before eating (just having eaten an ice-cold Clif bar certainly drove this home for me).
Rifles
Eric brought out a couple of rifles that he’s customized for winter warfare: a FAL and an AR in 5.45mm. Why 5.45mm? Eric’s got a lot of the 7N6 ammo, which offers better than average penetration and is optimized for a wide temperature range.
In addition to the white paint jobs, he’s also fitted oversized controls (except for safeties) and shorter stocks to accommodate heavy clothing. The AR is a rare example without any plastic furniture. Eric doesn’t trust plastic in extreme cold, so this has a metal buttplate that attaches directly to the back of the buffer tube (nice short LOP) and an aluminum free-float tubular handguard. Both have optics mounted fairly high, to accommodate face masks and the like.
Eric noted that you can stuff chemical hand warmers inside pistol grips and handguards to help keep your hands warm without limiting dexterity.
The Magpul magazine loops can be helpful when it comes to manipulating magazines in heavy gloves. Eric also mentioned that in these conditions, you probably want to be retaining and stowing your expended magazines. Drop a mag in a three-foot snowdrift, and you’re probably not getting it back.
Tier 2 Gear
When talking about gear, Eric uses a three-tier system to categorize it. Tier 1 gear is what you carry on your person, in your pockets, etc., like a survival kit or navigation gear. Tier 2 is the contents of your web gear, chest rig, war belt, etc. including rifle mags, water, and the like. Tier 3 is the gear in your ruck, including your sleep system, shelter, and rations. We may need to dump the Tier 3 gear to gain mobility in a fight, so your Tier 1 and 2 need to be able to sustain you and keep your weapon running.
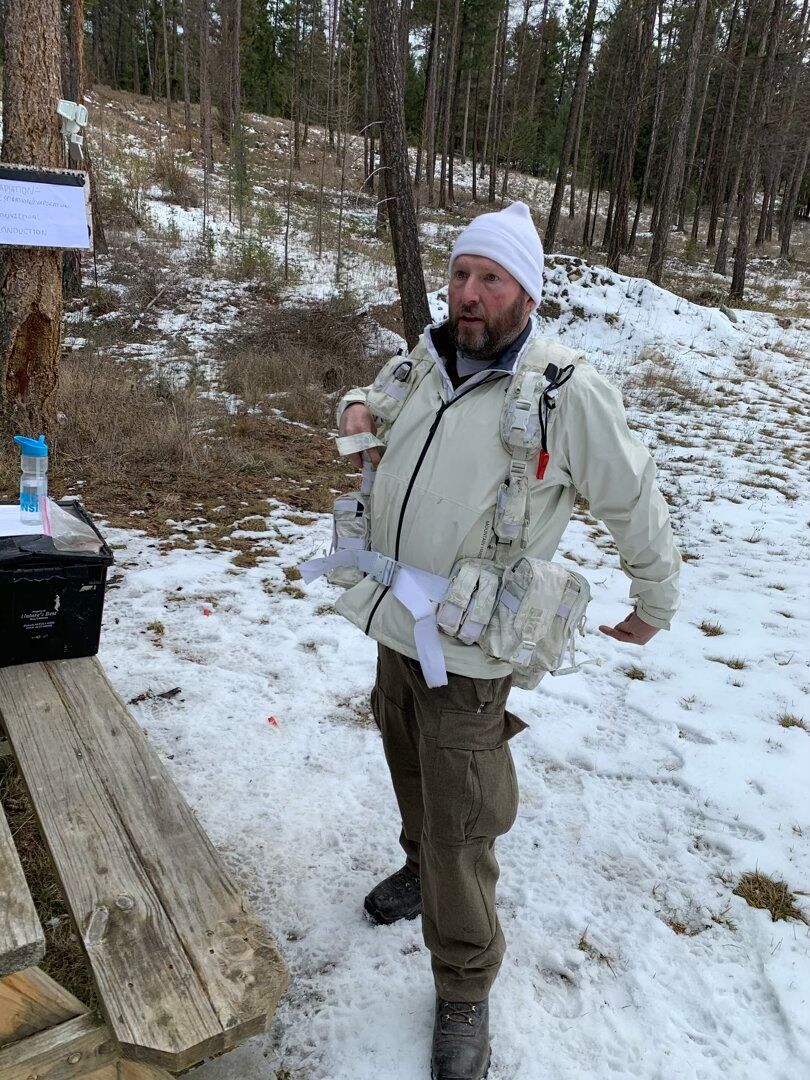
He showed off a bunch of different options for web gear, from spray-painted chest rigs to a nice Canadian-made war belt setup in snow camo. Regardless of the format, there are a couple of essential things you want in winter warrior “battle rattle.” First off, mag pouches and holsters need flaps to keep the snow out. Magpul mag loops or ranger plates on magazines can help make them easier to pull out of pouches and manipulate in thick gloves. Eric will often run a lanyard on his pistol to ensure it remains attached and not buried in a deep snowdrift.
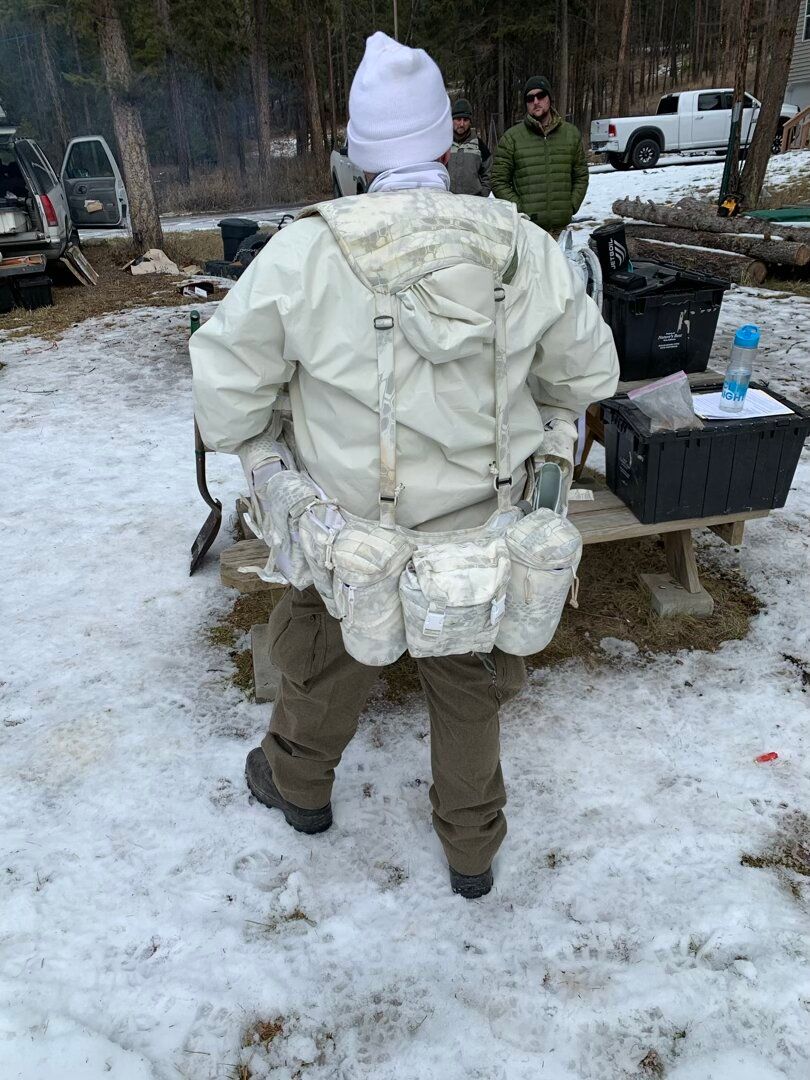
One important aspect of winter warrior web gear is adjustability. Most of my chest rigs and battle belts have been very much “set it and forget it”; after I initially get it adjusted, it stays that way for years. In cold weather conditions, we may need to be adjusting these multiple times per day as we add and remove layers in response to changing weather conditions and activity levels.
Rifle support gear can take on new meanings in conditions like this. For instance, Eric is a big advocate of hard sectional cleaning rods for knocking snow and mud out of barrels. Lock de-icer can be useful for getting a weapon that took a dunking in the water and then froze back into action.
Eric pointed out that we may need to take a broader view of what constitutes Tier 2 gear. In a hot environment, ammo and water may be enough to keep you in the fight for many hours. In cold temperatures, the environment can kill you as fast as the enemy. Staying in the fight can also require clothing, food, a heat source, emergency shelter, etc. This may mean additional gear on your battle rattle (Eric often runs a stove on his Tier 2 gear in winter conditions) or running a small ruck as part of your Tier 2 gear in addition to your chest rig or war belt.

An interesting piece of kit Eric showed off was his “belly rig.” This is a pouch on a shoulder harness, sort of like a chest rig or chest mounted binocular case. He can wear it underneath outer layers to store stuff that needs to be kept warm like batteries or certain kinds of stove fuel.
Hydration
Staying hydrated is just as critical in cold temperatures as it is in hot ones. While we’re hopefully not sweating as much, all the extra calories we’re eating to keep warm require water to break down.
As usual, the main options are water bottles and water bladders. Water bladders are easier to keep near to the body so we can use our body heat to keep them from freezing. However, their tubing and valves are vulnerable to freezing. Eric advocated blowing air into the tube after each drink to flush the water back into the reservoir.
Water bottles are harder to keep warm with body heat (though you can try keeping them close to the body). Insulated water bottles will keep hot liquids hot and go longer before freezing. However, if they do freeze, you can’t thaw them by applying heat externally. Single wall uninsulated metal bottles can be thawed over a flame (even plastic bottles can be thawed by putting them in warm water).
Eric is generally a fan of Nuun tablets, which you dissolve in water to basically turn it into a sports drink with lots of electrolytes. He pointed out that in the cold weather context, the salts in those electrolytes lower the freezing temperature of the water, making it less likely to freeze.
Water filters can be problematic in the cold. Not only can remaining water freeze and clog things up, but ice crystals forming inside the filter can tear tiny holes in it, allowing bacteria through. Filters vulnerable to this need to be kept above freezing, which probably means close to your body. On the other hand, ceramic filters can be warmed with an open flame to thaw them out.
Other water purification methods can be affected by the cold as well. UV purification, like the Steripen, works in cold water, but cold temperatures can affect the batteries. Some types of chemical water purification can take longer in cold water. And, of course, boiling water to purify it is going to take even longer in sub-freezing temperatures.
Tools
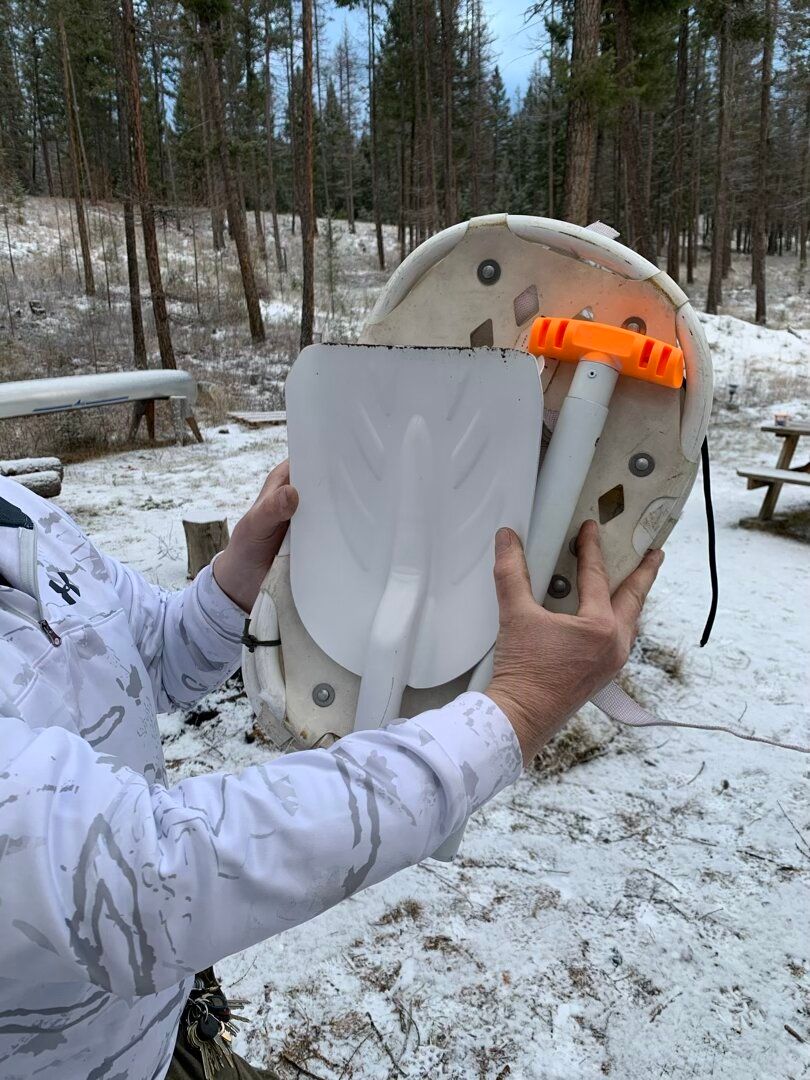
A good snow shovel is a vital tool for the winter warrior. Small bladed shoves like the Glock entrenching tool I brought just don’t scoop well enough to make effective tools in the snow. A much better place to look are small collapsible handle shovels intended for avalanche rescue for skiers mountaineers. Thankfully, Eric had one he was willing to let me borrow for our overnight exercise.
A good saw is important, as well. Eric likes a triangular skinning saw, which he’s modified with a scalpel-like tip profile for making fine cuts in small game. He was also rocking a very nice folding bow saw
Sleep Systems
An important aspect of staying warm is separating yourself from the cold ground. Eric likes the insulated Thermarest mattresses for this. They’re multi-purpose too. In addition to sleeping, you can use them as shooting mats, gear flotation, litters, air splints, etc. Eric likes to customize his by adding grommets to the edges. Depending on conditions, you may even want to double up, running both a Thermarest and a closed-cell foam pad.
Pads are not just for sleeping on either. Whether we’re sitting to rest, eat, observe, or some other reason, getting some insulation between us and the ground will make it a lot more pleasant and help preserve body heat. Thermarest actually makes small pads for this, but a rump sized section of closed-cell foam will also do the job (I have one of the Thermarests, and there were several times where I regretted not bringing it to class).
You wouldn’t normally think of the reflectorized foam shades for windshields as winter survival gear, but Eric talked about using them as supplemental ground pads, to block wind from your stove, or to reflect heat from a fire. He puts grommets on his and sometimes attaches white cloth to one side to camouflage them a bit.
Eric is a big fan of sleeping bag liners both to add a bit more warmth to a bag and to help keep the sleeping bag clean. He talked a bit about sleeping bags, including the military ECWS system and other options.
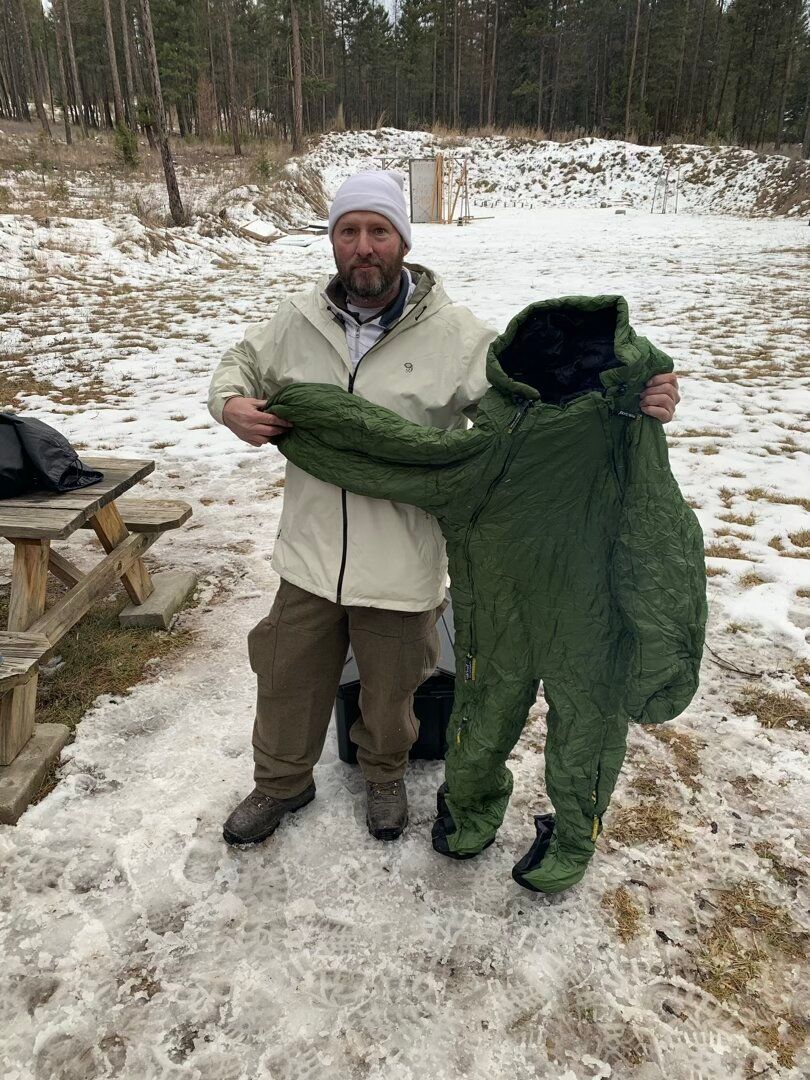
One very cool thing he showed off was the Selk’bag. This is basically a sleeping bag with separate legs and arms (or alternatively, a hooded jumpsuit made out of sleeping bag material). It allows you more mobility than a sleeping bag while still keeping you nice and warm. In addition to sleeping in it, there are some interesting applications if you need to move to a location (sniper hide, hunting blind, etc.), then remain stationary for a significant amount of time in very cold temperatures. This would let you set up your clothing for the walk in, then throw on the bag to keep warm while stationary. One of the students in the class found that they were having a 25% off sale that weekend. He actually bought one on the spot. I ended up snagging one that evening (the first of many purchases this class will cost me).
Shelter
In winter conditions, Eric prefers shelters that don’t have a built-in floor. Tent floors basically turn into buckets that trap snow and mud and are difficult to clean out. Tarp-based shelters are inherently floorless, of course. You can just set up a small ground sheet underneath your sleep system and perhaps your gear. Until this class, I hadn’t realized that various grades of tarps are actually color-coded (with the common blue tarps being the crappiest). As it happens, the standard color for heavy-duty tarps is white, which is convenient for the winter warrior. He also likes the Slumberjack Satellite tarp.
Another floorless option are tents that just let you set up the fly without the tent body or a groundcloth footprint. This capability is most often found in tents with external pole systems (the poles are outside the tent fly) such as the Slumberjack Nightfall.
Eric also talked a bit about bivy shelters.
Setting up tents in the snow comes with some unique challenges. One trick Eric mentioned was using the white plastic fabric sandbags as snow anchors. Tie your line to the bag and bury it in the snow, and it’ll do a great job staying put.
Packs
Cold conditions mean bulky sleeping bags, lots of clothing, tons of food, and lots of other gear. We have to have some way to carry all this stuff. Eric showed off a couple of larger packs, including his Eberlestock Skycrane and Warhammer packs. Both of these are built around a core pack with the frame and some side pockets, to which you attach either Eberlestock’s excellent Spike duffels or other large pieces of kit. Eberlestock also makes some nice reversible pack covers with digital woodland on one side and digital snow camo on the other.

Other Stuff
For winter operations, one of the pieces of kit Eric always carries is a paintbrush (sometimes more than one). Snow that falls on or adheres to your gear or clothing will often melt, either from entering a warm area or simply from your body heat. The brush can help get the snow off before that can become an issue.
If you do overexert yourself and sweat a bunch, a microfiber towel can be useful for jump-starting the process of getting yourself and your gear dry. Eric also mentioned including some picture hanging wire and binder clips in your kit to hang clothes above a fire to dry.
We talked a bit about propane and isobutane lanterns in the stove section. Eric also had a neat inflatable LED lantern, which doubled as a USB battery pack.
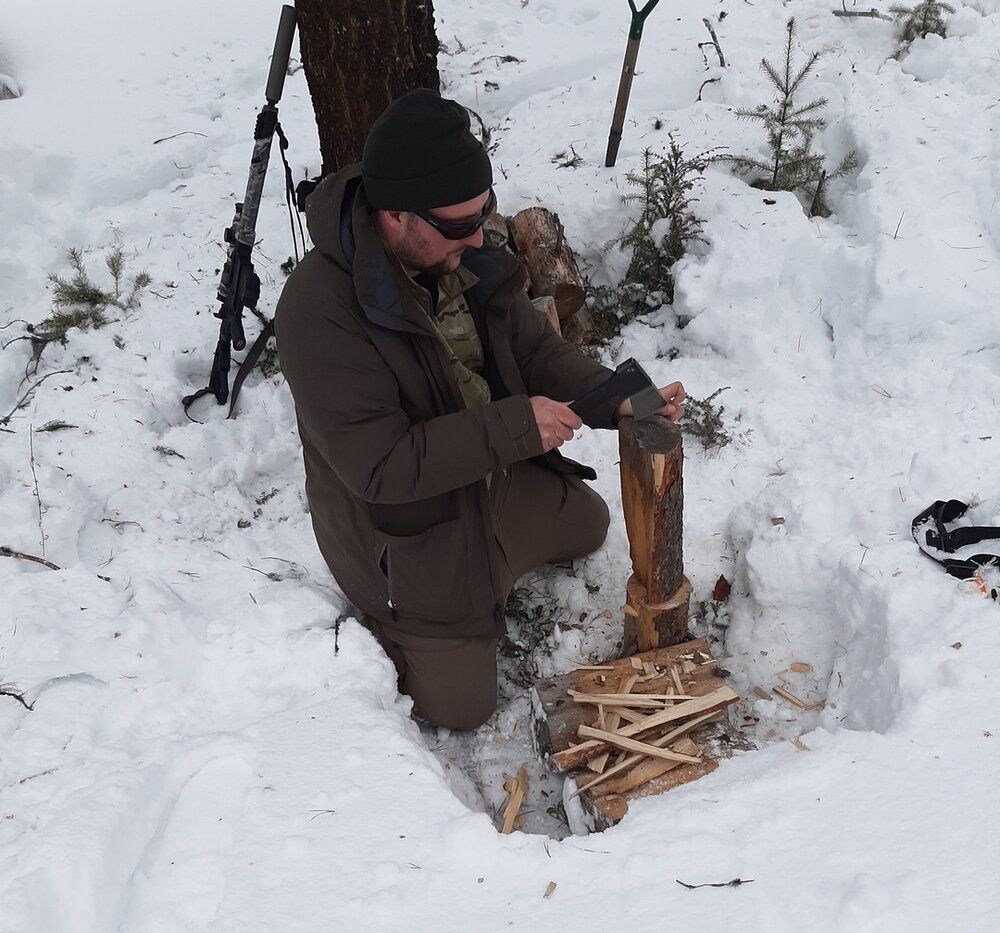
While Eric primarily talked about adjusting clothing to match your physical activity, he also mentioned that you can do the opposite and use physical activity to help regulate your temperature, even around camp. For instance, rather than bringing wood back and chopping it all at once, leave it, and whenever someone is feeling cold, they can grab an axe and get to work.
After the most epic gear lecture ever, Eric packed up his tremendous stack of demo gear, and we headed out for a nice dinner at a local restaurant.
That evening I got a bunch of my stuff together for our overnight out in the snow on Sunday evening. My 80 liter Mystery Ranch Blackjack ended up being absolutely stuffed to the gills, with the lid barely able to buckle over the top.
Sunday
After another breakfast of oatmeal and a muffin, we loaded up our gear for the overnight trip and headed back out to the range.
Again, it was in the low 30s when we got out there, and I was running the same layers as the previous day.
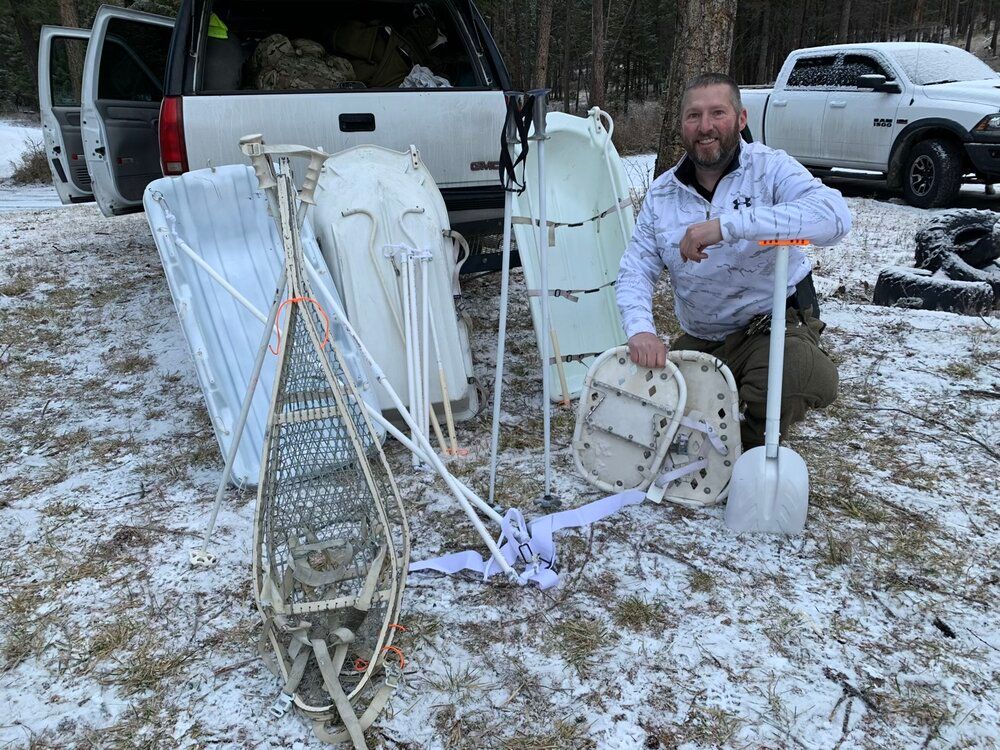
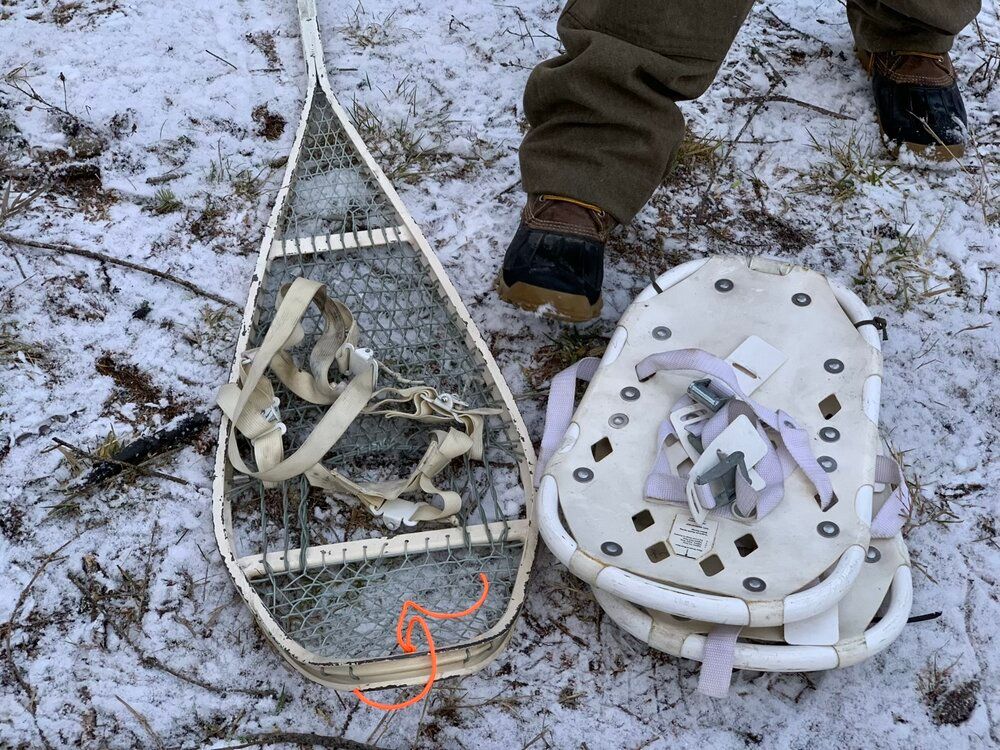
This morning’s subject was snowshoes. Eric pulled out a couple of examples of military surplus models. He had some Algonquin snowshoes, in the traditional teardrop-like snowshoe shape (though these are made out of aluminum and wire, rather than wood and rawhide). He also had a pair of military bearpaw snowshoes, which are smaller, oval-shaped shoes. The bearpaws are more maneuverable but less suited to carrying or pulling heavy loads than the Algonquins. Several students had commercial beavertail snowshoes, which have a blend of the characteristics of bearpaws and Algonquins.
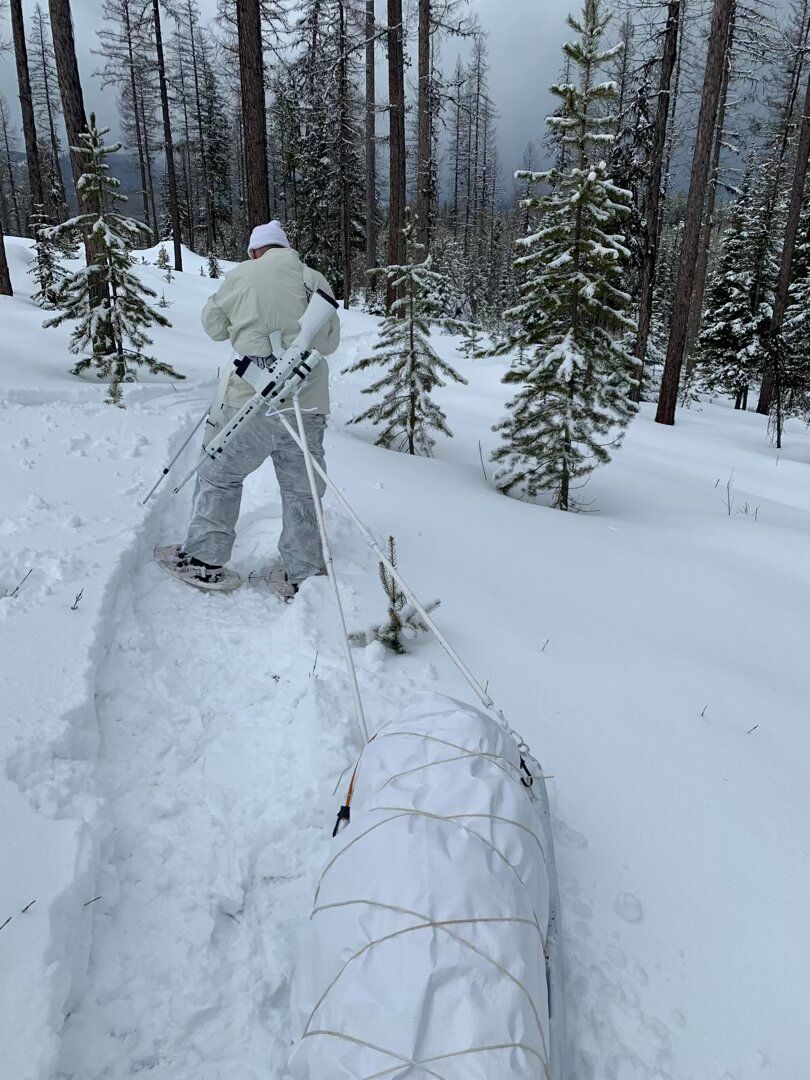
He also brought out some pulk sleds, both military issue infantry sleds and a similarly sized civilian model from Pelican. Eric prefers relatively small sleds, small enough that if you encounter an area without any snow on your travels, it’s small enough to lash the sled to your pack and carry it.
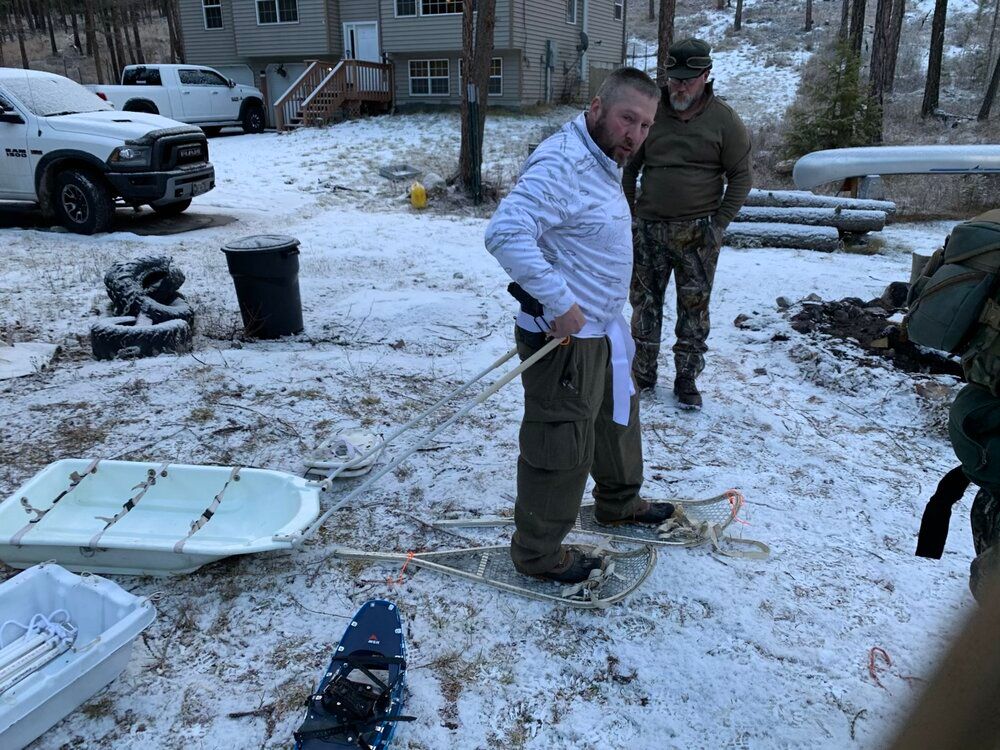
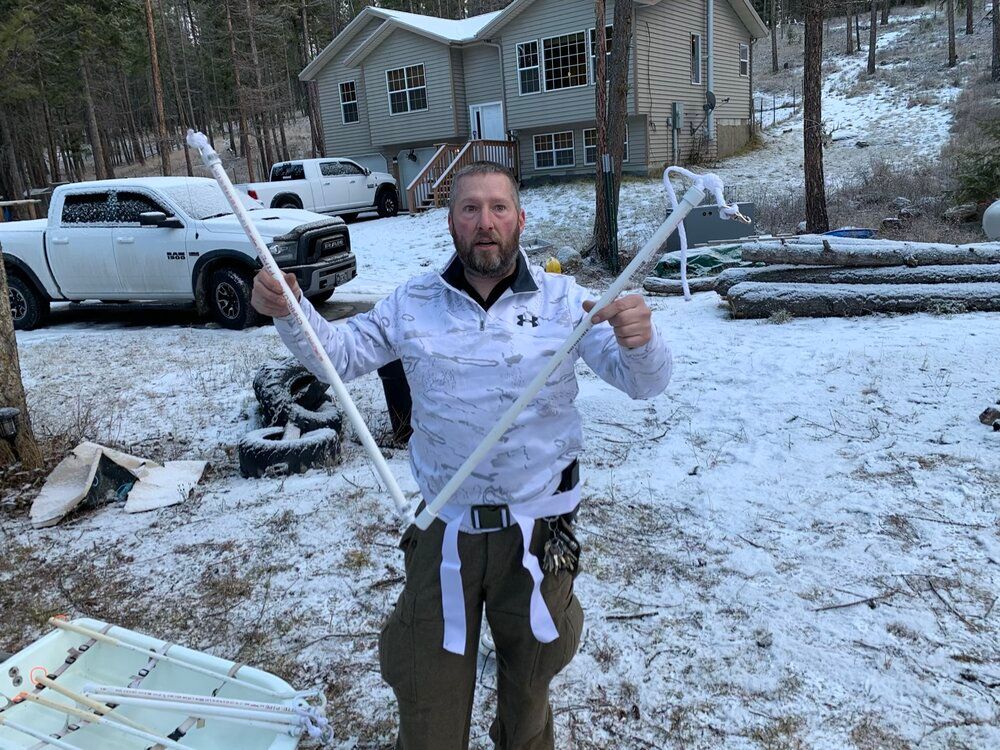
On anything but the flattest of terrain, you want to pull the sled with poles rather than ropes. That way, on a downhill, the sled doesn’t run up on you and hit you in the legs. The military sleds come with poles. For the civilian models, Eric has rigged up his own from PVC pipe with a rope running through them. To get them short enough to fit inside the sled itself, he made the poles in two sections that screw together in the middle. With this setup, you can cross the poles (pole from the right side of sled goes to your left hip and vice versa) for more maneuverability. You want the poles to be long enough to clear the back of your snowshoes during a normal stride.
Regardless the other end of the poles attaches to a belt. Some sort of padded belt like from a war belt setup is best, but a length of webbing with a couple of metal sliders will work too. The sliders should be positioned at the rear of each hip. The critical thing is you want a quick-detach buckle since the first thing you’ll do when the shooting starts is to ditch the sled.
Trekking poles or ski poles can help with balance when snowshoeing and in managing the sled on a steep slope. However, they do occupy your hands. Some poles offer the option of mounting a Y shaped shooting rest on top, making them multipurpose.
Generally speaking, you want to get as much weight off of you and onto the sled as possible. So all of your Tier 3 gear that would normally go in a ruck on your back would ride in the sled instead (subject to the discussion above about what counts as “Tier 2” in cold environments). That said, managing a sled significantly limits your mobility. In a team environment, one way to handle this is to specialize. An eight-man team might have four members pulling sleds (the mules) carrying the gear for everyone while the other four just run their Tier 1 and Tier 2 gear and provide security.
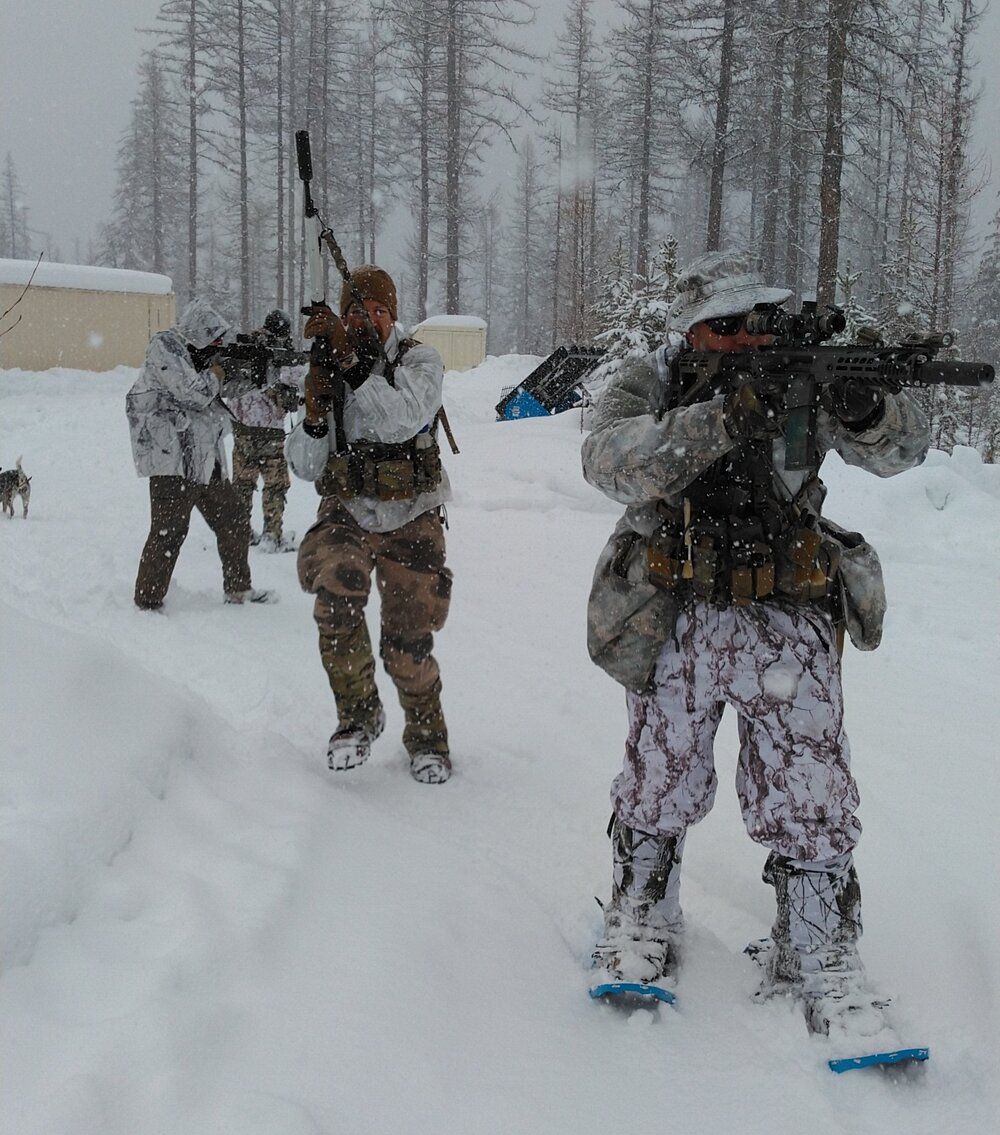
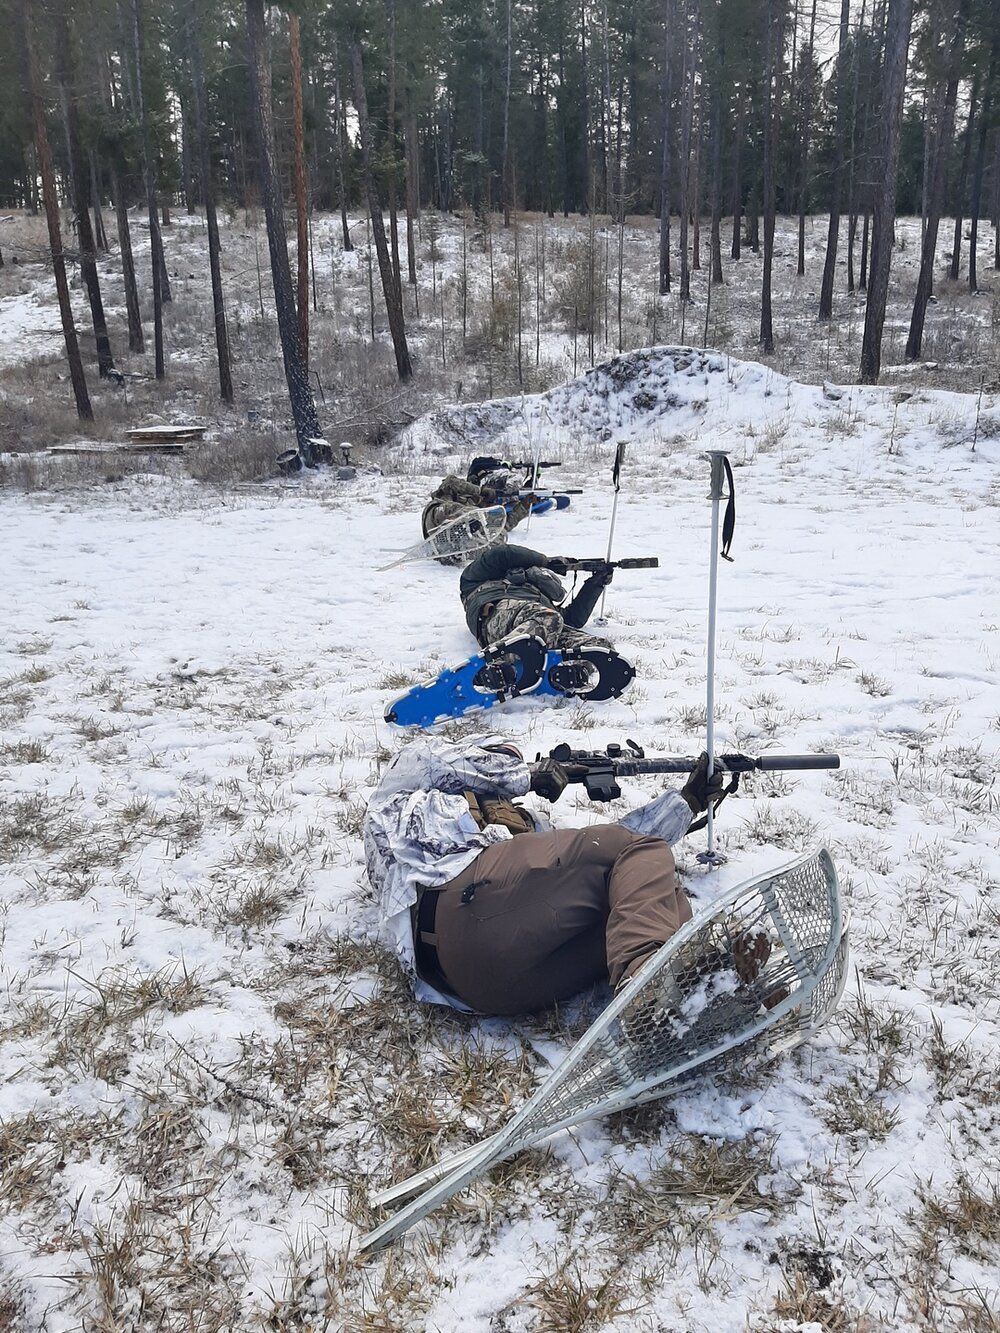
One of the problems with snowshoes is that you can’t assume a conventional prone position with them. The alternative is “snowshoe prone,” which has you lying on your side with your body perpendicular to the direction of fire. It’s much like urban prone, but with snowshoes on. To assume the snowshoe prone position, you crouch down to lower your center of gravity and roll/fall in the appropriate direction. If possible, it’s best to go down on your support side. That gets the rifle further up out of the snow.

Getting down into snowshoe prone is pretty easy. Getting back up is hard. The width and cumbersome nature of the snowshoes make it difficult to get a leg under you to stand up. I found it hard enough on the range with just a thin layer of snow; out in deep drifts where you put your hand down to lever yourself up, and it plunges a foot into the snow, it would be even worse. A pole can help with this (as well as helping hold your rifle up in snowshoe prone.
We practiced getting into and out of snowshoe prone a couple of times dry, then loaded our rifles up to do it live. I had some trouble getting my PTR to load properly. The bolt did not want to go all the way forward. Eventually, I managed to get it chambered after switching to another mag, so it may have been a mag issue.
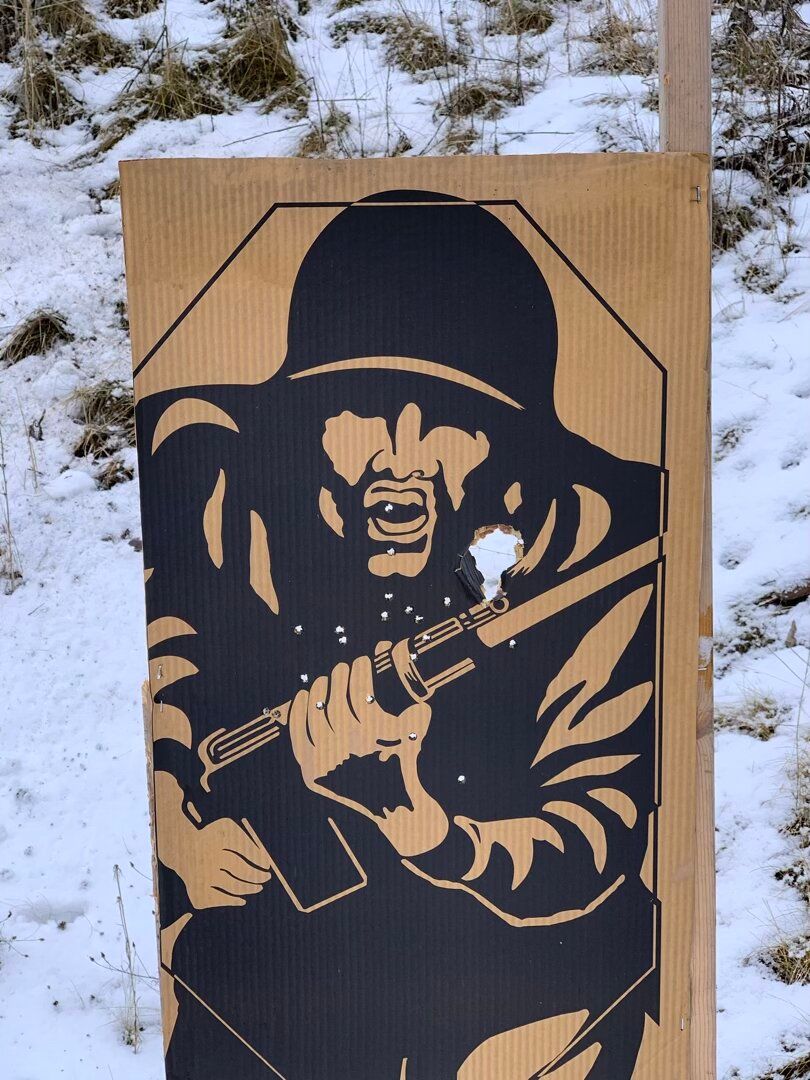
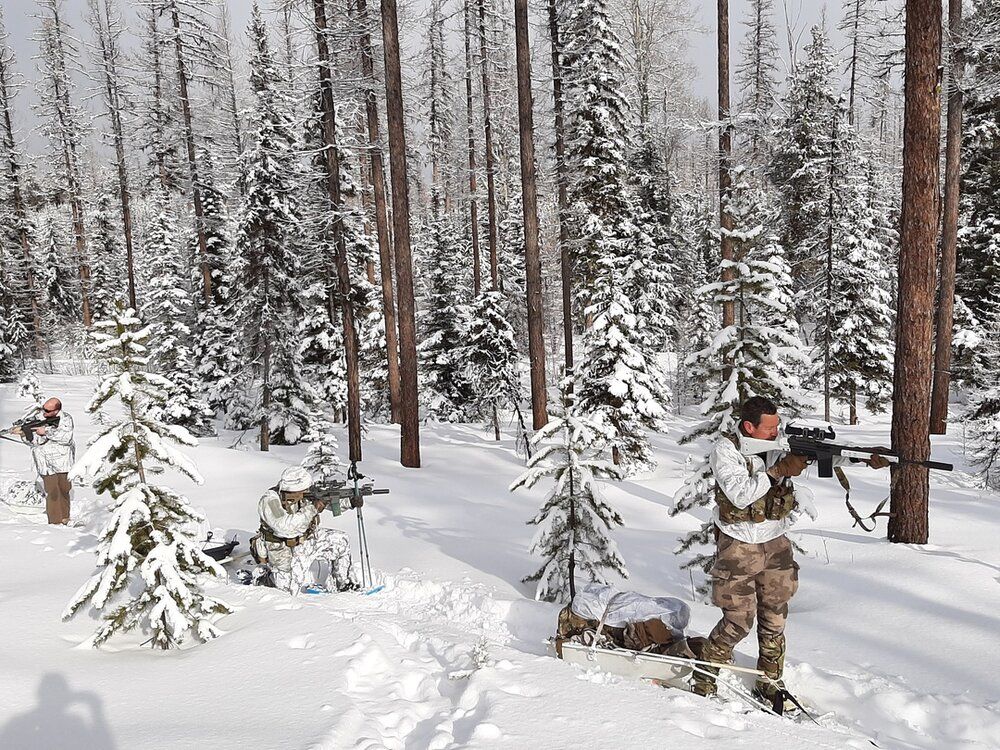
We did some live fire, practicing dropping into snowshoe prone on both our support and primary sides. Between iterations, Eric had us snowshoe towards the target, ending up with a burst delivered from standing at close range. As it happened, I ran my rifle dry, so I went ahead and did a muzzle strike on the target with my suppressor (everyone in the class was running a can, which was very nice).
Eric dug out the cracked wheat that had been soaking in hot water in an insulated mug since yesterday afternoon. It was pretty good, even plan. Throw on some honey or something, and it would be downright tasty.
After that, we packed up all our gear and headed down to another location, where they had considerably more snow for our overnight trip.
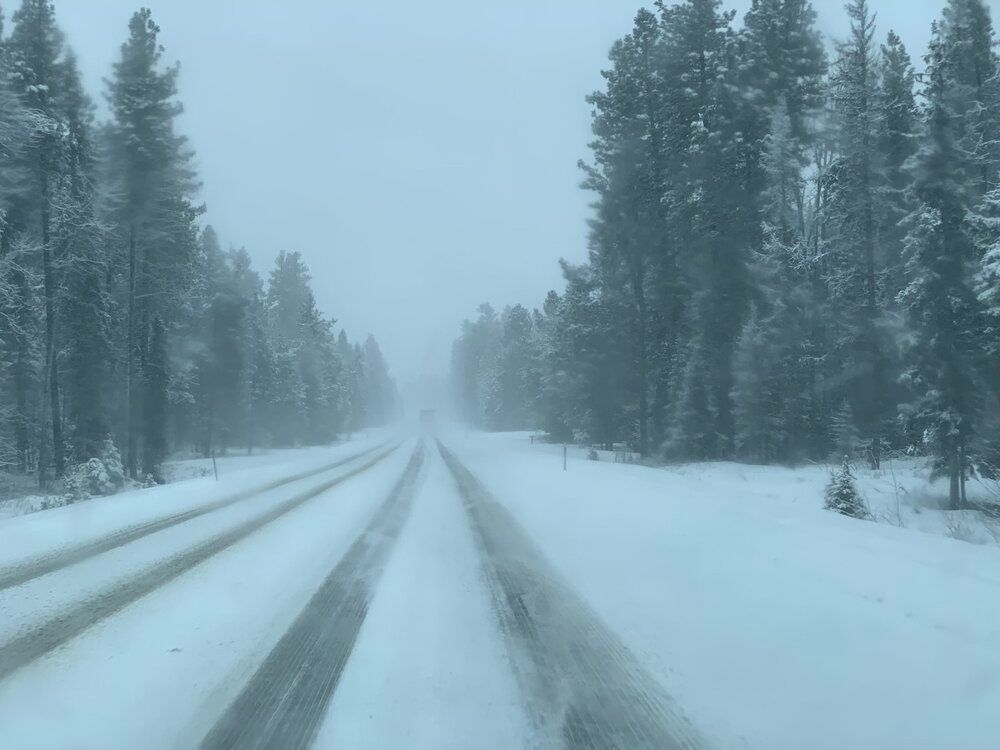
We had some issues while convoying our way down there. First, when we pulled over to let a lagging student catch up, another student blew right on by. Then, after a fuel stop, a group of students indicated they were ready to go (thumbs up), but only one followed us when Eric pulled out. The others were about five more minutes. Eric remarked that we really need to do a vehicle operations class.
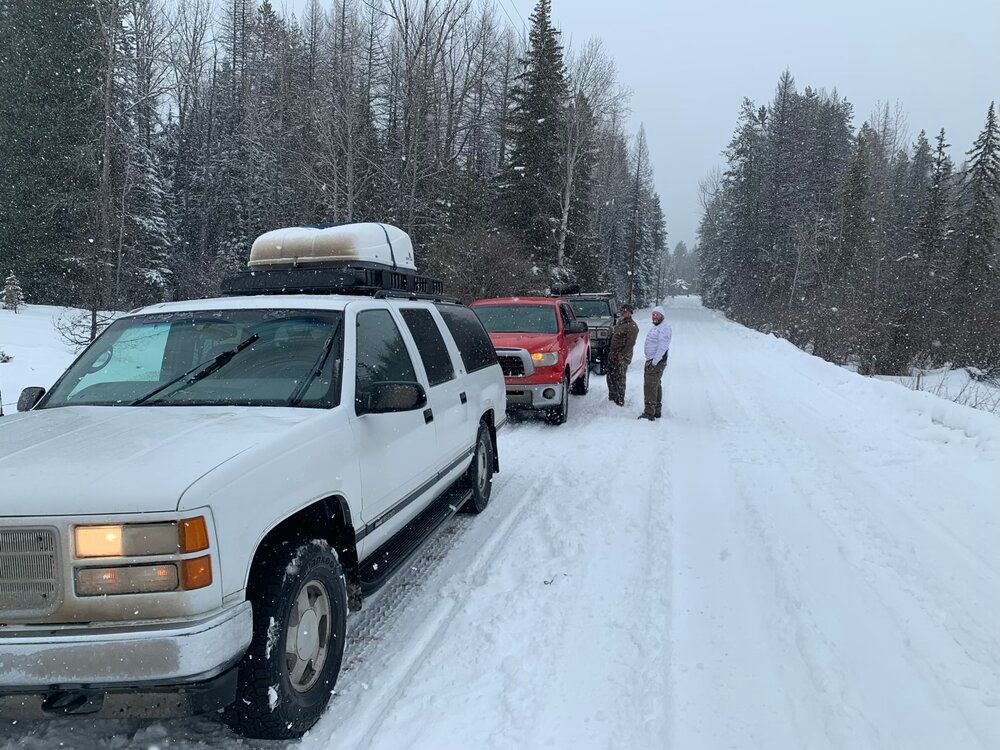
The location for the rest of the class was owned by a friend of Eric’s and sported snow two to three feet deep.
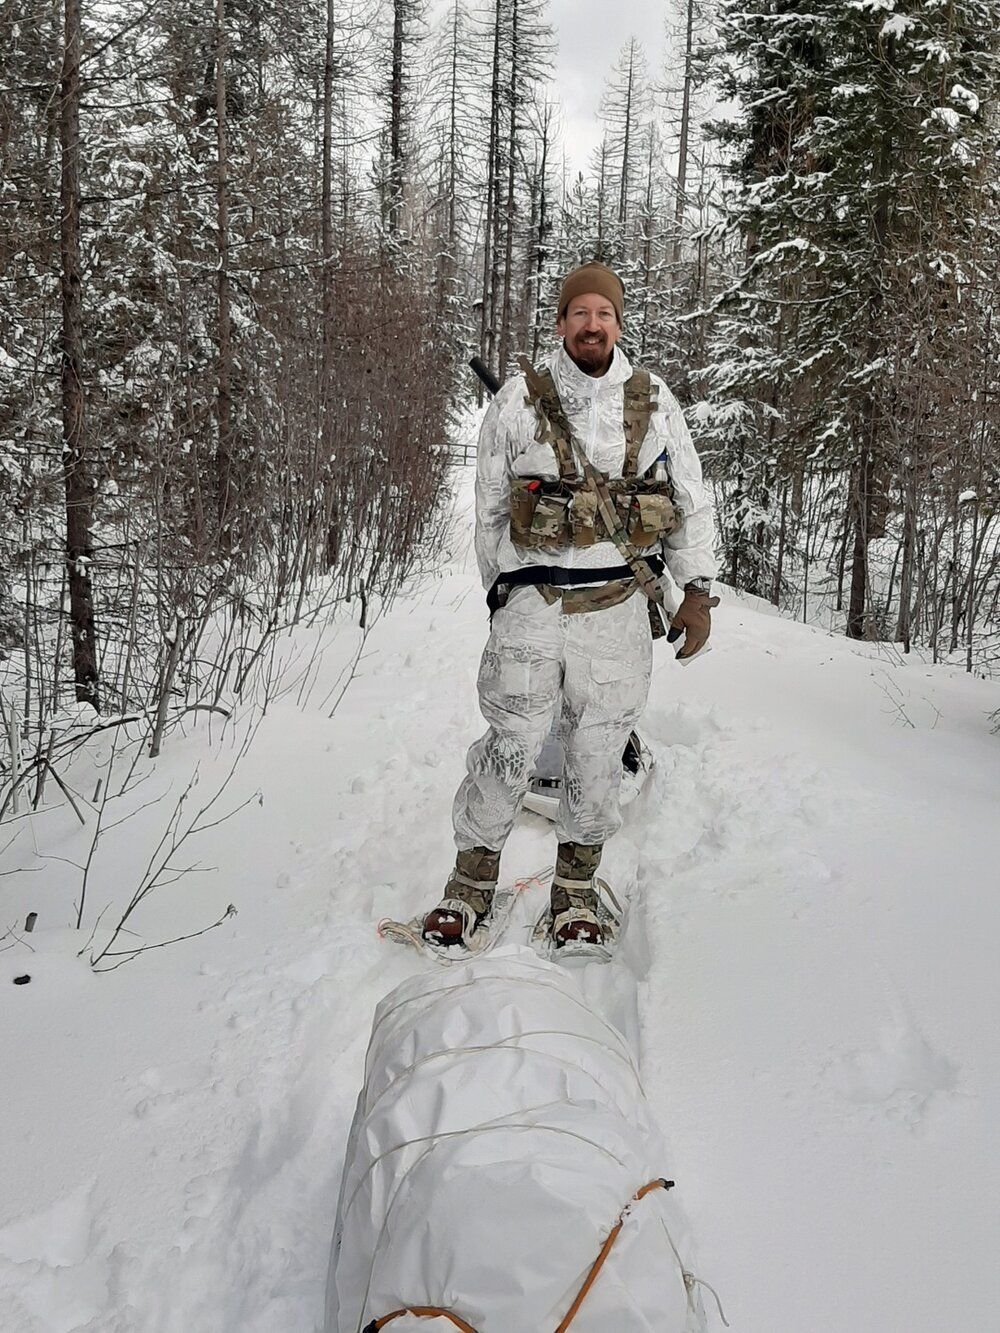
We pulled out the sleds and got all our gear loaded up. Since no shooting was expected (absent a big cat or an angry mamma moose), Eric had us run empty chambers on the rifles.
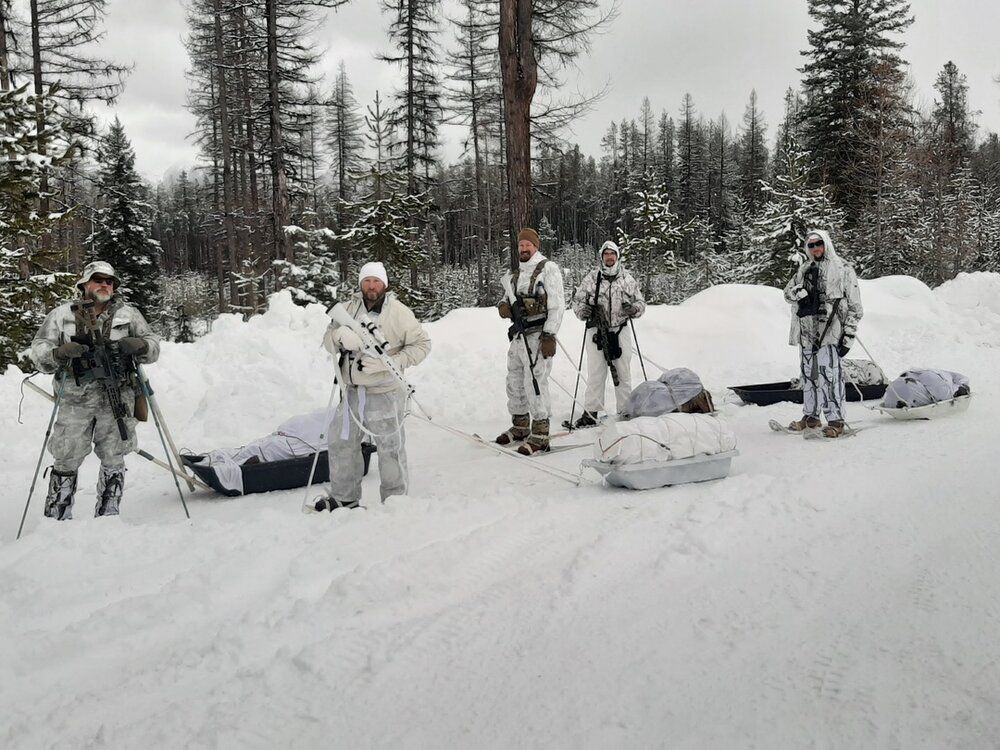
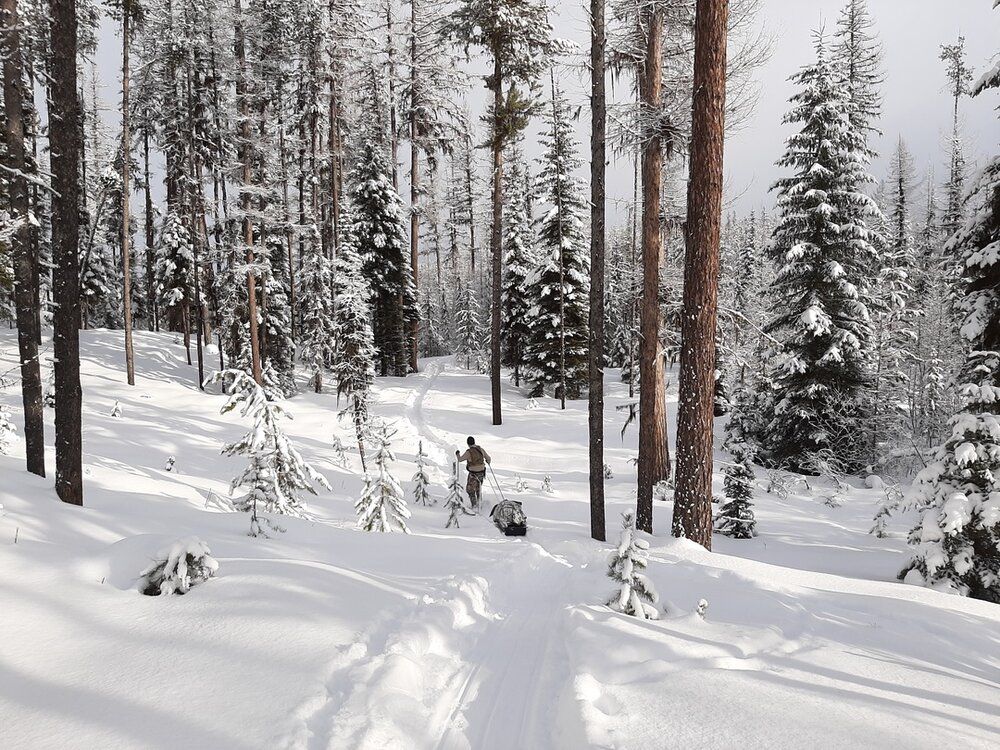
Eric decided that we wouldn’t be going too far, less than a mile. The point of this was to give everyone experience snowshoeing and managing the pulk sled, not to put on miles.
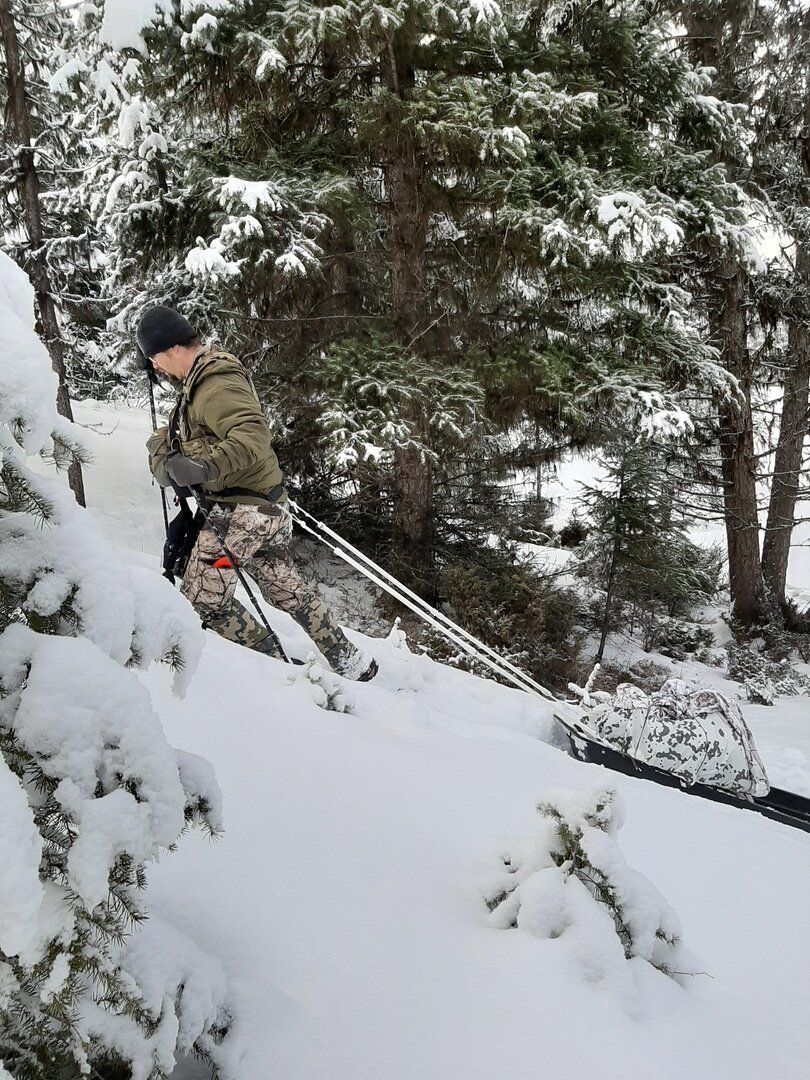
Even over this short distance, the sleds were a challenge. Some tended to roll over on side slopes or as they went over bumps. Eric also broke one of his two-section poles at the point where they threaded together.
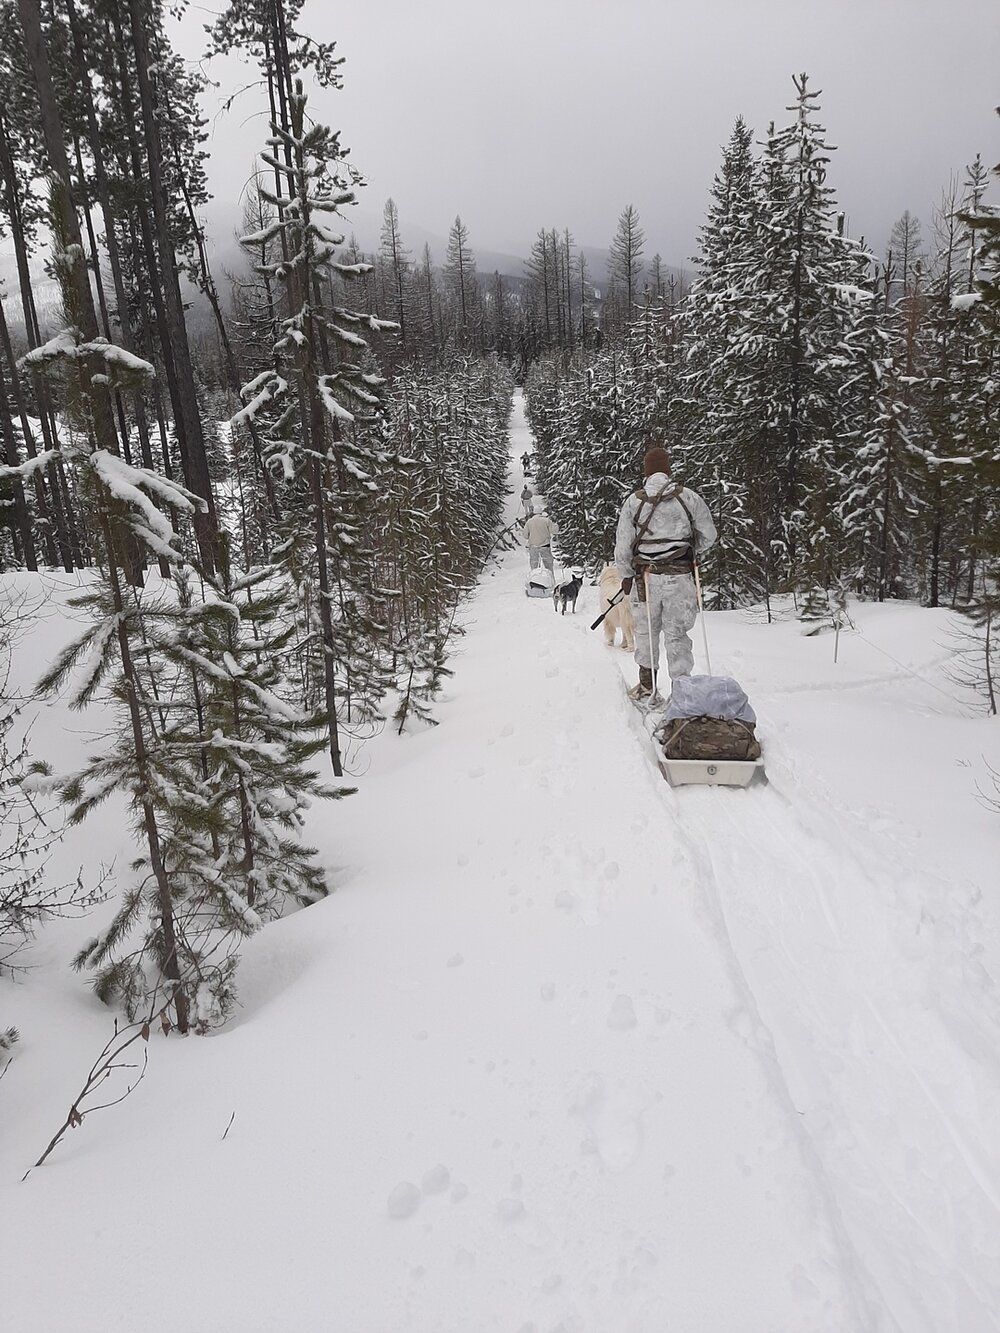

I found going up some of the steeper little hills a challenge. The Algonquin snowshoes I was using don’t have the traction of the civilian models or the milsurp bearpaws Eric was using, so they tended to slide backward. That said, they were definitely effective in keeping me on top of the snow. This was driven home when the property owner came out walking on foot without snowshoes; at points, he postholed down two feet or more into the snow.
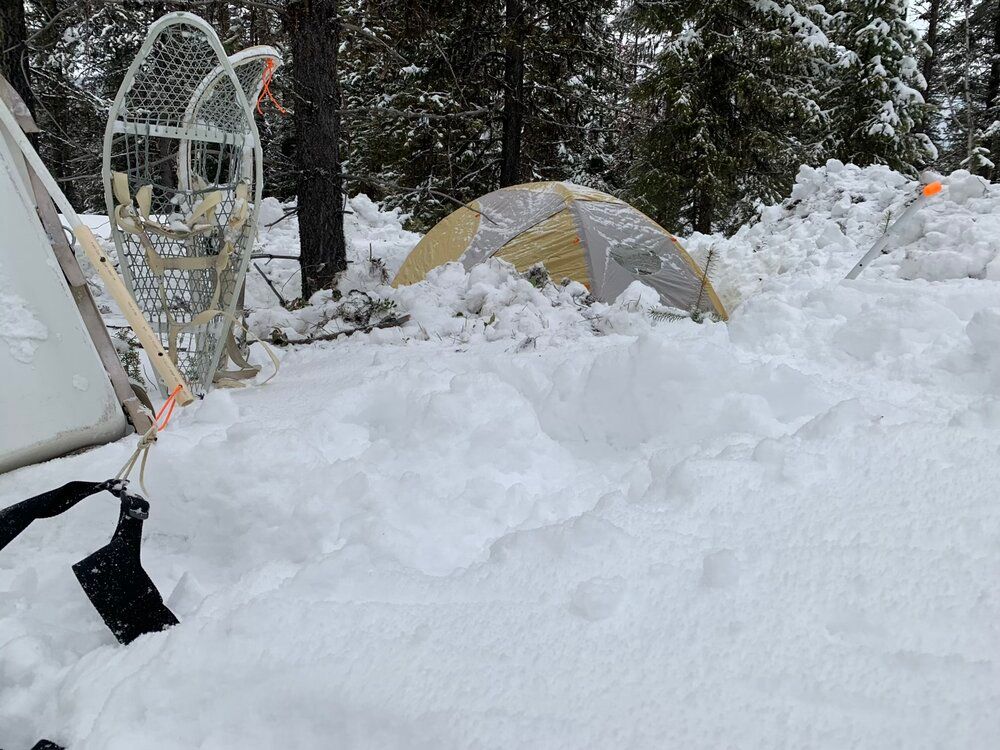
We made camp in a couple of clearings, with Eric and I setting up on the edge of one clearing and the other students doing the same in another clearing down a short, steep drop-off. We had an interesting diversity of shelters, with a couple of tents, a couple of tarp-based setups, and a teepee.
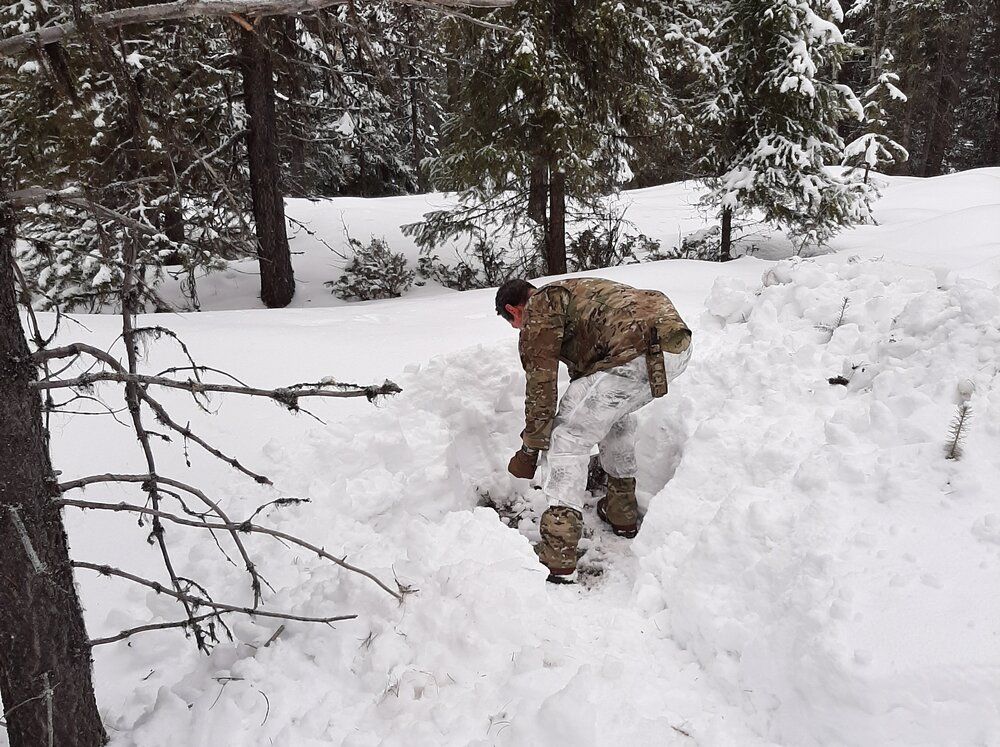
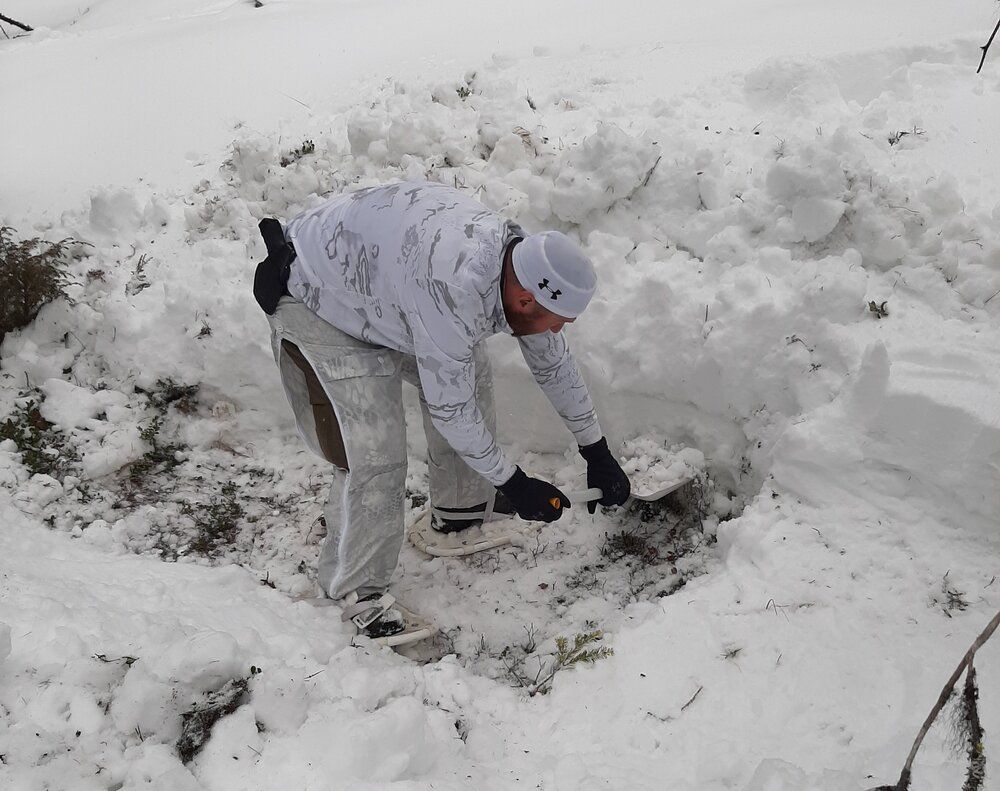
My backpacking tent requires staking out the rain fly. Rather than trying to do that in the snow, I decided to dig down to some ground I could drive some stakes into. However, I may have underestimated just how deep the snow was and ended up digging down 2-3 feet. The nice big vestibules on either side of my tent and the length of the guy lines meant I had to dig out quite a large footprint too. I was very glad to be using the snow shovel Eric loaned me rather than my little Glock entrenching tool. The hardest part of digging out this snow was actually the beginning. Digging down below the level of your feet is surprisingly difficult. Once I got down to ground level and had cleared some working room, it got easier. Rather than digging from the top down, I could basically “shave” 6” or so of snow off the side of the hole and scoop it out.
Digging out all this snow put the need to adjust clothing to my activity level in stark relief. By the end of the process, I had stripped off my goretex and BDU top and was down to just my merino wool base layer shirt with the overwhites over it to keep the snow off. Even so, my base layer was damp with sweat; I probably should have ditched some of those layers sooner. I also found that while goretex lining of my Convoy gloves did a good job keeping my hands themselves dry while shoveling, water did soak into the part of the gloves outside the lining, making them heavy and cold. A second set of gloves should probably be on the list for activity like this.
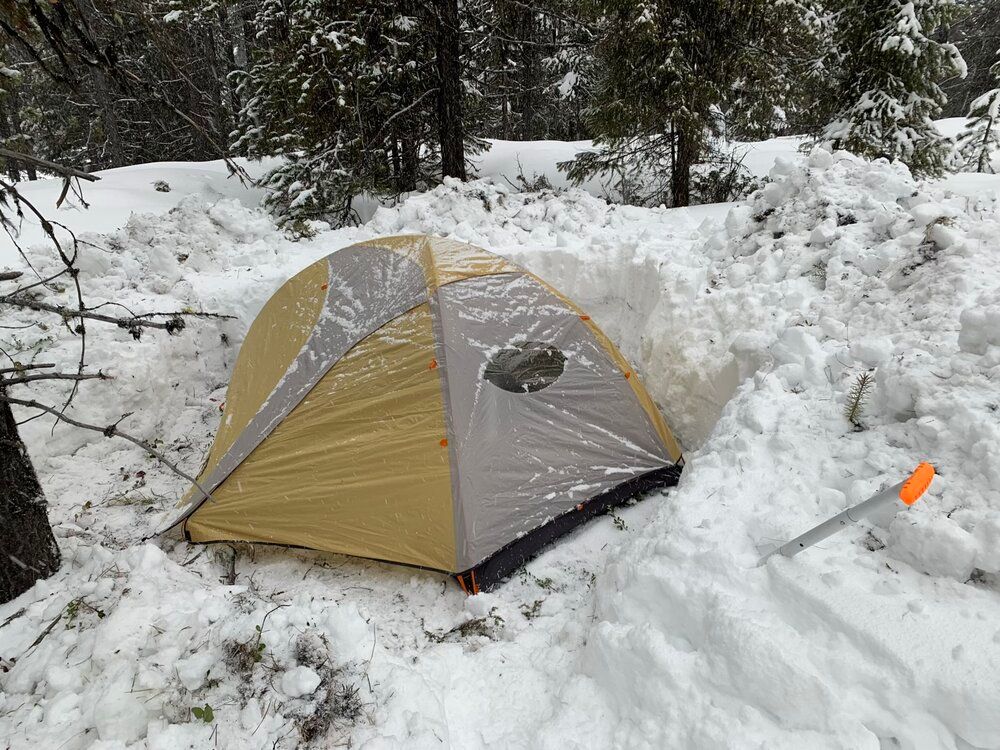
Eventually, I got enough ground cleared to set up my tent and got my gear unpacked.
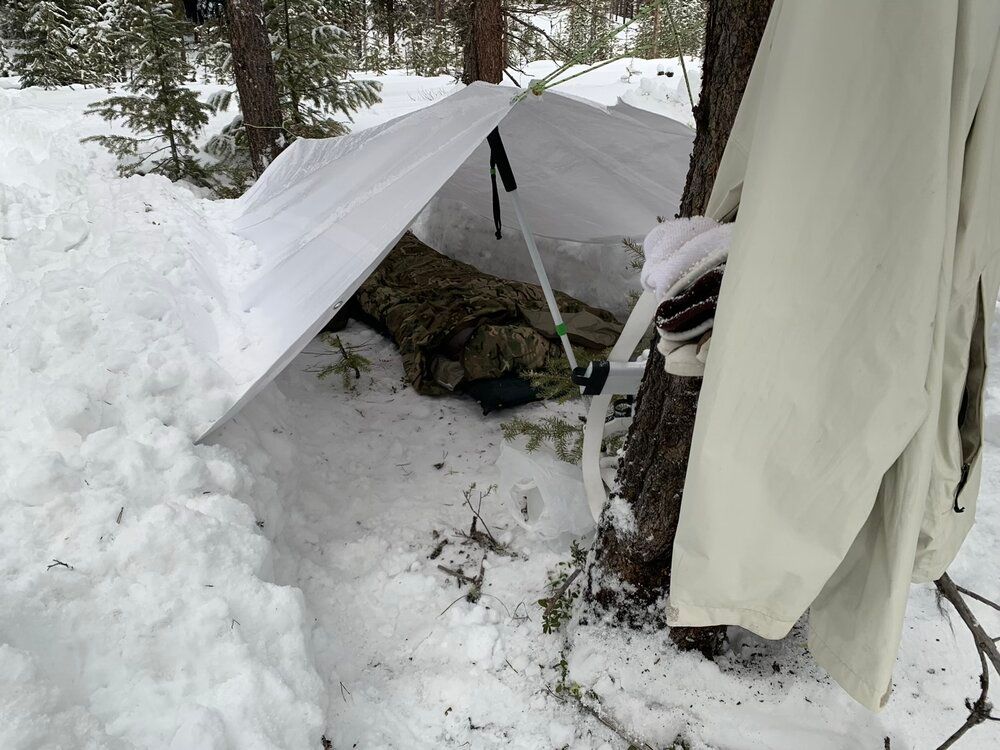
Eric had a pretty neat setup. He’d dug out a trough in the snow between two trees, then strung a line between the trees and hung a white heavy duty tarp on it. Rather than staking out the sides, he buried the edges of the tarp underneath some of the snow he dug out. This was a very sturdy setup (he really had to work the next morning to get the edges of the tarp out of the snow). It provided him quite a bit of room under there.

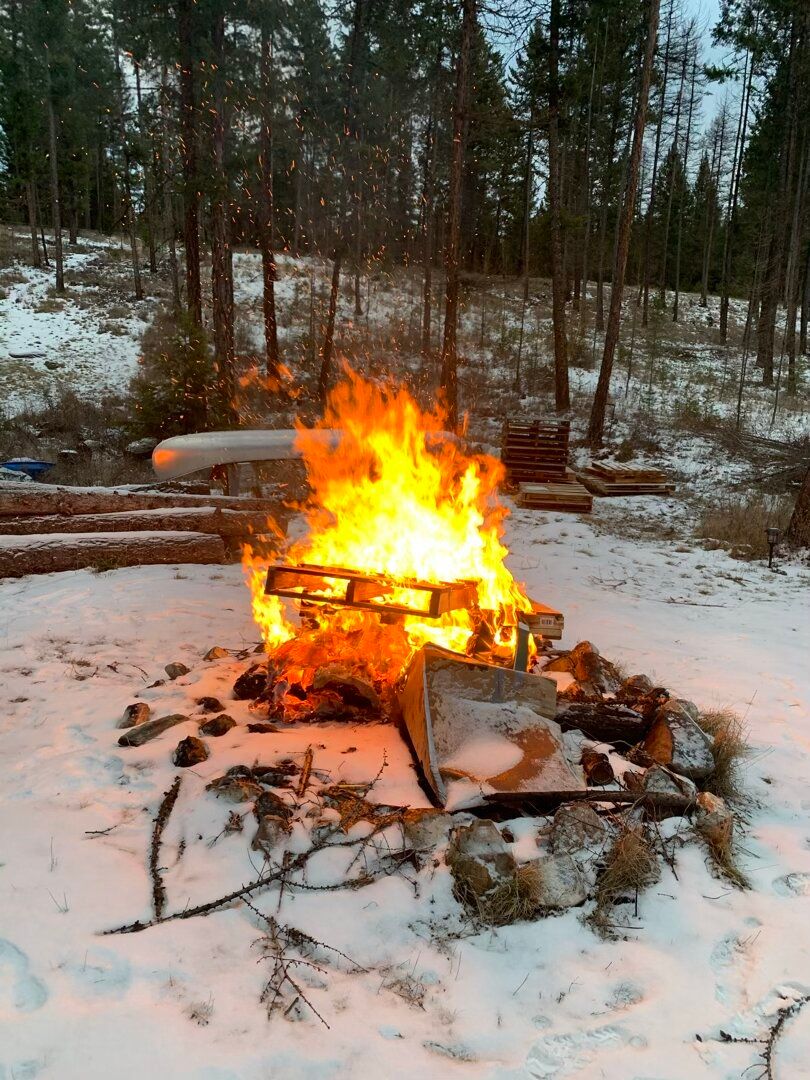
Other students had gotten their shelters set up faster than I had and went off to get some firewood so we could have a campfire that night.
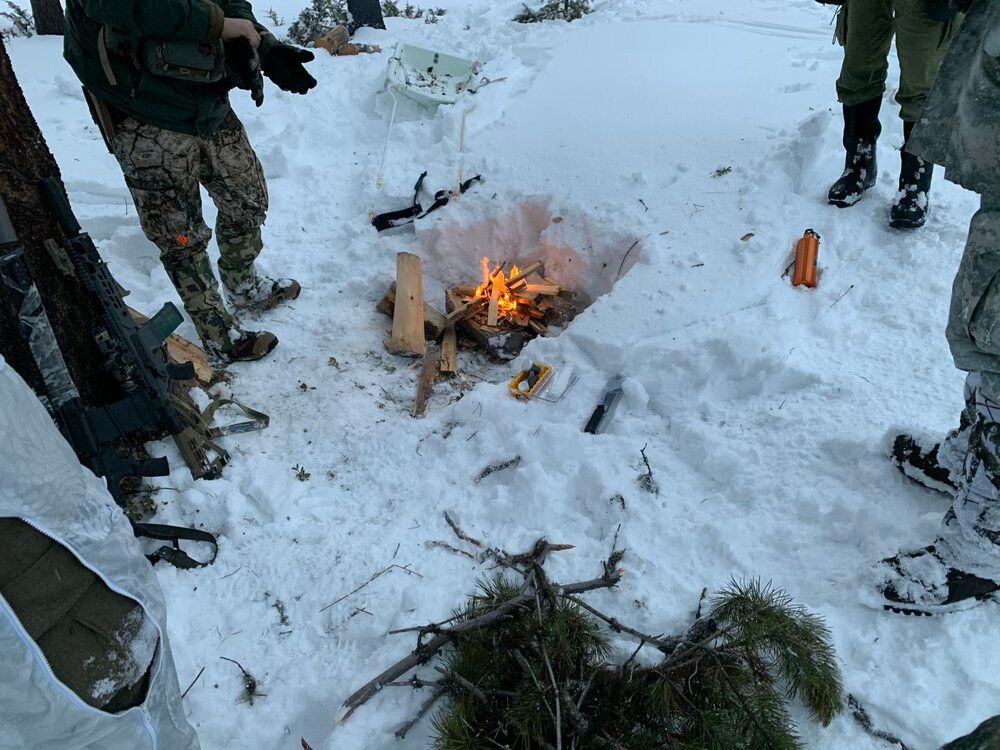
While we were well above the 10-degree minimum temperature for Jetboil canisters, one student had some blooming issues as he started up his stove (and singed some hair off his hand). I ended up following Eric’s example and tossed my canister inside my parka for about fifteen minutes to warm up. Another student tried the trick of sticking a toe warmer on the underside of the can and got good results that way.
As it turns out, I was the only one in the class, not eating Mountain House freeze-dried food for dinner. Nevertheless, I thought my creamy chicken with herb stuffing and cranberries was quite tasty (much better than the Mountain House I’ve tried in the past).
After dinner, we all stood around the fire and chatted for a while. Most folks had brought booze of one kind or another (in my case, our Airbnb host had provided the bottle of cherry bourbon, and Eric provided the flask). This sort of fellowship is one of my favorite things about these kinds of classes.
Eric, another student, and I stayed up a bit later than the rest of the class (at least on my part this was driven by the desire to avoid being stuck in my sleeping bag for 10+ hours during the long Montana winter night), but we still turned in fairly early.
Monday
My Wiggy’s zero-degree bag did an excellent job keeping me warm overnight. I did put on a fleece when my shoulders got a bit cold from air coming in the opening. Other than that, I was nice and toasty.
According to Eric’s thermometer, it was about 19 degrees when I got up. I decided to rock the Cabela’s Wooltimate pants and jacket that I’d gotten after seeing Eric’s when we were out hunting last fall. They were nice and warm, even in these temperatures. I did find that whenever I knelt down, the woolly outer surface did want to latch onto a layer of snow. The stuff is like velcro.
For the most part, the insulated boots and Thermacell insoles did a good job keeping my feet warm. However, my toes did get a bit chilly. I think this is because the Thermacells’ heating coils don’t extend all the way to the front of the insole. There’s an area there with no coils so that folks feet towards the smaller end of the size range (size 11.5-13 for the XXL insoles I was using) can trim it. With my gigantic feet, I didn’t do any trimming, so that heating coil was a good distance from my toes. Some chemical toe warmers may be in my future.
After packing up most of the gear inside my tent, I fired up the Jetboil and made myself some oatmeal. I followed this up with both a double serving of hot chocolate and two packets of apple cider. It felt like I had not been drinking enough the previous day, so I made a specific effort to get some more liquid into me. I also warmed up some extra water and mixed it into a couple of my half-empty water bottles to warm them up a bit.
With that, I got the rest of my gear packed up and struck my tent. This ended up being one of those times when you try to repack everything in the field and find it takes up more space than it did before you unpacked it. I ended up not loading my tent into the pack; instead, I sandwiched it between the pack and the bottom of the sled.
When I was securing my pack and other gear to the sled, it quickly became clear that fastex buckles packed with snow really suck. I was eventually able to get the snow cleaned out and get everything attached, however.
I almost left my PTR hanging on a tree near my campsite. Thankfully, another student pointed it out to me before we snowshoed off.
I stripped off most of my upper body layers, down to just my merino wool base layer and the overwhites. However, I didn’t want to go through all the trouble of getting my boots off, so I kept the Wooltimate pants on. That was a mistake, and my legs were pretty sweaty by the time we got back to the vehicles.
My sled rolled over onto its side several times on the way back. It seemed much more prone to rolling than today than it did yesterday. I think part of the difference may have been the way I had it loaded. The center of gravity seems to matter a lot, and having my somewhat loosely rolled tent in the bottom of the sled wasn’t doing it any favors. The last time it rolled, I broke the attachment point for one of the poles. Thankfully, this happened very close to the vehicles, so another student was able to help me carry it the few remaining feet rather than having to rig up some a rope system to pull the sled.
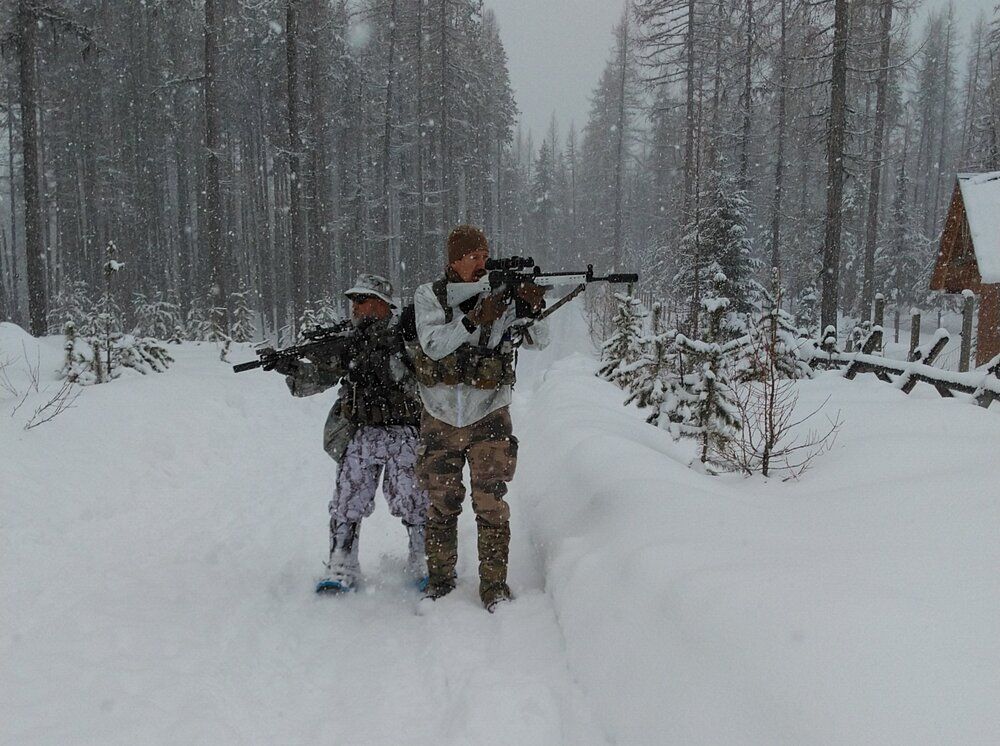
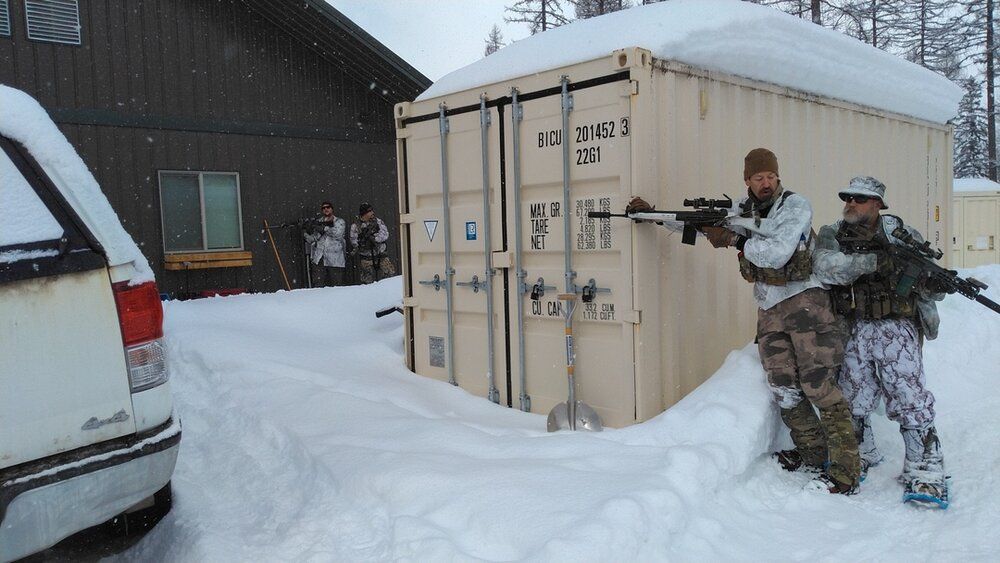
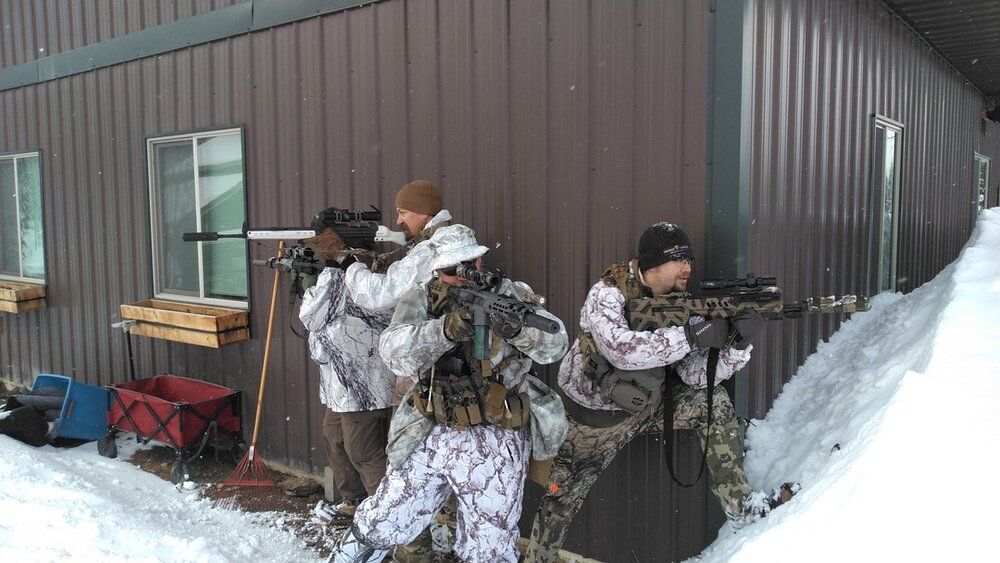
Back at the vehicles, we unloaded the sleds and got our gear squared away. Since we had a bit of time left, Eric ran us through some basic team tactics dry drills in the driveway (lateral peels and bounding drills with two-man teams). With those down, we moved up and approached the house as if we were going to assault it. Eric talked about how to employ sniper cover and team members to cover danger areas and get into position while keeping a gun on areas where a threat could emerge. We ended up stacked up outside one of the windows. At that point, you would deploy a break and rake to port and cover the window before making entry (but that’s a different class).