Last weekend I took the two-day Carbine Vitals class from Daniel Shaw. I’d trained with Daniel before back when he was teaching with Thunderbird Tactical, including taking Carbine Vitals I and II, but it’s been several years since I had the opportunity to train with him. It’s also been a while since I’ve taken a straight-up carbine class (most of my long gun training in the past year have been either CQB or long-range focused). So when I saw Daniel was teaching this course, I jumped on it.
Gear
My primary rifle for the class was my 14.5″ AR. However, it’s not exactly the same 14.5″ AR that I’ve run in previous classes. That rifle originally sported a LaRue Stealth barrel with a fairly heavy profile. I got kind of tired of the weight, so I swapped it out for an Aero Precision upper with a lightweight barrel. To balance things out on the back end, I swapped the heavy Magpul UBR for a CTR. Along with pulling the IR illuminator off of the rifle, this lightened the gun up by about two pounds. I also swapped the trigger out for the JP Rifles modular trigger. I’m still running the Leupold Mark 6 1-6 scope in a tall mount and an AAC Mini4 suppressor.
For support gear, I ran my AWS Light Assaulter belt. This has seen a couple of changes from previous classes as well. I ditched one of the rifle mag pouches and moved some stuff around to make it easier to get into some shooting positions (especially when using it with armor). I’m down to two rifle and two pistol mag pouches, a pistol, medical gear, a multitool, and a dump pouch. I figure if I need more ammo, I can throw on a chest rig or plate carrier.
I brought the Glock 19X Roland Special that I’ve been testing in some recent classes, though I temporarily swapped the Lightguard out for a Surefire X300 so it would fit the Safariland holster I’m running on the war belt.
Everyone in the class was running an AR of one flavor or another. Mostly .223, though there was one in .300 Blackout. About half the guns had suppressors on them. There was a fairly even mix between red dot optics and low power variable scopes. Most students were running belt setups, though one had a chest rig. Pistols included Glocks, an M&P, and a VP9. Quite a few had red dot sights.
Saturday
We started the class with some introductions. Everyone except for one student had trained with Daniel before. Most folks had some previous carbine classes under their belts as well.
With introductions out of the way, Daniel dove into the safety brief. He has a somewhat different take on some of the four rules of gun safety. He mentioned that this is in part in response to some square range bad habits he sees in classes.
In particular, his take on muzzle discipline is along the lines of, “Be relentlessly aware of your muzzle and keep it pointed in the relatively safest direction in that moment.” This emphasizes both that there is not necessarily a completely safe direction and that the direction that comes closest to complete safety may change with the circumstances. Sometimes going muzzle up will be safest, sometimes muzzle down, sometimes horizontally a particular direction. It can change, and we need to be aware of when and how it changes and be adaptable in how we handle our firearm.
In a similar vein, he emphasized the dynamic nature of a target’s foreground and background. It’s essential not just to establish that the target’s foreground and background are clear before we start shooting, but that we remain aware of any changes while we’re engaging the target.
Daniel went through a medical briefing, laying out the plan in case someone got shot or otherwise injured during the class.
We began our live fire with a quick opportunity to confirm zero. I was quite grateful for this because the zero on my rifle was a bit dodgy. I’d gone out to the range to zero it earlier in the week, but at the range, I found I didn’t have the right hex wrench to adjust the turrets and zero stop. So I had to do my elevation adjustment by measuring how far off I was, then making the adjustment based on that measurement once I got home. I was pretty close, but I ended up having to make a few clicks of adjustment to get my zero dead on.
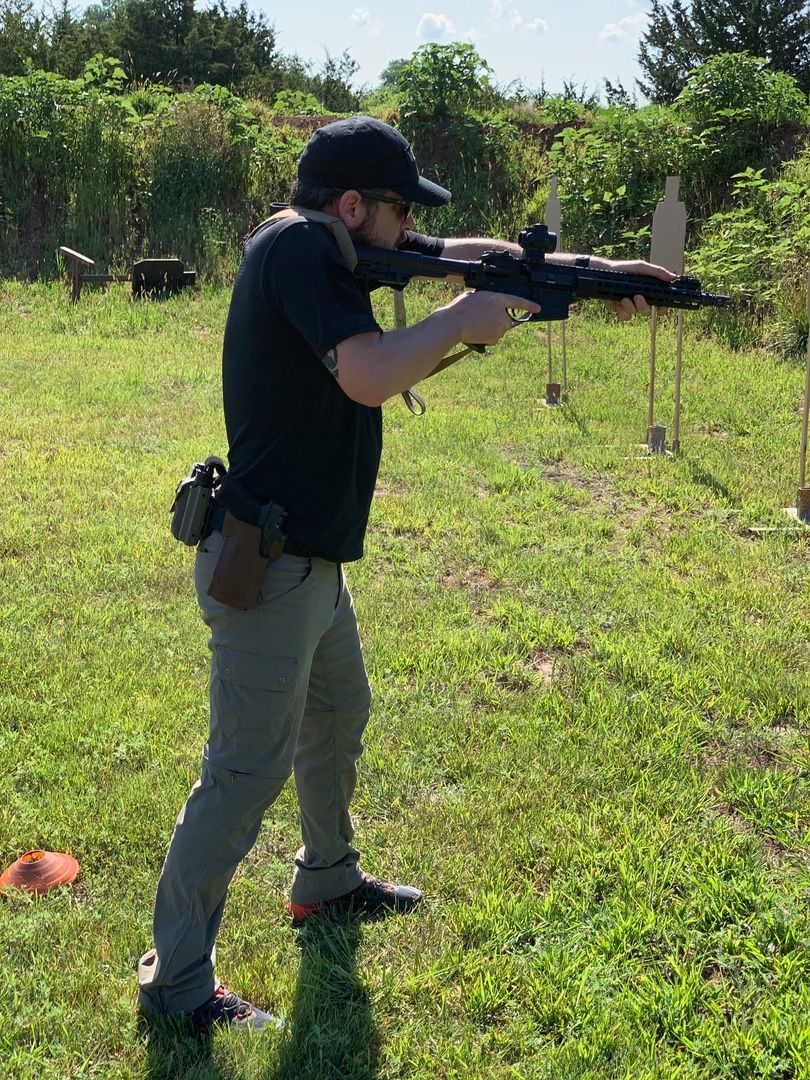
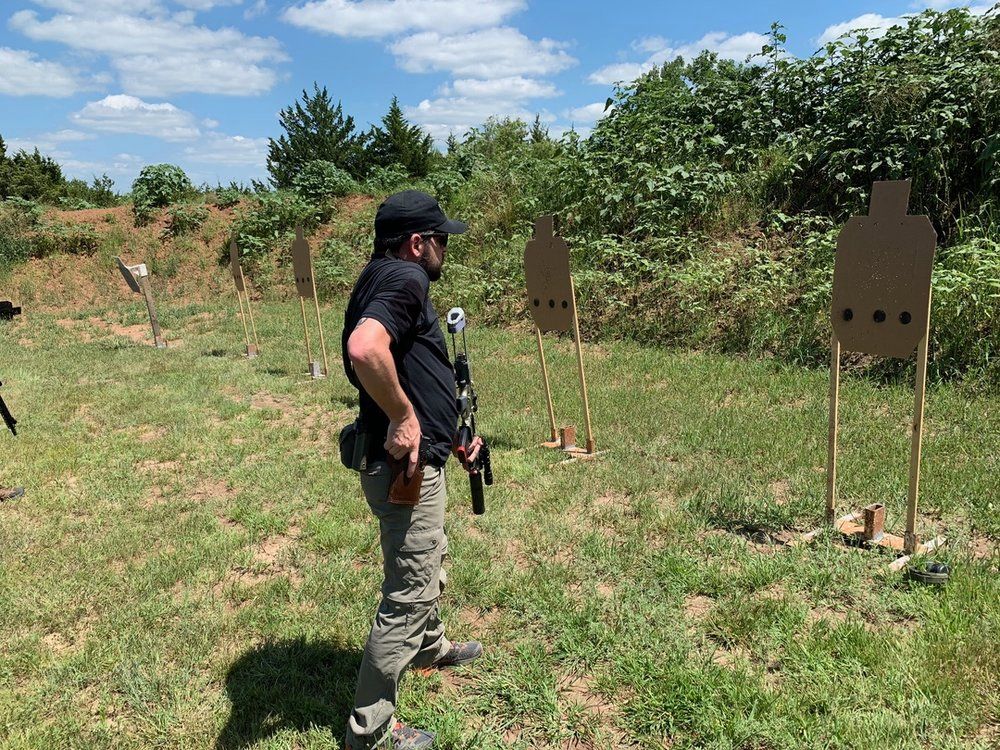
Everyone was either on target or only had to make some small adjustments, so we were able to dispose of zeroing pretty quickly. Next up, Daniel talked a bit about the standing position and what makes an optimal shooting stance. He had each of us deliver some rapid fire into the target at about 3 yards, asking us to shoot as quickly as possible while keeping all the rounds in the center circle of an IDPA target. After watching each person shoot, he gave them some pointers and then had them shoot another burst. When my turn came, he suggested bearing down on the stock with my cheek more, to help lock the gun in place. I found that this did help steady the rifle during my follow-up burst.
Daniel talked a bit about rifle ready positions. In addition to the standard low ready, he spent quite a bit of time talking about the benefits of high ready (muzzle up at about a 45-degree angle, with the tip of the muzzle about eye level and the stock down near your hip). This is kind of interesting, since I’ve been doing more work from a high ready type position lately (though I tend to run the stock more beneath the arm than all the way down at the hip). He also covered having the gun straight up in one hand and straight down (what I’d call high noon ready and rifle Sul).
We did some shooting from the 3-yard line, alternating between mounting the gun from low ready and high ready. Then we moved back to 50 yards and did the same drill on steel torso targets, going through a full magazine. After doing all the quick, up close shooting, it was a bit of a mental gear change to shoot from 50 yards. Intellectually I knew I had to slow down, but I was definitely fighting a tenancy to rush my shots.
For the next drill, Daniel had set up cones at roughly 5-yard increments from about 25 yards up to 5 yards. He’d call out a number, and we’d have to run to that cone and shoot 2-4 rounds. Then he’d call another number, and we had to run to that cone. This is a drill that emphasizes “landing in a shooting position” as you make the transition between rapid movement and stationary shooting. The fact that you’re doing this with a bunch of other guys one line with you at the same time means it also requires good muzzle discipline and situational awareness, particularly when he called the number of a cone behind us and we had to turn and run uprange, then turn again to engage.
During a break between drills, Daniel talked about what to do after the fight is (seemingly) over. Rather than the rote sort of scanning that you see taught some places he emphasized the thought process, starting with the most immediate problem: Do I need to shoot this guy some more? Are there any other threats? This can include other bad guys, but also other hazards like traffic. Is this the most survivable location? What’s my next problem? (This could be medical care, calling 911, etc.)
Back out on the range, we incorporated side to side movement into the move into a shooting position drill. Rather than a number, Daniel called out “forward”, “back”, “left”, or “right” and we had to move 4-5 steps in that direction, then shoot our 2-4 rounds. This requires an even higher level of situational awareness than the previous drill since there aren’t any specific lines. You have to adjust on the fly based on how far and how fast the guys on either side of you move.
For our last subject before lunch, Daniel talked about clearing malfunctions. He went through the different type of stoppages you can get with an AR, from the common (failing to fully lock in a magazine) to the uncommon (bolt override) and how to identify and fix each of them. During the process, he emphasized setting up these malfunctions in a realistic way when you want to practice them. For instance, the way many people set up stovepipes doesn’t really match how they occur in the real world, and this can lead to learning the wrong lessons about what works and what doesn’t work when it comes to fixing them.
We set up bolt override malfunctions and practiced clearing them. The other malfunction types we’d get a chance to practice this afternoon.
After a break for lunch, Daniel talked a bit about communication between teammates. Specifically, he covered how to communicate when your gun goes down (due to a malfunction or running out of ammo) or when you deliberately want to take your gun offline during a fight (to perform a proactive reload, for instance). When doing this proactively, the first step is to ask your partner to cover you. There’s a lot of different verbiage you can use, but he prefers a simple “cover.” Your teammate replies “OK,” indicating he’s able to provide cover while you reload. Once he’s confirmed that he can cover you, perform the reload. When you’re finished, you call out “ready” to indicate your back in the fight.
If you run dry or your rifle malfunctions, you use the same verbiage, but the intent is a bit different. In this case, rather than asking for him to cover you before you start working on your gun, “cover” is more of a declarative statement. You need to fix this rifle whether he’s able to cover you at that moment or not. Hearing “OK” can provide some peace of mind knowing that he can cover you, but you’re not waiting until he does to get to work fixing your gun.
We paired up and did a drill where we alternated performing proactive reloads, using “cover,” “OK,” and “ready” to coordinate. Every so often Daniel would call out “threat,” and we had to deliver 2-4 rounds to the target (if we were covering for our partner at that moment, we had to deliver 2-4 rounds to his target as well). As the drill went on and we got a bit smoother Daniel threw in a curveball by using a stick near our ejection port to induce malfunctions, giving us something else to deal with in addition to the proactive reloads.
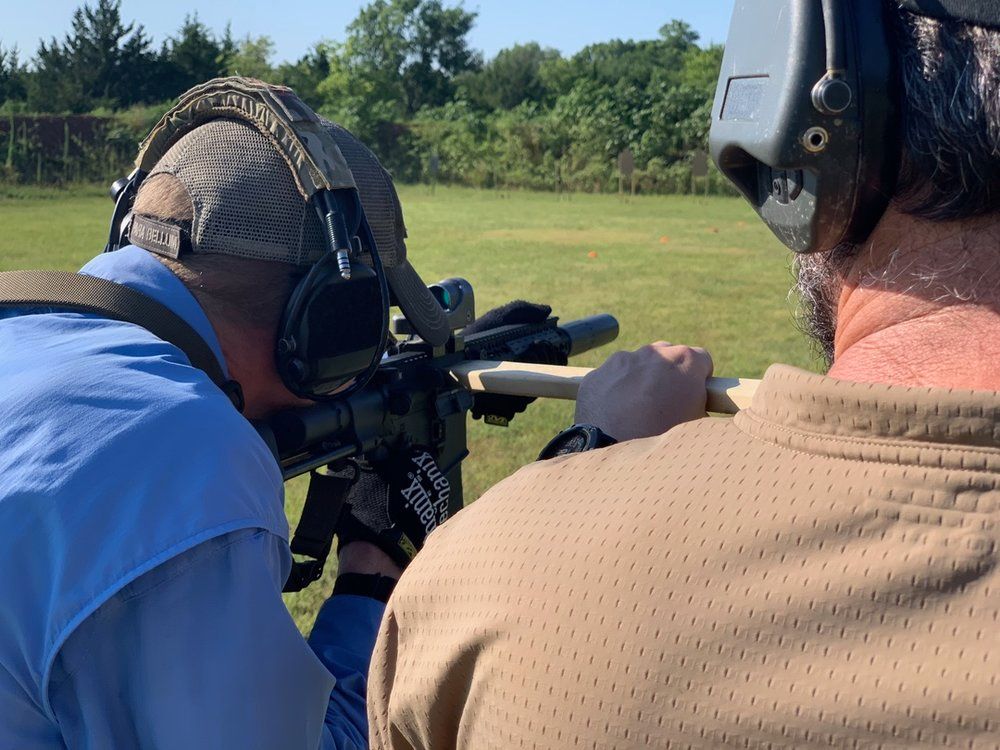
After a break to load mags, we did the drill again, just running one pair at a time. This time we dispensed with the proactive reloads and Daniel calling “threat.” Our goal was to be constantly putting rounds on target while Daniel used the stick to induce malfunctions. He’s pretty good at causing malfs, so even with two shooters, we spent more time fixing the guns than putting fire on target. Frustrating as it was, I really like this drill. It involves very realistic malfunctions (exactly what you’d see if you had your ejection port too near a piece of cover and obstructed it), the need to support your teammate induces some pressure, and the requirement to communicate adds on another layer and takes up some of your mental bandwidth.
Of course, in the real world, our response to a malfunction in our rifle is going to be transitioning to pistol. We did a slow fire group at 5 yards to verify that we know how to shoot a pistol properly (I managed a one-holer).
Since not everyone has had one of his pistol classes, Daniel briefly went through the drawstroke and some pistol ready positions. He really likes the high compressed ready position (gun at chest level, pointed towards the target but angled upward at about 45 degrees). This is not a position that I’ve done a lot of work with (I generally prefer a compressed ready with the gun horizontal), but I can see the crossover with the high ready with a rifle. Daniel demonstrated transitioning from rifle to pistol. He favors using the support hand to guide the rifle down rather than just dropping it on the sling.
We finished up the day by setting up double feeds and attempting to shoot the target, then transitioning to pistol. After delivering our pistol shots, we had to coordinate with our teammate to maintain cover on the target while fixing both rifles and reloading our pistols.
Sunday
To help beat the heat, we got going an hour earlier on Sunday morning (at 8 rather than 9). After a brief review of the safety rules and medical plan, we started off doing some shooting from standing at 50 yards. Then we did some work with the cones set up at 5-yard intervals, running forward and back as Daniel called out cone numbers and firing pairs at each distance.

With our shooting skills warmed up (and the blood pumping a bit), we picked up from where we left off on Saturday. We did the 2-man team malfunction drill again, this time incorporating pistol transitions. This introduced another, more complex layer of decision making into the drill. For a lone rifleman, if your rifle goes down and you’re within effective handgun range, the transition to pistol is pretty much automatic. In a team environment, with a buddy to provide cover, you need to decide whether it makes more sense to fix your rifle right away or transition to pistol. In turn, this requires effective communication within the team and an awareness of your teammate’s status.
Our next subject was shooting from the support side shoulder. Daniel demonstrated both a half shoulder transfer (moving the stock to the support side shoulder without changing hand positions) and a full transfer (moving the stock and switching the primary hand to the forend and the support hand to the pistol grip). We did some shooting to familiarize folks with the support side shooting and the process for transferring the rifle from one side to the other. Then we moved back to 50 yards and went through a magazine alternating between shoulders as we put rounds on two steel targets.
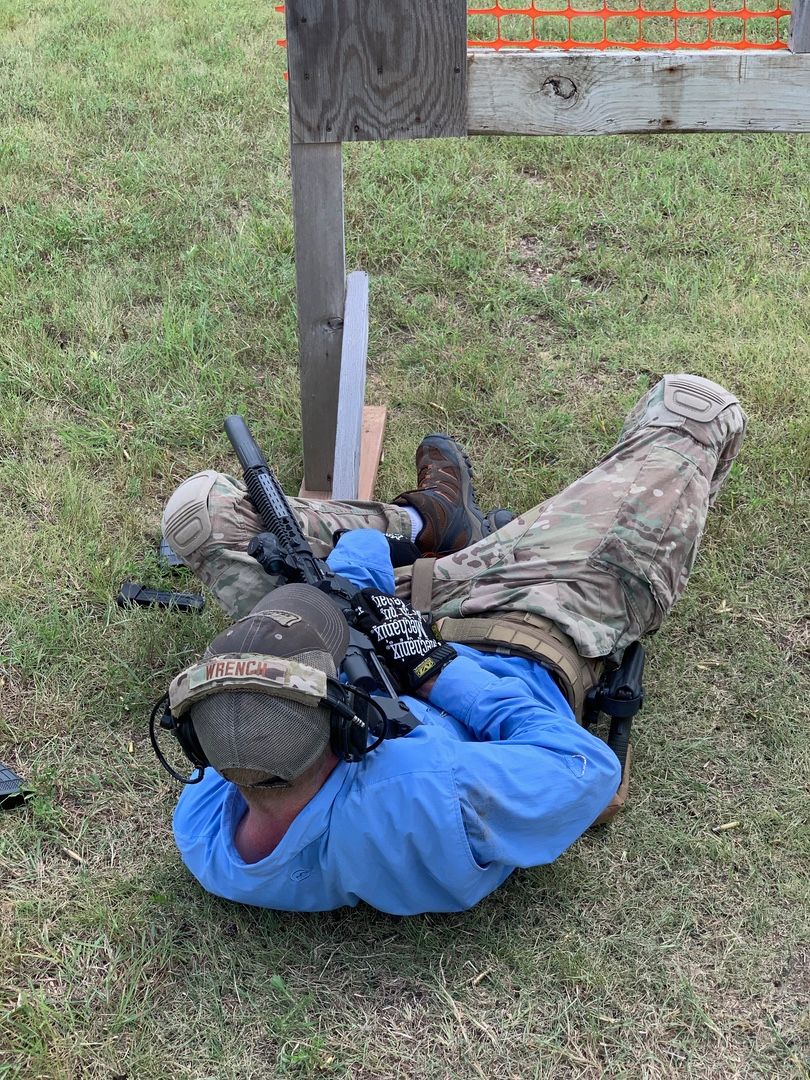
Daniel went through a couple of shooting positions including squatting, kneeling (in primary side knee down, support side knee down, and double kneeling variations) and urban prone. I had mostly thought about urban prone in terms of shooting under vehicles or perhaps over very low obstacles like curbs, but one thing Daniel pointed out is that it also provides a much greater ability to traverse left and right than more conventional prone positions.
To practice these positions, Daniel would call a position (and sometimes call for a shoulder transfer), and we had to assume that position and fire a burst, then return to standing. Daniel really emphasized that as you get back up from a lowered position, you need to scan every time you change elevation. Every time you assume a higher position, you reveal stuff you couldn’t see before because it was blocked by obstacles or micro terrain (and you make yourself a taller target). You need to scan and update your information about your surroundings.
After lunch, Daniel talked a bit about using cover. He particularly emphasized coming out of cover in a shooting position, rather than peeking out and then having to raise your rifle to shoot. When moving from one piece of cover to another, he also emphasized moving explosively (and stopping the same way) so you spend as little time as possible exposed to the adversary.
Daniel set up various pieces of cover, including some at kneeling height, standing height, and a couple for urban prone (shooting both over and under the cover). The drill was to move through these pieces of cover and shooting from three different positions at each.
One thing we found during this drill was that some people’s gear was not adequately secured. My iPhone popped out of my pocket, and I was not the only one to lose a phone (thankfully, mine was undamaged). Other folks lost magazines and other gear. Mag pouches that are adequate for delivering fire from a standing position may not provide sufficient retention for less conventional shooting positions.
In preparation for some subsequent drills, Daniel briefly covered pistol malfunction drills (fairly simple compared to the complexity of fixing AR malfunctions). He also covered one-handed malfunction clearance for both pistol and rifle (which was a bit of an ominous sign). He gave us some time to experiment with one-handed rifle malfunction clearance at our own pace.
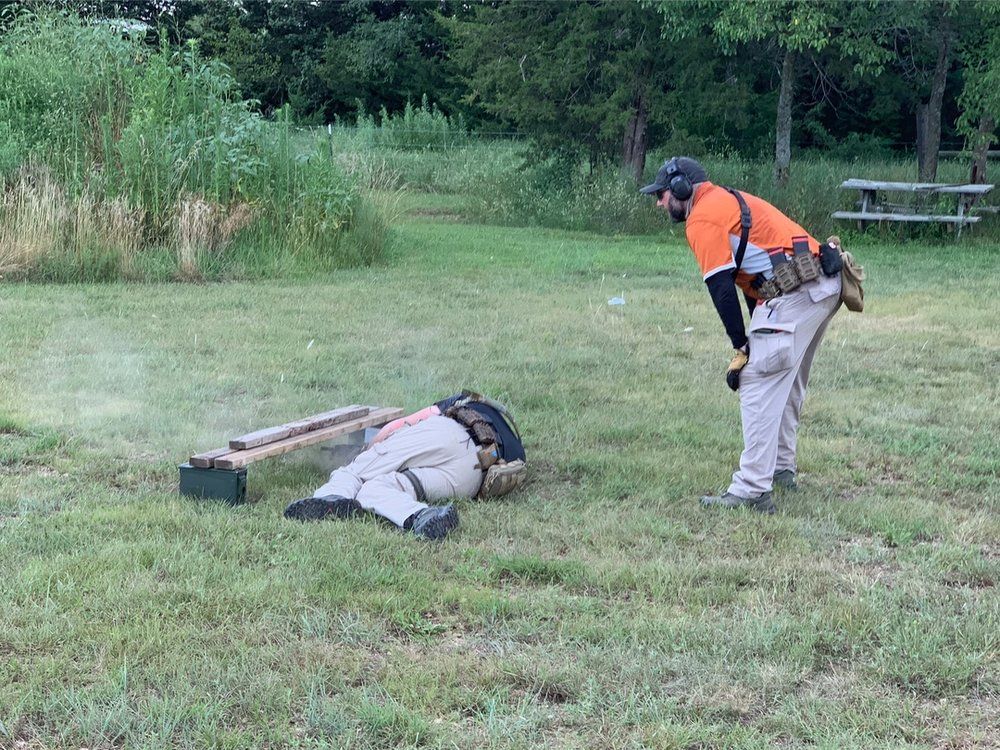
The next drill had us stacking up behind our teammate and advancing toward a target. When the lead team member ran dry (or suffered a stick-induced malfunction), they peeled off and assumed the rear position while they fixed their rifle while the other man stepped up and continued to engage the target. Once we got up within a few yards of the target, Daniel had us continue the drill moving backward. The point of this drill was not so much the malfunction clearance, but rather to get us used to safely moving in close proximity to our partner, something we’d need on the next exercise.
That next exercise was really the culmination of the entire class. Daniel placed each two-man team behind a piece of wall representing cover. Our job was to deliver continuous fire on steel targets downrange. Periodically, Daniel would call “switch,” and we’d have to swap the side of the cover that we were shooting around with our teammate. Of course, he was there with the stick to induce malfunctions. Partway through the drill, he told one or both shooters that they’d lost the use of their support hand and had to shoot and clear malfunctions one-handed for the rest of the drill. Just to throw in one more level of complexity, he started calling out a particular target out of the four downrange that we had to engage (rather than leaving it to the shooter’s choice).
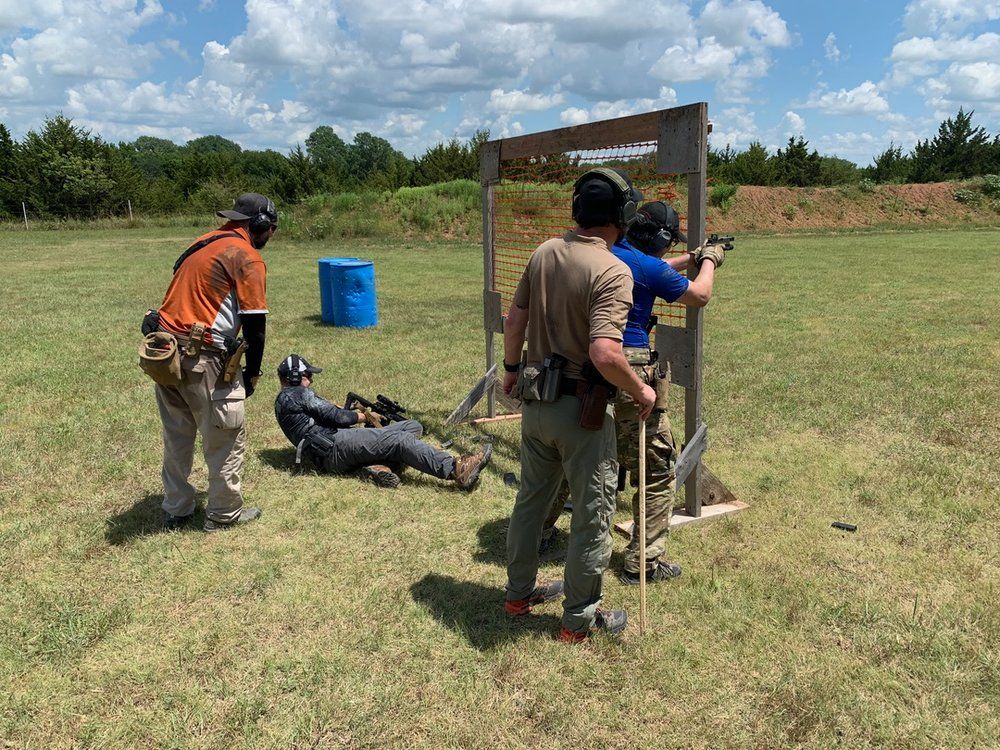
Not only did this require you to exercise all of the physical skills we covered in the class, like shooting from cover, malfunction clearance (including one-handed), transitioning to pistol, muzzle discipline, moving in close proximity to your teammate, communication, and general situational awareness; it also layered on all of these things onto your thought process. While good, safe gunhandling skills are critical, at its core, this is as much of a thinking exercise as it is a shooting or gunhandling exercise.
An interesting manifestation of this was that one the differences between more experienced shooters and less experienced ones weren’t just that the more experienced shooters were more accurate or cleared malfunctions better, but that more experienced shooters were much less likely to get task fixated. For instance, less-experienced shooters tended to transition to pistol and just keep engaging with the handgun, rather than asking their teammate to cover them while they fixed their rifle. Or when they were fixing a malfunction, and their teammate’s gun went down, they continued with the malfunction clearance rather than putting that on hold and drawing their pistol. They’d get started on a task and carry it through until they finish it or something prevents them from continuing.
More experienced shooters were more fluid and were able to react to changing situations. When their partner’s gun went down, they stopped fixing their own rifle and drew their handgun. When the partner got their gun back up, they put their own handgun away and went to work getting their rifle up. The difference in situational awareness, communication, and task fixation was quite noticeable.
Based on some of the difficulties students had doing one-handed rifle shooting, Daniel had us do one last exercise. We worked our way through the various pieces of cover again, this time shooting our rifles one-handed. Some of these were fairly easy (plunk the forend down on a piece of low cover and use it to support your rifle) but figuring out three different one-handed shooting positions from each piece of cover was a challenge. This is one area where a red dot does better than a low power variable, but the eye box on the Mark 6 was big enough I was able to make the hits I needed to, even if it wasn’t ideal.