Gear
Last weekend I took the Precision Long Range 2 class from Match Grade Precision, taught by Matt Howard and Chris Long. Back in May, I took Precision Long Range 1 class; I was impressed enough with the class and the instructors that I immediately signed up for the follow-on course.
Unlike the LR1 class, which was up in northern Kansas, this class was at a range south of Wichita. Since it was about 45 minutes from my house, I could sleep in my own bed and drive down there for the class each day.
My primary rifle for this class was my .223 DMR. It’s a JP Rifles upper on a lower I put together myself. I’ve got a US Optics B-10 1.8-10x scope on it. I’m running an Atlas bipod and an AAC Mini4 suppressor. I’m running hand loaded ammo with Sierra Match King 77 grain bullets. I used this same gun at the LR1 class, and it ran well there.
The one change I made to this rifle since the previous class was to swap out the trigger. I took out the Rock River NM 2-stage trigger and replaced it with a JP Rifles Modular Trigger. It’s still a duty weight trigger, so it’s not super light, but it has a very crisp single stage trigger pull. This is the first time I’ve run a single stage trigger, and I’m still getting used to it, but I like it so far.
Unlike the LR1 class, which had steel out to a mile, the range at this class only goes out to about 900 yards. This meant that almost everything would be within reach of my .223, so I didn’t bring a heavier rifle to supplement the AR.
The rest of the class were running bolt guns, with both Ruger and Tikka rifles in represented. Mostly 6.5 Creedmoor, but one was chambered in 6.5x47mm Lapua.
I also brought out my Leupold Mark 4 spotting scope with the Horus mil-grid reticle.
Saturday
I loaded up the car and headed out, making it out to the range at 8:55. All of my fellow students in this course had also been in the LR1 class I took back in May. Some of the other students had arrived early to check their zeroes (I was reasonably confident in mine from LR1).
Matt started the class out with a brief overview of the material that we’d be covering. He made very clear that the two major emphasis areas for this class would be wind reading and ranging using the reticle in your optic. Matt followed this up with a quick medical brief and emphasized that he wanted our rifle’s bolts open and a chamber flag inserted whenever we weren’t on the gun. He talked a bit more about the course outline, then finished off the introductory briefing by going over the four rules of gun safety.
With that, we jumped right into the class material itself. Matt talked a bit about what we can look at to judge wind direction and velocity. He pointed out the motion of the tops of the trees, the movement of the grass downrange, flags back at the firing line, etc.
Chris talked a bit about wind direction. For shooting purposes, we’re only concerned about the lateral component of the wind. We can ignore any wind blowing towards us or away from us. At that time the wind was blowing fairly strongly from behind us, from about the 5 o’clock direction. This is a half-value wind (only half of the overall wind speed contributes to pushing the bullet off to the left). If it were coming from 4:30, about 70% of the wind speed would be pushing the bullet off course. At 4 o’clock, 90% of the wind is pushing the bullet sideways, and with a wind coming directly from the side (3:00) the full value of the wind would be pushing the bullet to the side. So after establishing your wind speed, the next step is to account for the direction and translate that into your wind value.
Of course, the real complication is that the wind speed is seldom the same everywhere along the bullet’s flight path. This is something we would have to deal with in spades today. The shooting lane was flanked on the right side by a line of tall, dense trees. These cause the wind to swirl and roll quite dramatically. They also meant that wind conditions on the right side of the range could be entirely different from wind conditions on the left. Matt mentioned that a good way to visualize this was to imagine a sheet of water flowing across the ground rather than air. Where would it flow? Where would it swirl and eddy?

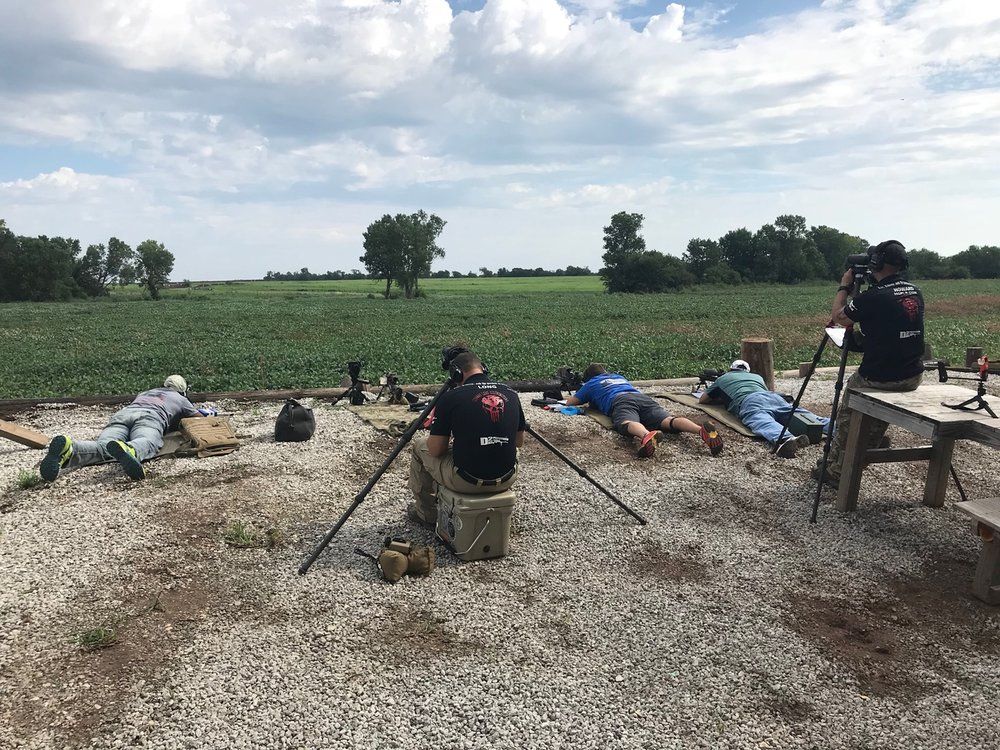
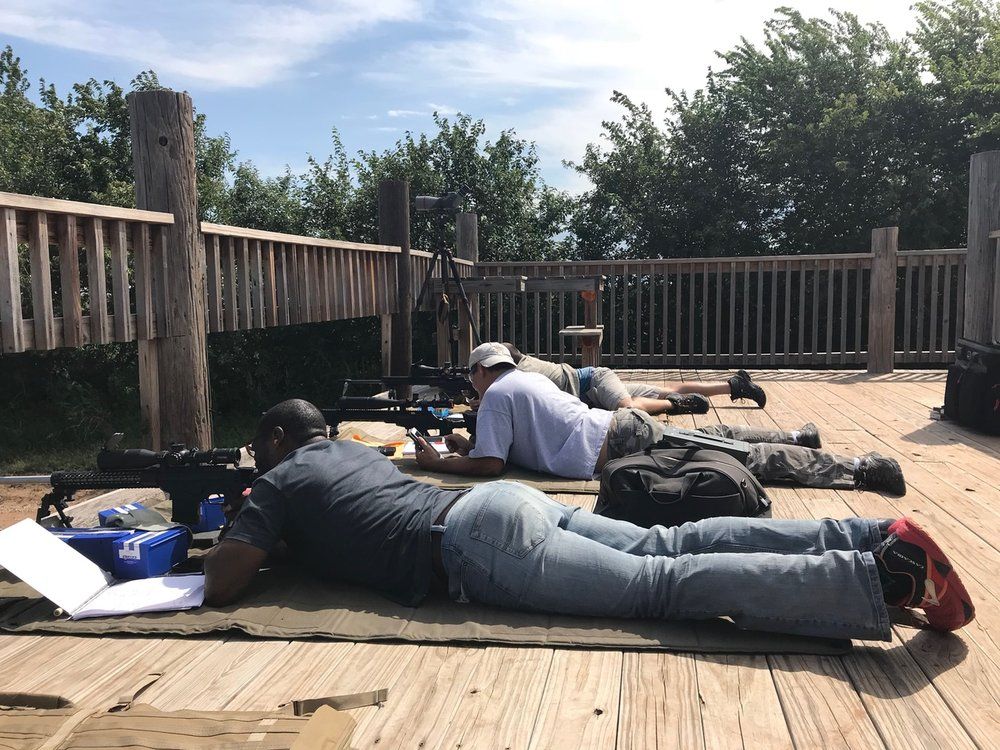
The primary shooting positions on this range were up on a big platform built about 12 feet off the ground. The added elevation gave us a good vantage point and helped us get a line of sight to all of the steel set out downrange. I toted my gear up there. In contrast to LR1 where we started with the closest targets we Matt had us start out at 500 yards, followed quickly by some shooting out at 835 yards (the furthest this range goes). I got a first round hit at 500 and was able to get on target after a few shots at 835 (which is pushing it for a .223).
We had strong winds from about the 5:30, which you would think would lead to a small left to right value, but thanks to that line of trees wind conditions were much more confused. At closer distances, you were holding to the right, as you would expect, but further out you often actually had to hold left (depending on how strongly the wind was blowing and how it was being affected by the trees). We engaged some targets at various distances to see these effects.
After everyone had done a bit of shooting, we headed back down to the whiteboard where Matt and Chris talked us through determining range with a mil reticle (everyone in the class was running optics with reticles graduated in angular mils). To determine the range, take the size of the object in inches and multiply by 27.77, then divide by the apparent size of the target in mils in the reticle to get the distance in yards.
In addition to the ranging formulas, Matt also gave us the dimensions for most of the targets out on the range. For all of them he gave us height and width, and for some of the torso targets, he also gave us the height from the base of the target to the shoulder. Being able to measure multiple dimensions is essential both because you may not be able to see the whole target, and may only have one of these dimensions available to measure and because measuring range using both height and width allows you to cross check your answers.
Something Matt suggested that I hadn’t heard in previous classes was when you were recording the size of objects to go ahead and precalculate your constant for each dimension (size in inches times 27.77) so that will save you a step in the field.
We headed back upstairs and got to work ranging the targets. This is a known distance range, with targets every hundred yards from 200 to 800 (plus some more up on the berm at 835) so we already knew how far each target was. If the value you got from measuring the target in mils and calculating the range didn’t match the known distance, you knew you messed up somewhere.
This was a self-paced, self-directed exercise, so I started with the 200-yard target and worked my way out. For each target I did the math, then shot the target (exercising my wind reading skills while I was at it). I’d done some mil ranging in the past, so this was mostly a matter of knocking the rust off. Some of the students had more of a challenge, but everyone was doing reasonably well after an hour or so.
One thing I did struggle a bit with is the relatively chunky reticle in my rifle scope. The relatively thick stadia lines made getting the base or side of the target exactly matched up with the center of the line a bit difficult. Rather than ranging using my central crosshair I ended up using the first hash mark because that way I could line it up halfway over the target and make sure I was bisecting the line with the base of the target.
The other challenge I had was the fact that the smallest increment this scope has is 0.5 mils. I could guesstimate down to about a tenth of a mil, which seems pretty precise, but when you get out to long range a 0.1 mil can make a pretty big difference. For instance, for one of the more distant targets, using my optic I had a hard time deciding whether it was 1 mil high (which would put it at 833 yards) or 1.1 mils (757 yards). Since this was a known distance range, it was evident that neither of these was right on the money (it was an 800-yard target). However, the difference between 757 and 833 yards is significant. I’d have to dial in 2 more mils of drop to shoot at 833 than I would at 757, which is considerably more than the height of the target. Making a ranging mistake like this would probably mean a miss.
At this point, I broke out my spotting scope. Not only is it 40 power rather than the 10 power of my rifle scope, it also has a grid of mil markers 0.2 mils apart. With this, I found I was able to measure much more precisely, down to 0.05 mil or better.
Wind conditions were also challenging, and not just the shooting. The wind was strong enough up on the platform that it was blowing around my spotting scope, and the tripod mounted binoculars. I ended up lowering my tripod down to it’s lowest height where it was much steadier and doing my ranging from prone.
Lunch arrived, provided by Match Grade Precision. Tacos, corn on the cob, rice, and some excellent brownies. They definitely feed you well in these classes.
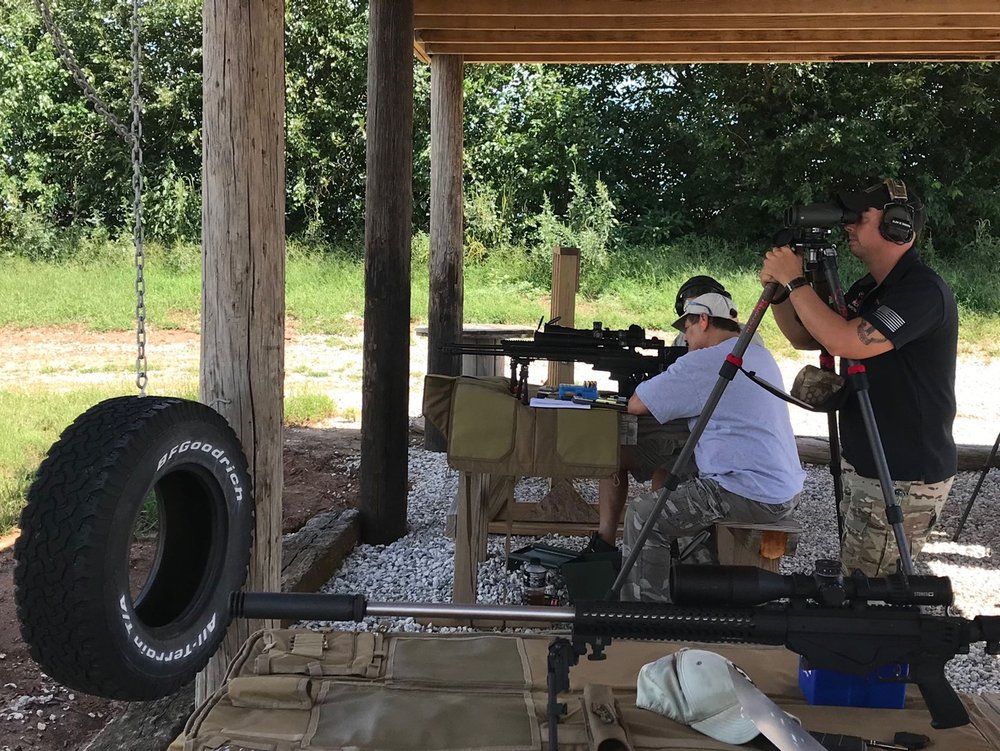
After lunch, we headed back up to do some more mil ranging and shooting. Before too long the clouds that had been building to the south of us all day finally pushed far enough north to drop some rain on us. We grabbed our gear and moved down to the shooting benches underneath the platform. This introduced some new challenges: even at bench height, vegetation and micro terrain partially masked some of the farther targets (many would have been completely invisible in prone). This meant you sometimes only had the width to measure for ranging and only part of the target available to aim at.
I figured that the mil ranging was a skill that I needed more practice on than shooting, so I didn’t put a whole lot of rounds downrange for the first part of the afternoon. Instead, I ranged every available target, doing both height and width if possible. Using the reticle in the spotting scope, I found that when I could measure both the height and width of the targets, they usually agreed with each other within about 5-10 yards, and were often within 10 yards of the known distance.
One target both the student next to me and I had trouble with was a diamond target out at 800 yards. Even measuring very carefully we were both getting ranges around 750. It was hard to judge precisely where the tips of the diamond ended even with a 40 power spotting scope. Eventually, I had the bright idea to roll my spotting scope over at a 45-degree angle and measure from one side to the other rather than tip to tip (treating it as if it were a square rather than a diamond). This produced a much more accurate value. A good lesson to measure between clearly defined points if you can.
Having ranged everything I could see that we knew the dimensions of, I switched back to my rifle to do some more shooting. While doing this, I ran into another issue with micro terrain. I was shooting at a target about 500 yards out. Based on the way the grass I could see in the foreground was blowing I called a moderate right to left wind and held on the right edge of the target.
Chris was spotting for me, and when I sent my shot, he said I was off the right side of the target and called I correction of 1 mil left. I made the correction and got the hit. I was a bit confused. It was evident from where my first round went that I’d completely misread the wind. I thought it was blowing right to left, yet my round ended up to the right of my aiming point. I got up and took a peek through the tripod mounted binoculars the Chris was using. Through those, I could see that the grass closer to the target was blowing the opposite direction, indicating a left to right wind. That was what blew my first shot off targets. The micro terrain meant that a two foot difference in elevation revealed an entirely different picture of what the wind was doing.
After everyone had their fill of ranging and shooting, we packed up and headed out.
Sunday
I rolled up to the range about 8:45. One of the other students was zeroing a new scope (after class the previous day he swapped his Vortex Viper PST for a newly bought Razor HD Gen II). Once he finished, we moved over to the unknown distance range.
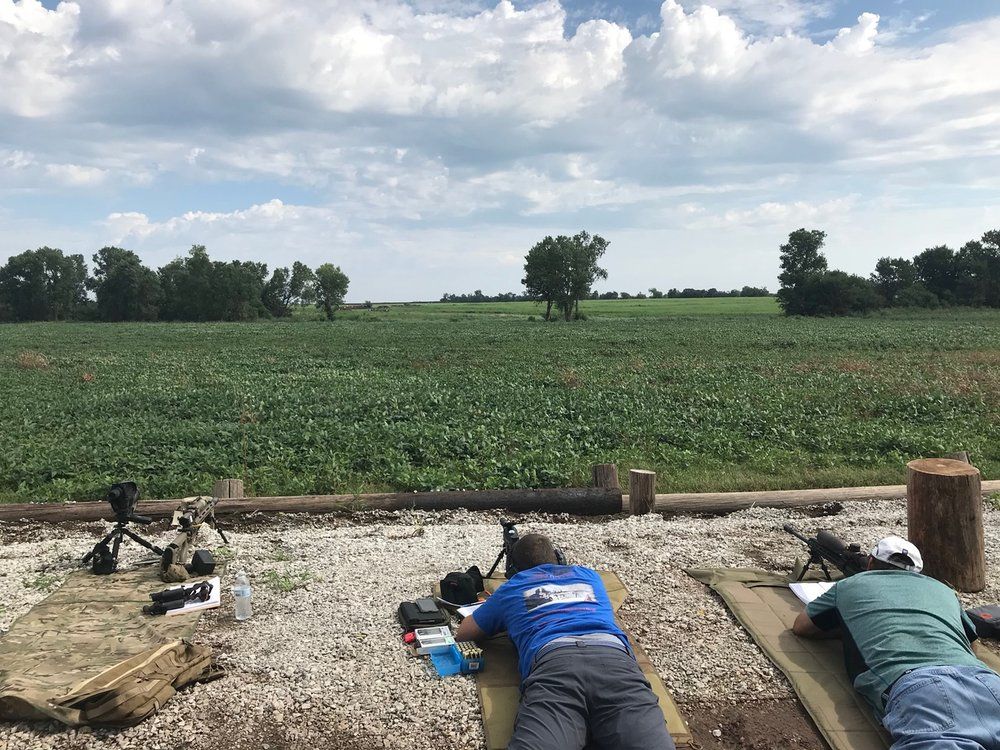
Once the last student arrived, we got started with a big unknown distance shooting exercise. This exercise is the big centerpiece of the class. Matt gave us dimensions for five targets at unknown distances, and we had 30 minutes to range the targets using the reticles in our optics. After ranging all the targets, we each engaged them in turn, with only three rounds per target. No laser rangefinders, Kestrels, or ballistic software allowed (Matt had suggested that we work up written dope sheets the previous afternoon).
I started by multiplying all of the target dimensions by 27.77 to get a constant for each of them. That way I had one step out of the way and only needed to divide this by the target dimension in mils to get the range.
Based on my experience on Day 1, I did all my mil ranging for the exercise using the finer reticle and higher magnification of my spotting scope. For four of the five targets, I was able to range them using both their height and width. This gave me two different dimensions to cross check against each other. For the closest target, the ranges I got measuring the height and width were within three yards of each other. On the most distant target, they were within 12 yards. However, for two of the targets, the ranges measured by height were 75-80 yards closer than the distance measured by width. Based on my experience the previous day, I trusted the distance measured by height a bit more than the one measured by width, so that’s what I went with.
Tall grass obscured the lower part of one target, making it impossible to measure its height. Even if I ran my sitting height tripod up to its maximum height, it wasn’t tall enough to see the base of the target (I tried balancing my tripod on top of a stump, but couldn’t get it steady enough to range with). So I could only do my ranging based on the target’s width. This was the target I was most uncertain about the range on. It was also the one where there was the most variation among the different students (despite this being set up as a competition, we all cooperated on the ranging, talking about what mil dimensions we measured the targets at and what distances we calculated).
Having used all of our available 30 minutes, we loaded up our rifles and each student engaged every target in turn. You had three rounds, so if you missed with the first one and could either self-spot or one of the other students spotted for you, you could make a correction and get your second (or third) round on target.
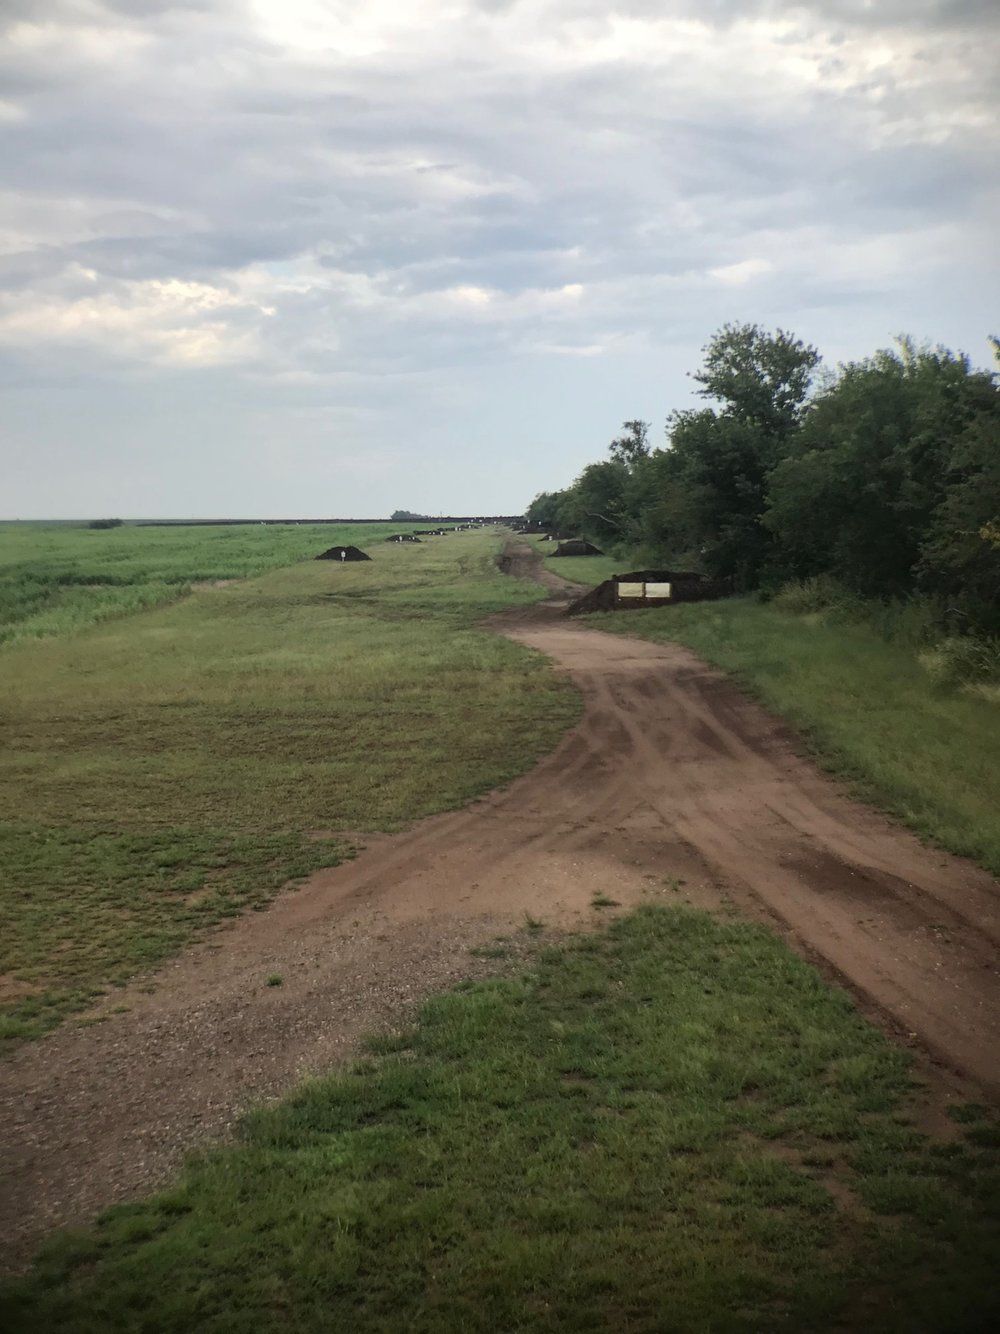
We did quite a bit of missing as it turns out. By the time we got to shooting the wind was blowing fairly strongly, about 15-20 mph at the firing line from about 5 o’clock. However, a row of trees off to the right perpendicular to our line of fire partially screened the targets from the wind. This meant that the first part of the bullet’s flight path was affected strongly by the wind, the latter part of its flight much less so. That said, the winds were more consistent across the course than on the range where we’d shot the previous day. The row of trees was far enough off that the winds weren’t nearly as switchy and confusing as they’d been the day before.
Some of the more distant targets were very hard to spot your shots on as well; especially one that was placed out in the middle of some tall grass with no berm behind it. The grass just absorbed any splash, making it very difficult to figure out where your shot went.
I went 2 for 3 on the closest target. The second target was the partially obscured one that I’d had trouble ranging. My first shot was short, so I added some elevation. The second shot was short as well so I held another mil of elevation before firing the third shot and got the hit. As I was engaging the third target, the winds picked up a bit, and I didn’t end up with any hits. The fourth target was the one in the middle of the field which was very difficult to spot your shots on. I took my best guess for the wind, fired, and missed. With no feedback about where I missed I swung one target width to the left and fired (no joy), then tried one target width to the right and managed to get a hit on the right edge of the plate. The last target was out beyond 900 yards, which is really beyond the effective range of the .223 (and it’s also almost impossible to spot splashes from these little bullets out at that distance). I took my three shots but wasn’t rewarded with any hits. Despite only getting four hits out of fifteen tries, I tied for first place.
After we shot each target, Matt gave us the actual range. On the troublesome one where I could only measure the width, I was off by over 75 yards. For all of the others, I was pretty close, with 35 yards of the correct distance. So ranging really wasn’t the problem. Like I said, the wind conditions were pretty challenging.
It is worth noting that after getting my hit on the second (poorly ranged) target I was able to work backward from the amount I held and come out right on the money with the correct distance. This gives me confidence in the accuracy of my scope’s reticle and adjustments.
After we finished the exercise, we had the chance for some more free shooting using the array of unknown distance targets on this range. I worked to re-engage some of the targets that I’d missed, especially one where I’d had the wrong range. With a little bit of work (and some good spotting from Matt and Chris) I was able to get on steel on everything except the most distant target. I also did some shooting at some of the other targets out on the range as well (there were another dozen or so that we hadn’t even used for the exercise).